42 – The Influence of the Game Board
42 – The Influence of the Game Board
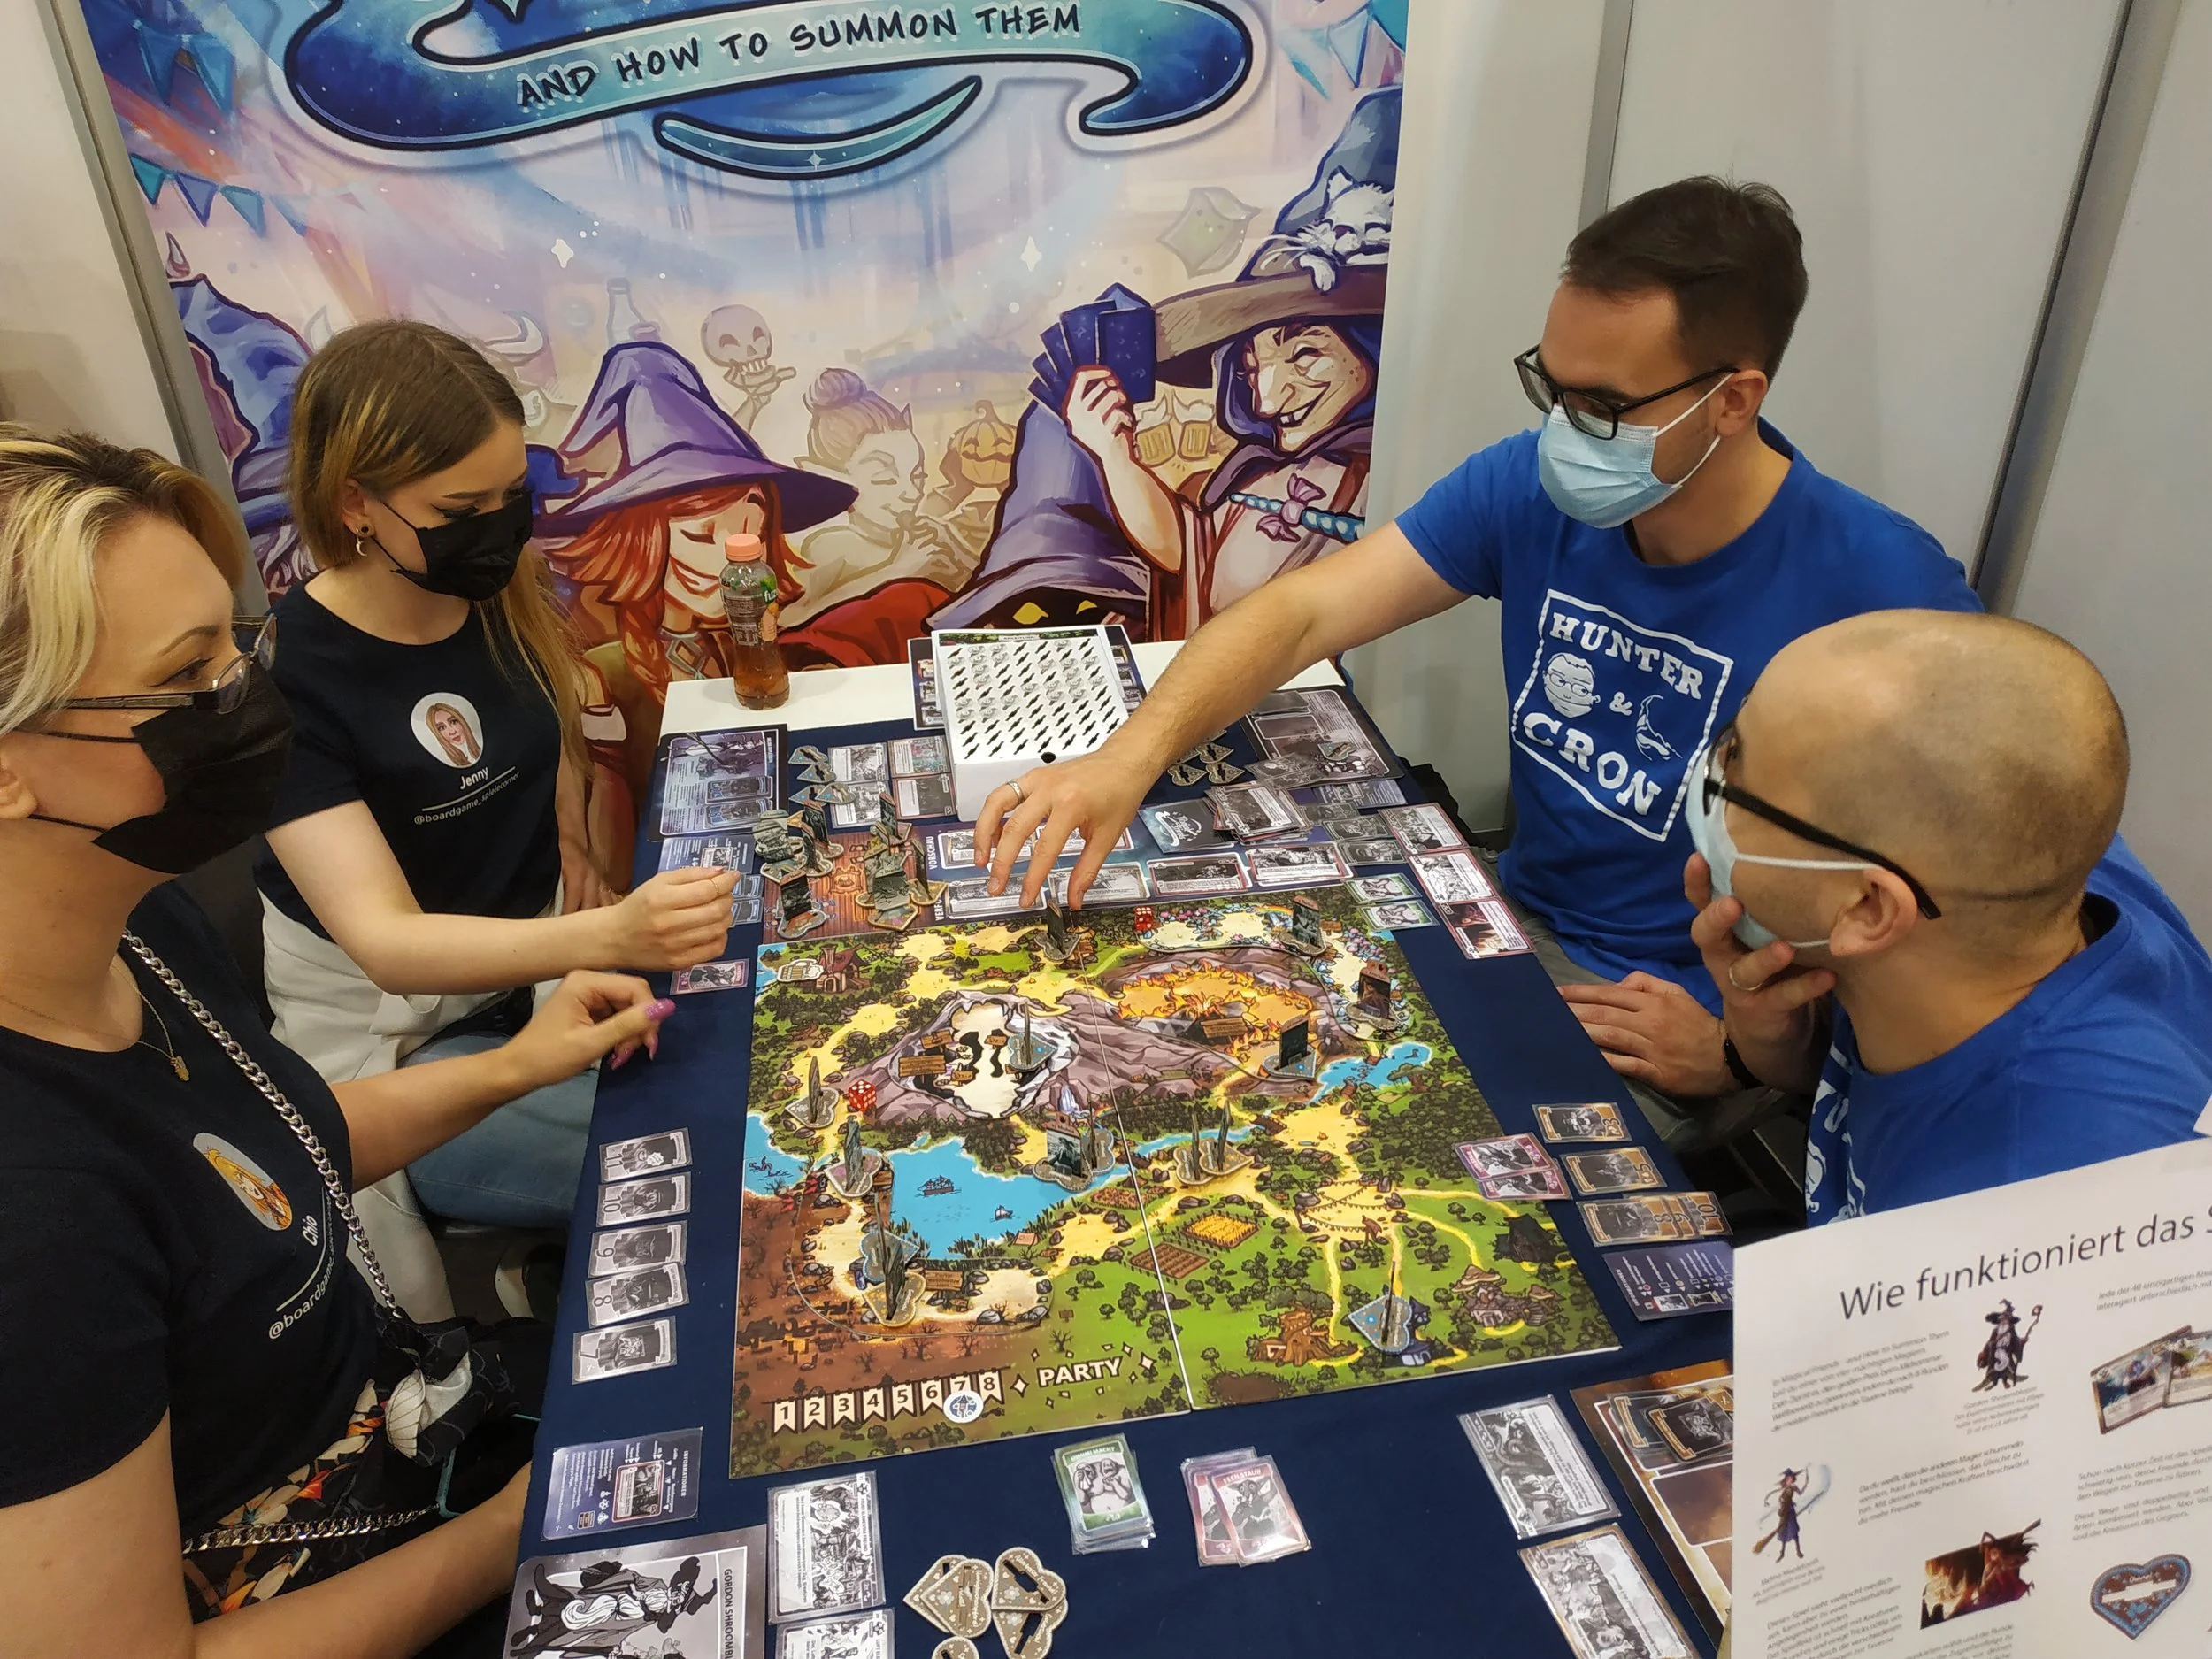
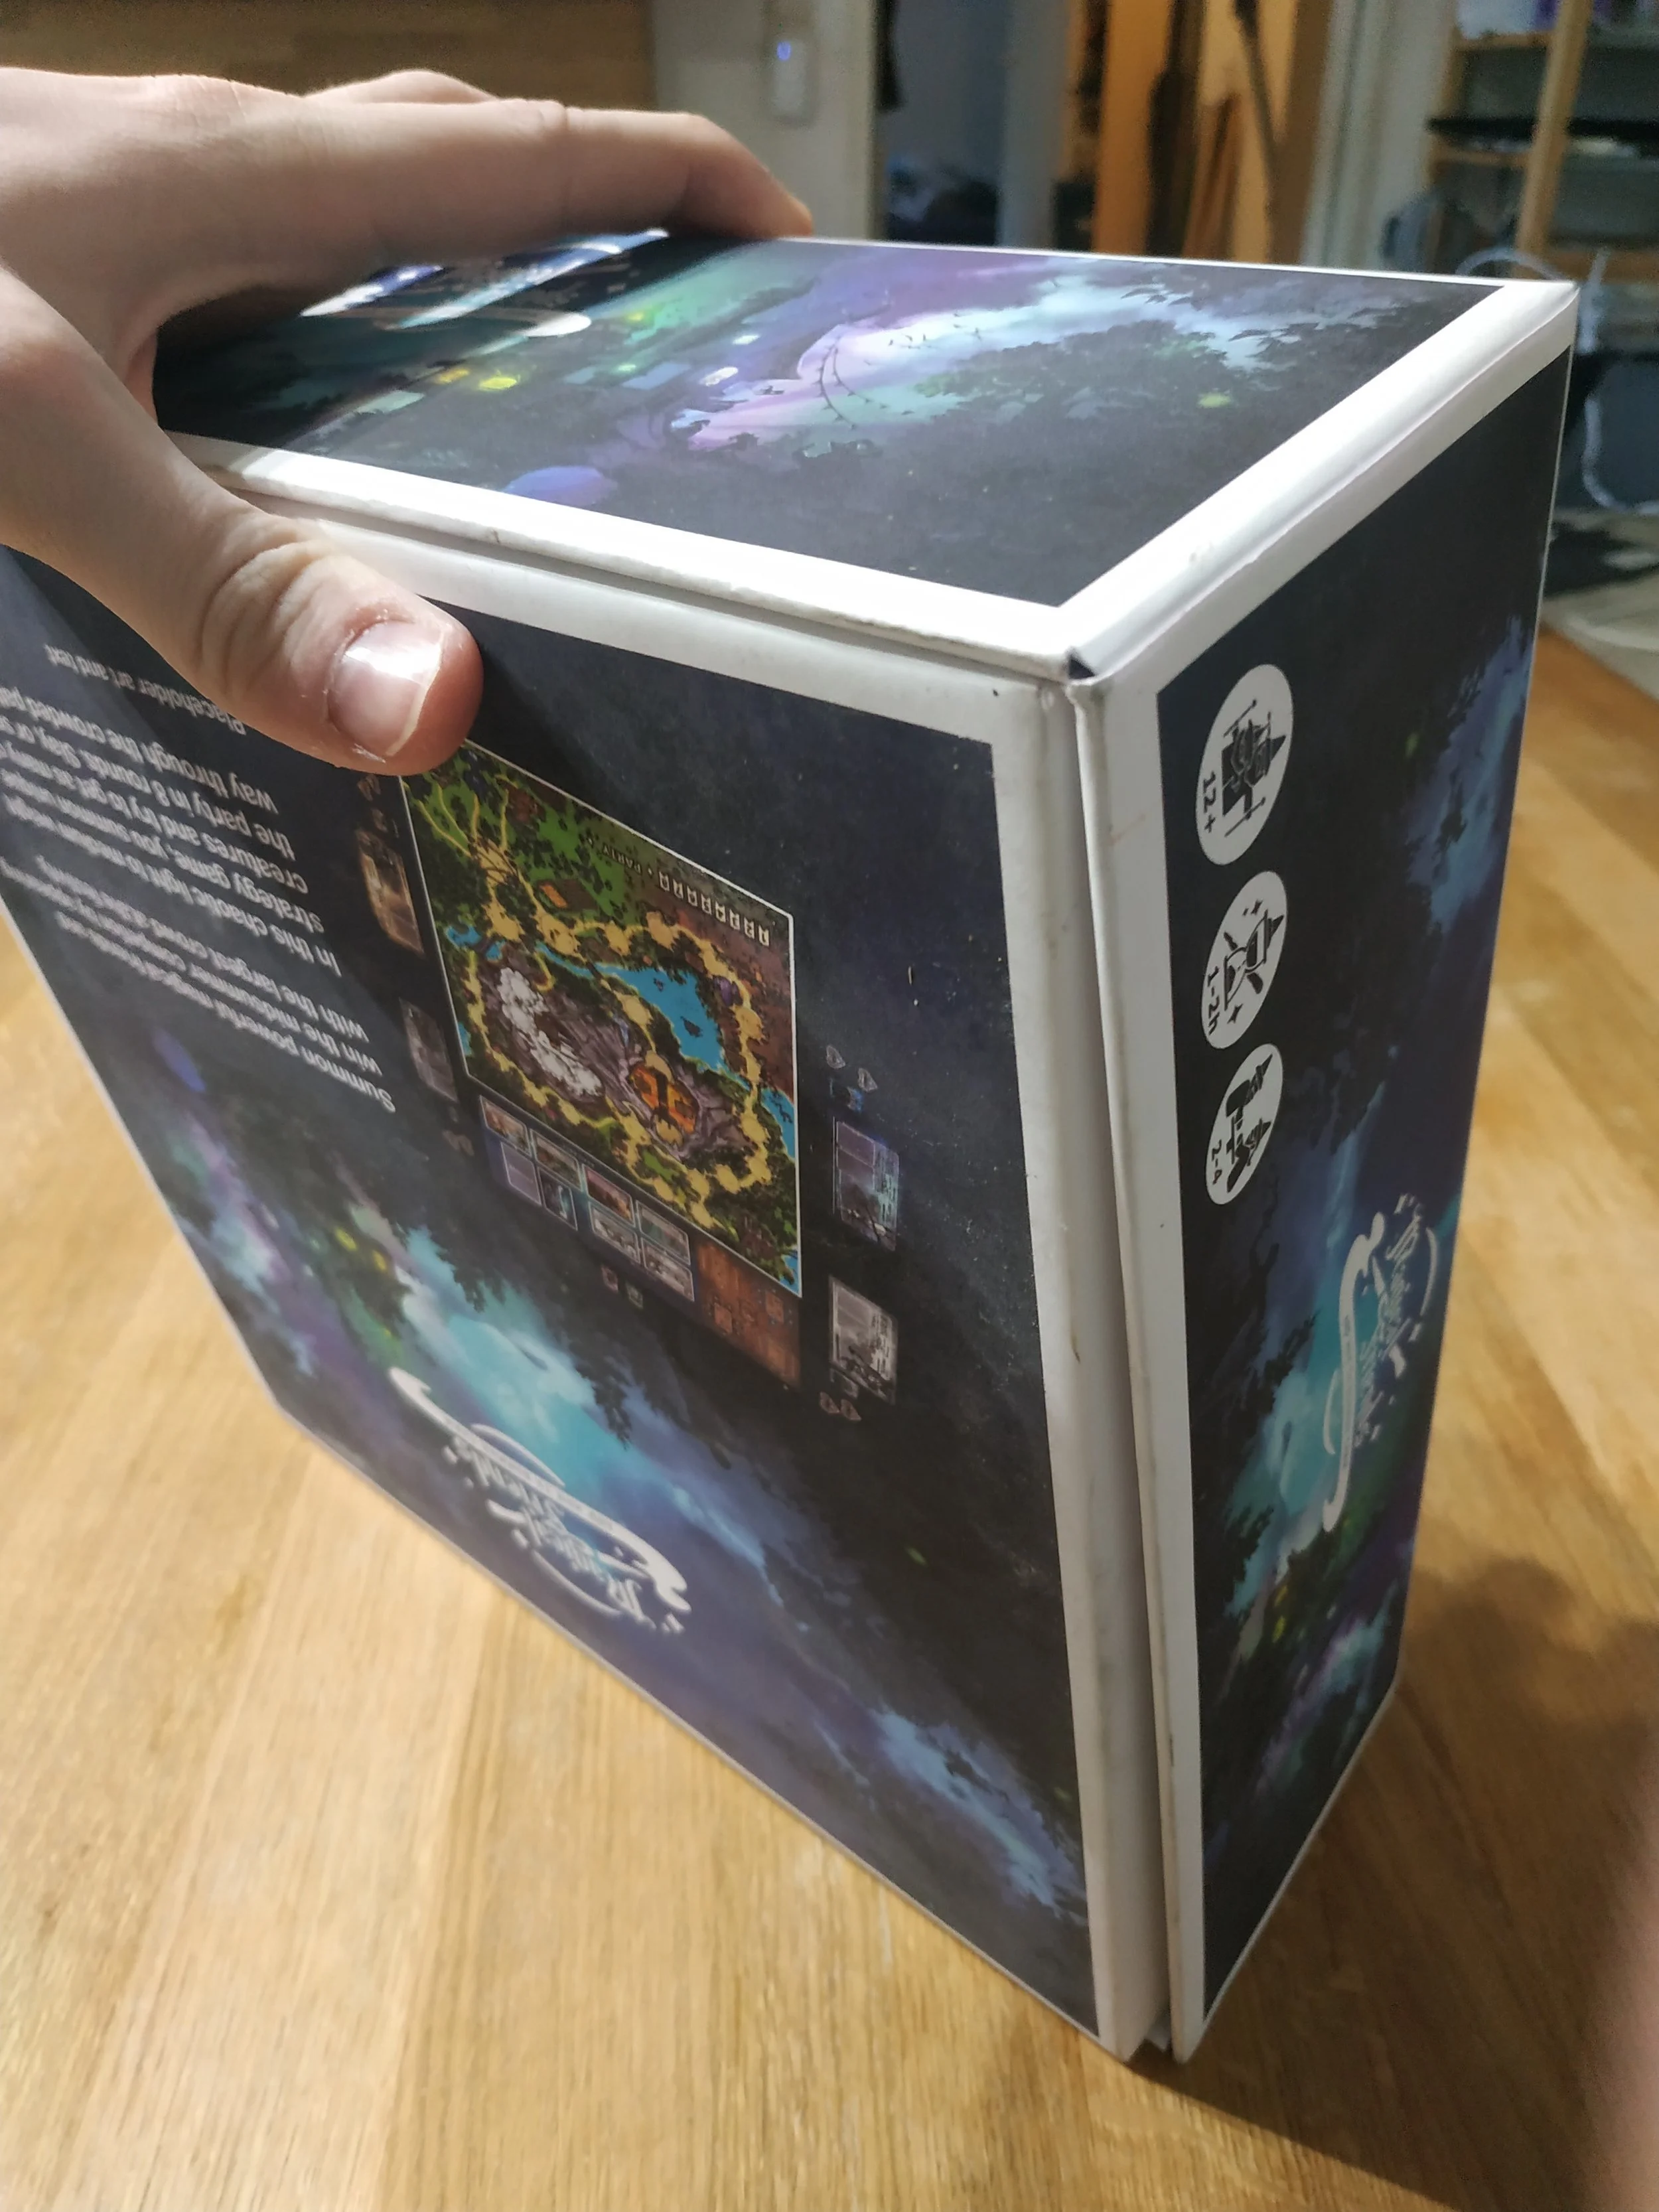
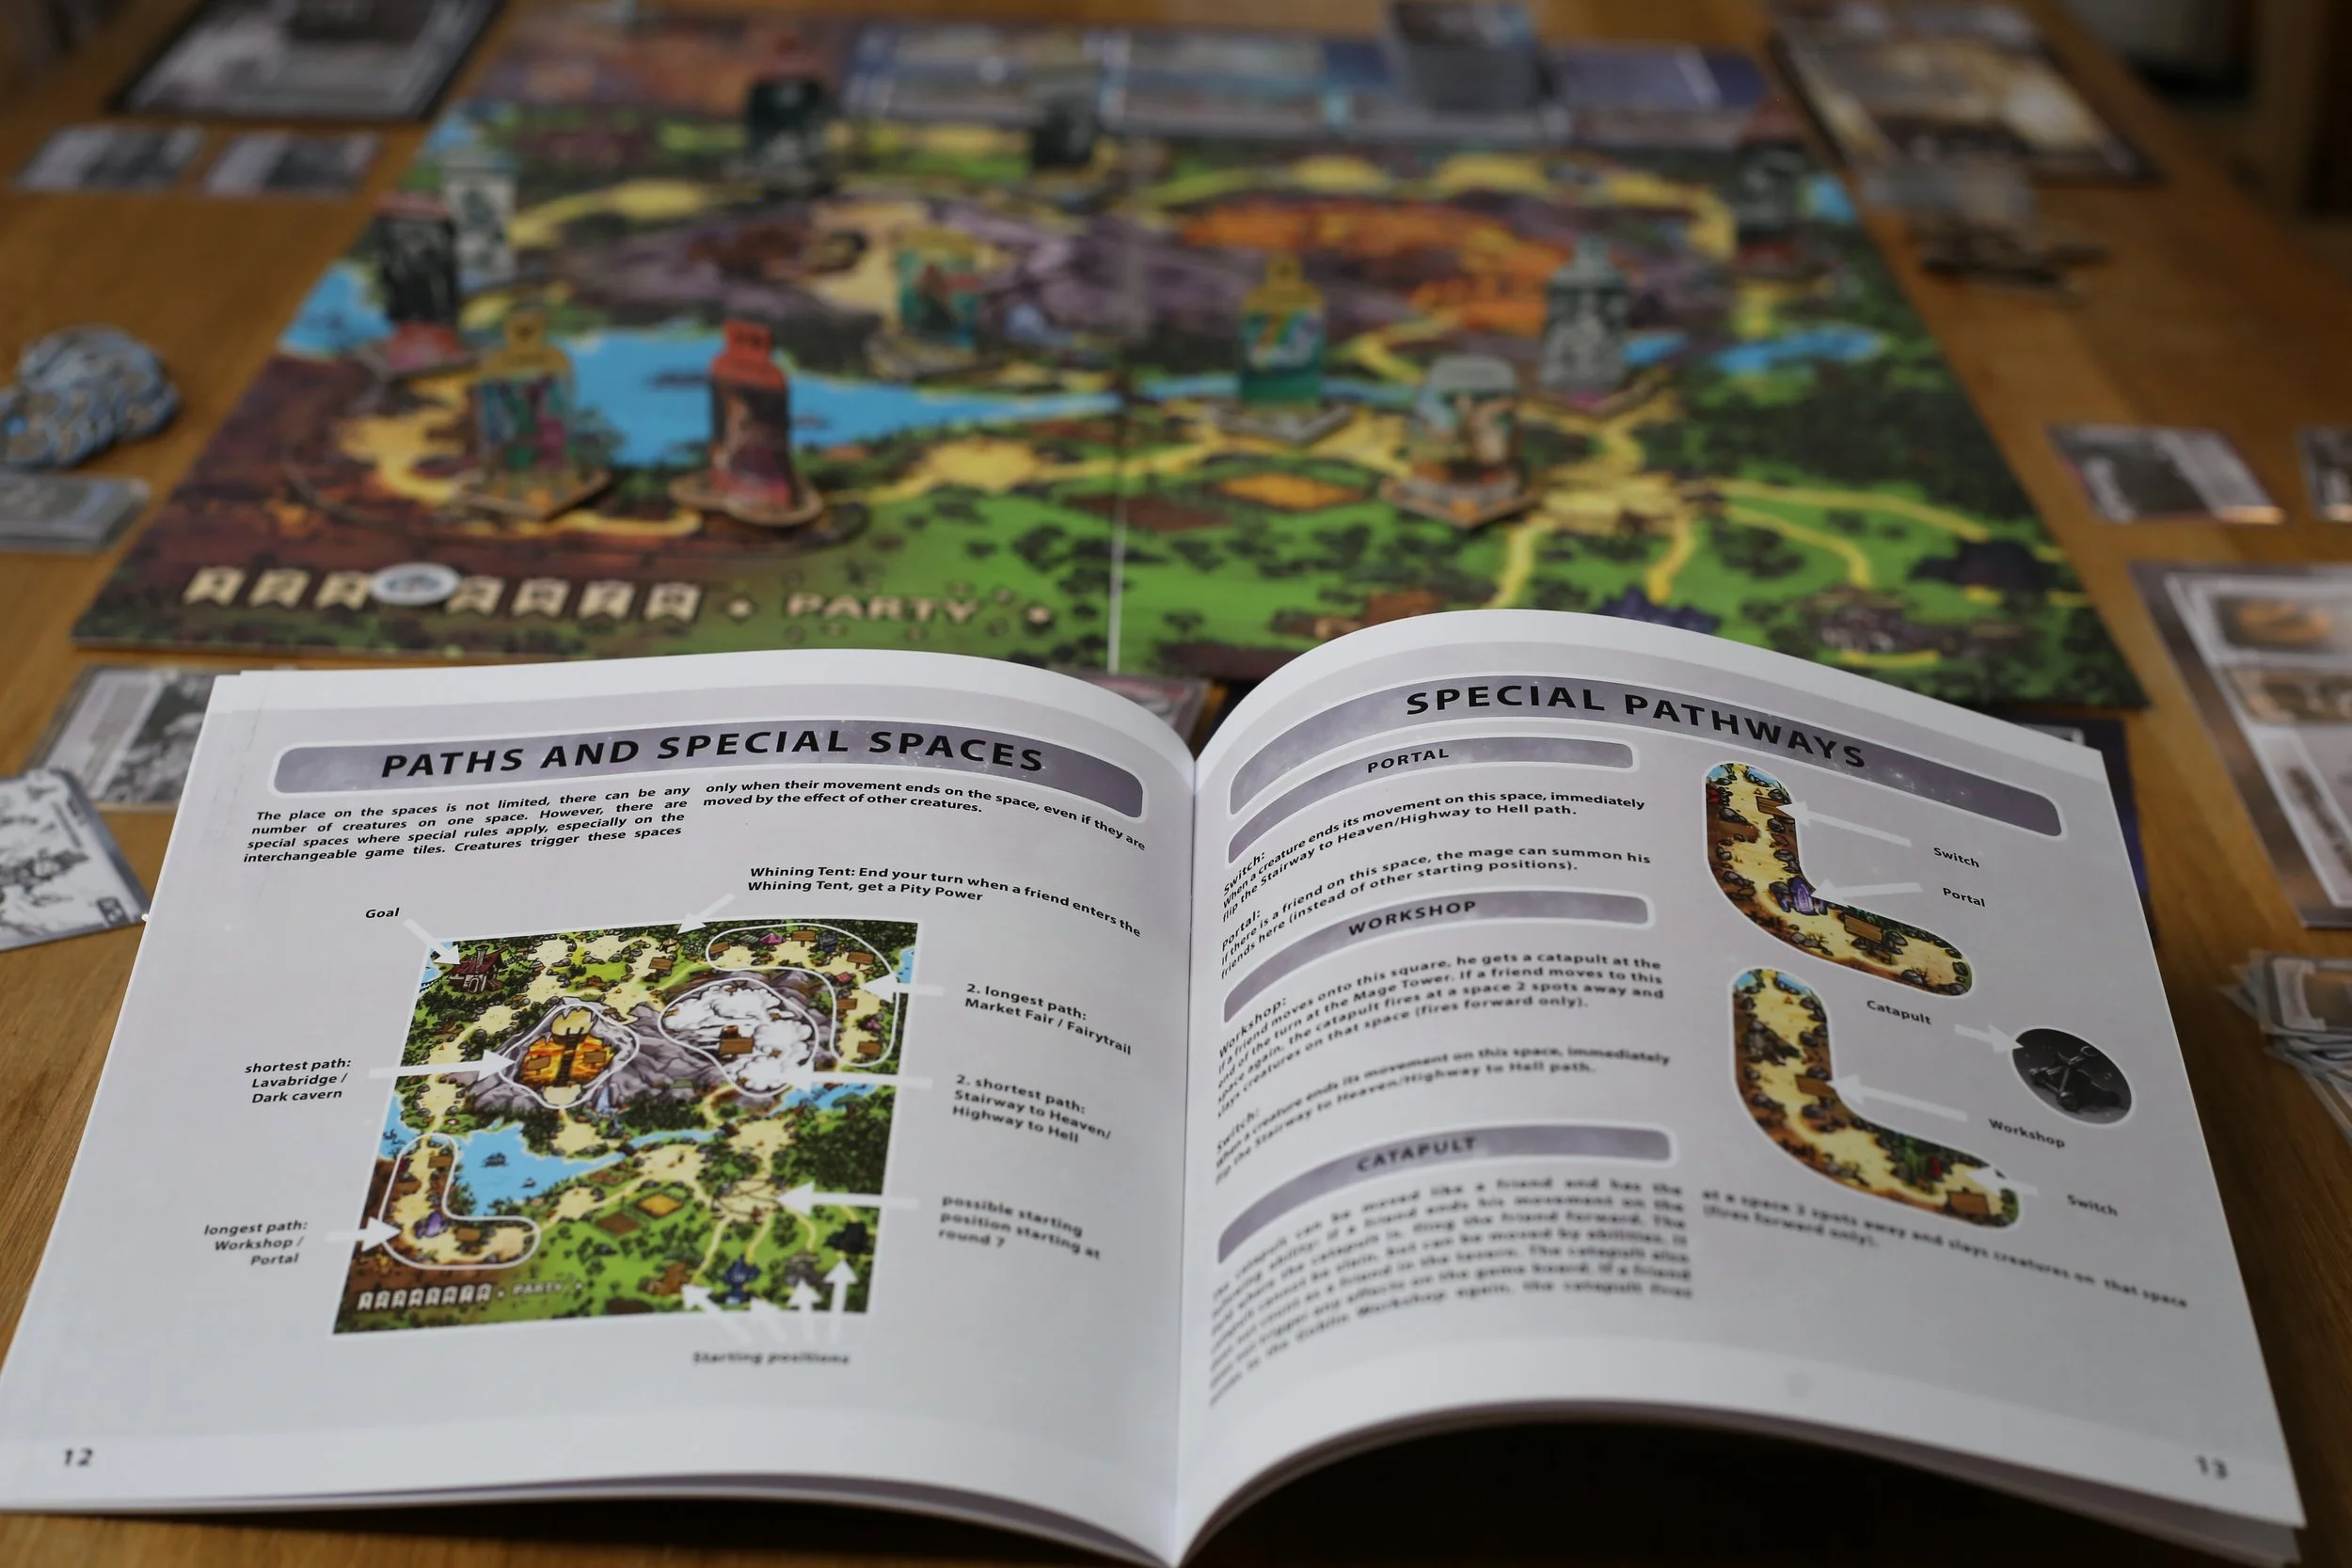
Rarely is any element in a board game more in focus than the game board. That makes it perfect for building atmosphere. The color palette sets a certain mood, and the spaces on the board should draw us into the game. Especially when learning a new game, small details on the board can help distract from longer waiting times and make the first play feel more pleasant.
In many games, the spaces on the board are tied to specific actions — in many worker‑placement games, for example, but also in games like Magical Friends. These spaces require a lot of fine‑tuning. How many spaces are optimal so they can be used well during the game? Does the number of spaces match the game length? Do players end up using the same spaces over and over — and if so, is that fun? If the same spaces are always used, it might be because there are simply too few, but it could also mean the balance between them is off.
If some spaces are clearly better than others, they’ll be used at every opportunity, while the weaker ones become consolation prizes and stop feeling good. Balance is crucial. Often, using a space comes with a cost. This mechanic is great for making small adjustments to balance: you can weaken overly strong spaces or strengthen weaker ones. If you have the chance to improve a weak space, that’s usually the better choice — powerful actions are generally more fun for players. But if there are interactions with other abilities, you have to be careful not to let things spiral out of control and create a strategy that’s far stronger than the rest.
You often see actions that are reliably good in general, while others are highly situational. Those situational actions should be a bit stronger — and it’s especially nice if players have ways to intentionally create those situations. That allows them to set up turns that feel particularly satisfying.
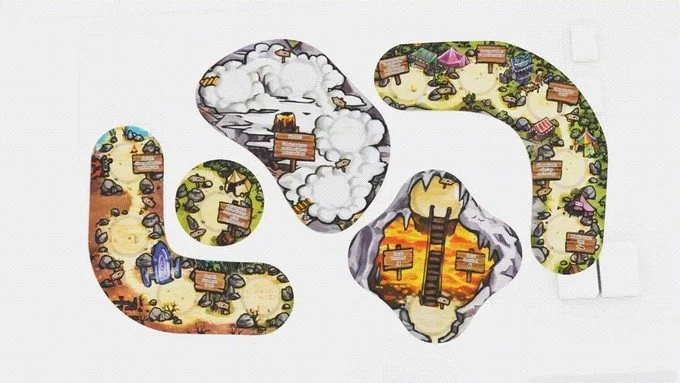
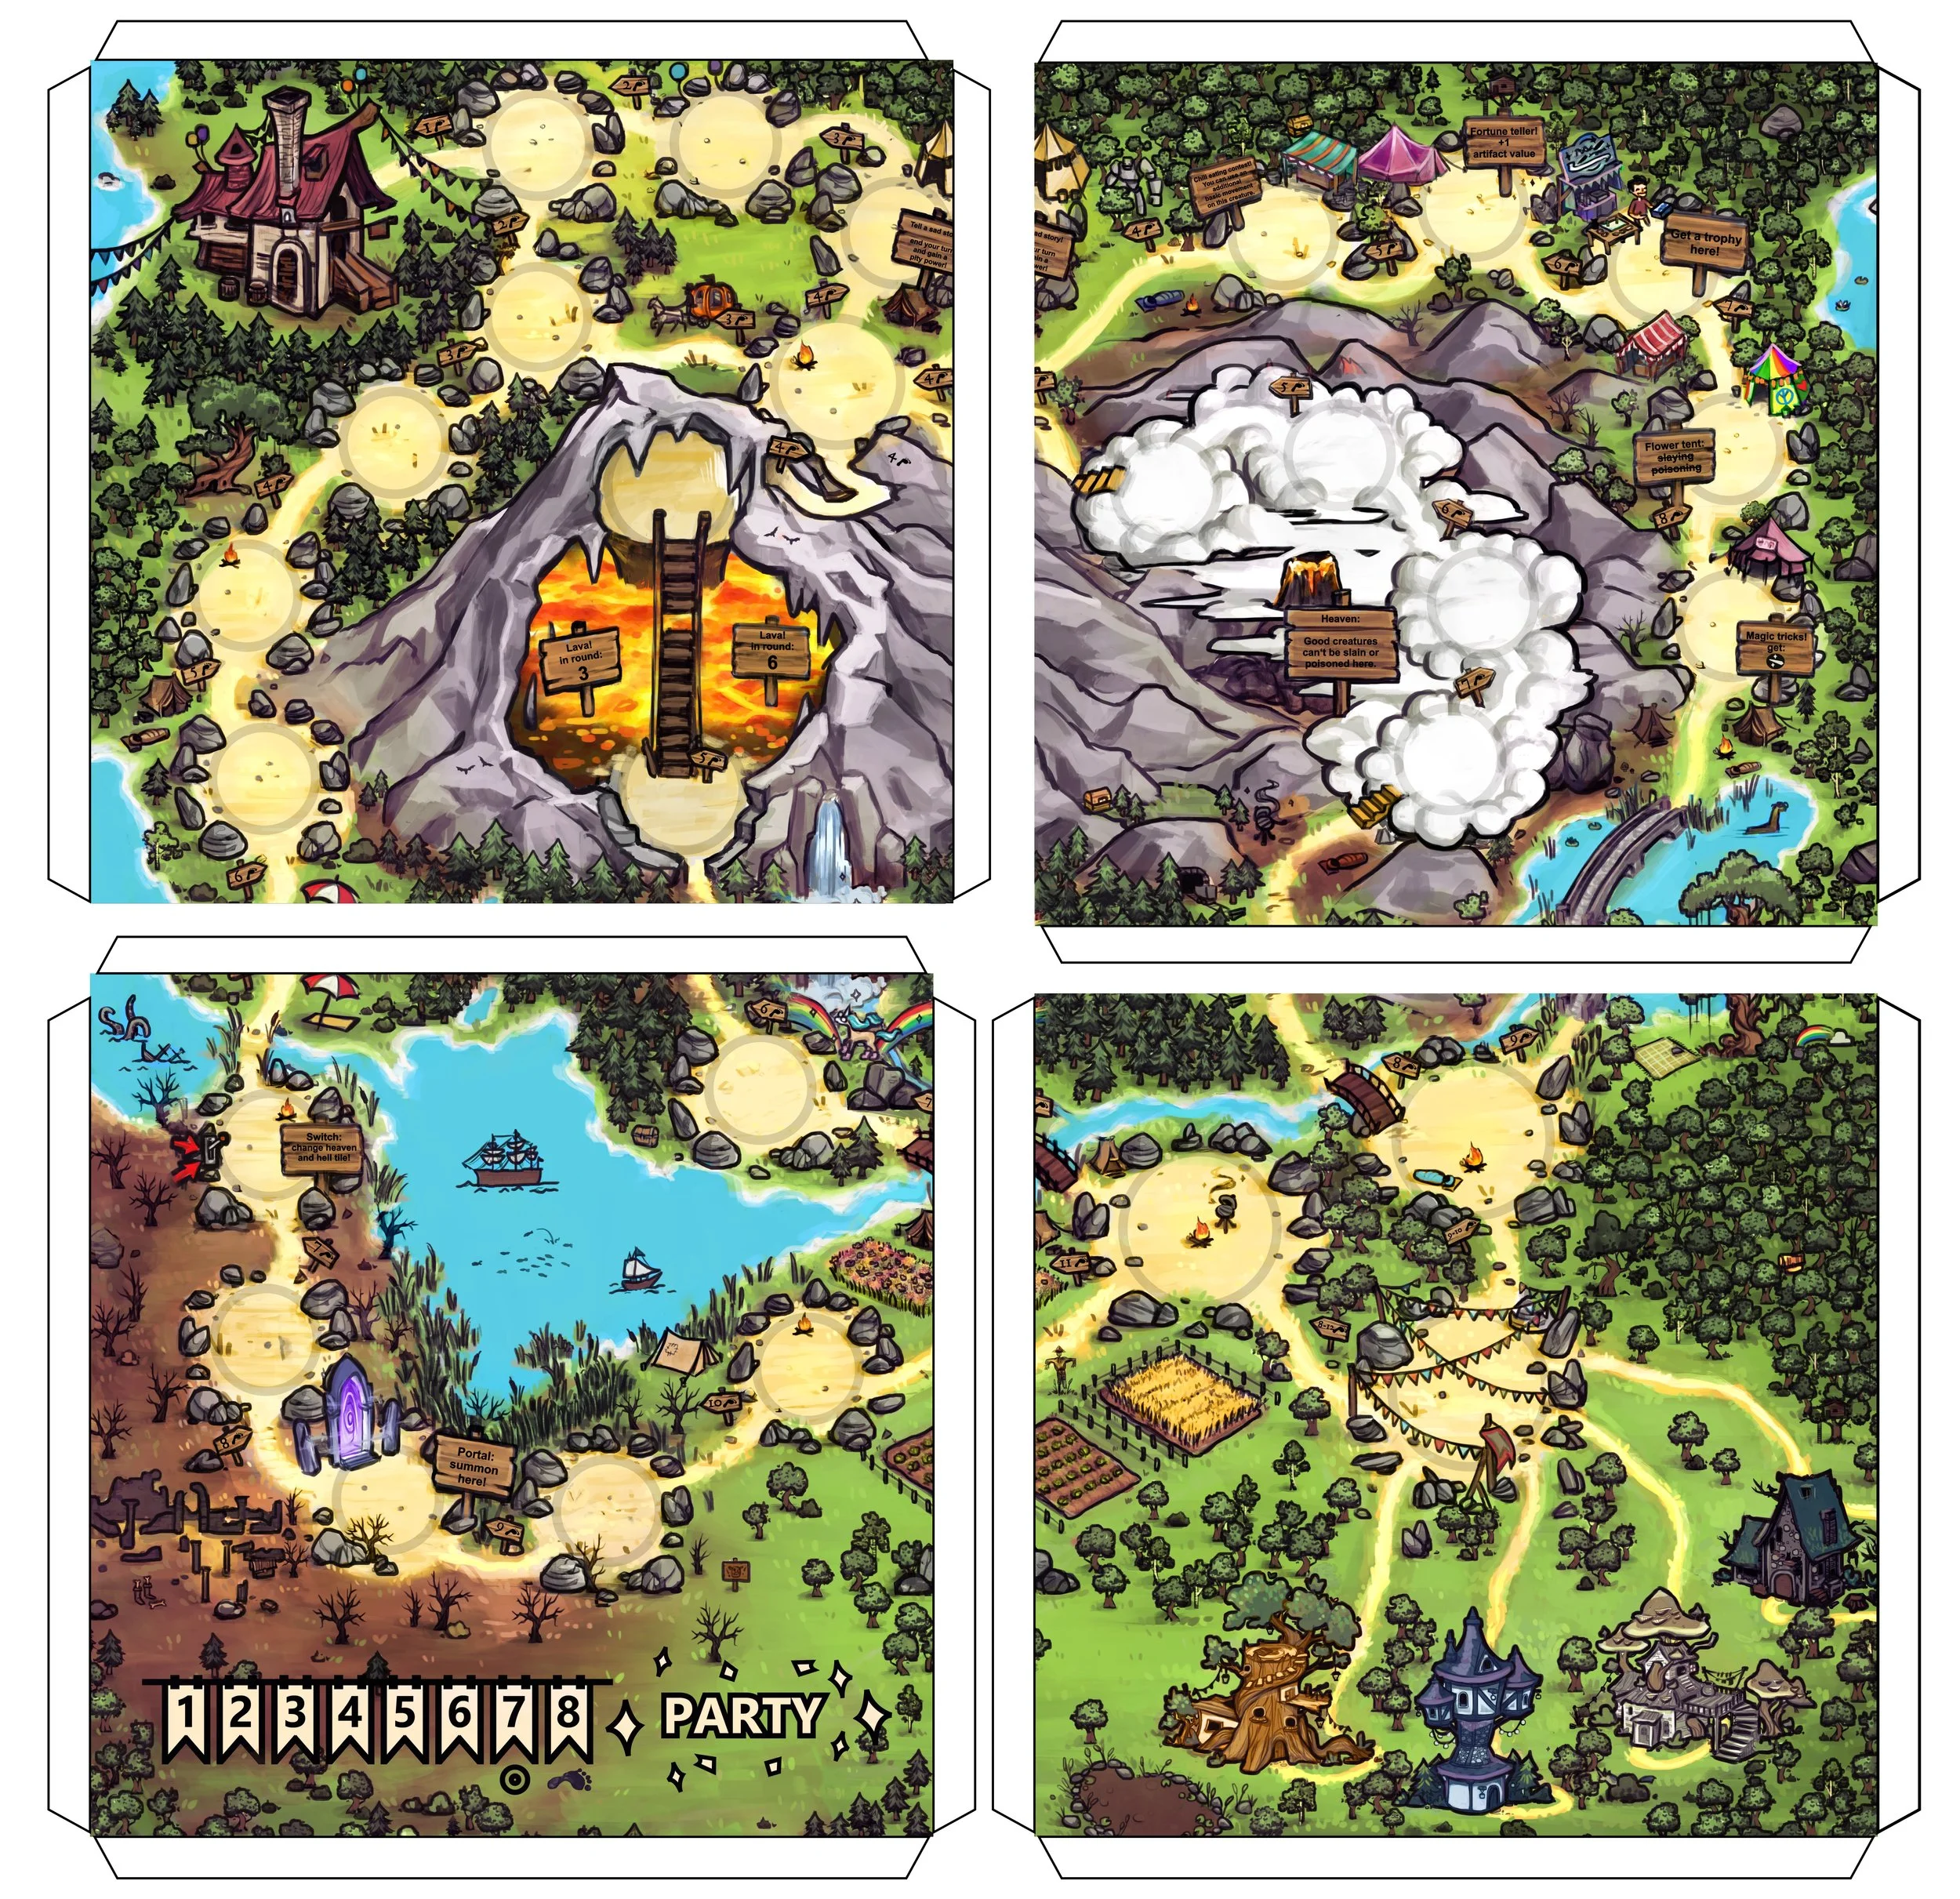
A game board also offers a great opportunity to increase replayability. With interchangeable tiles, you can create a variable setup. This can change resource distribution or interactions with other game elements from one play to the next.
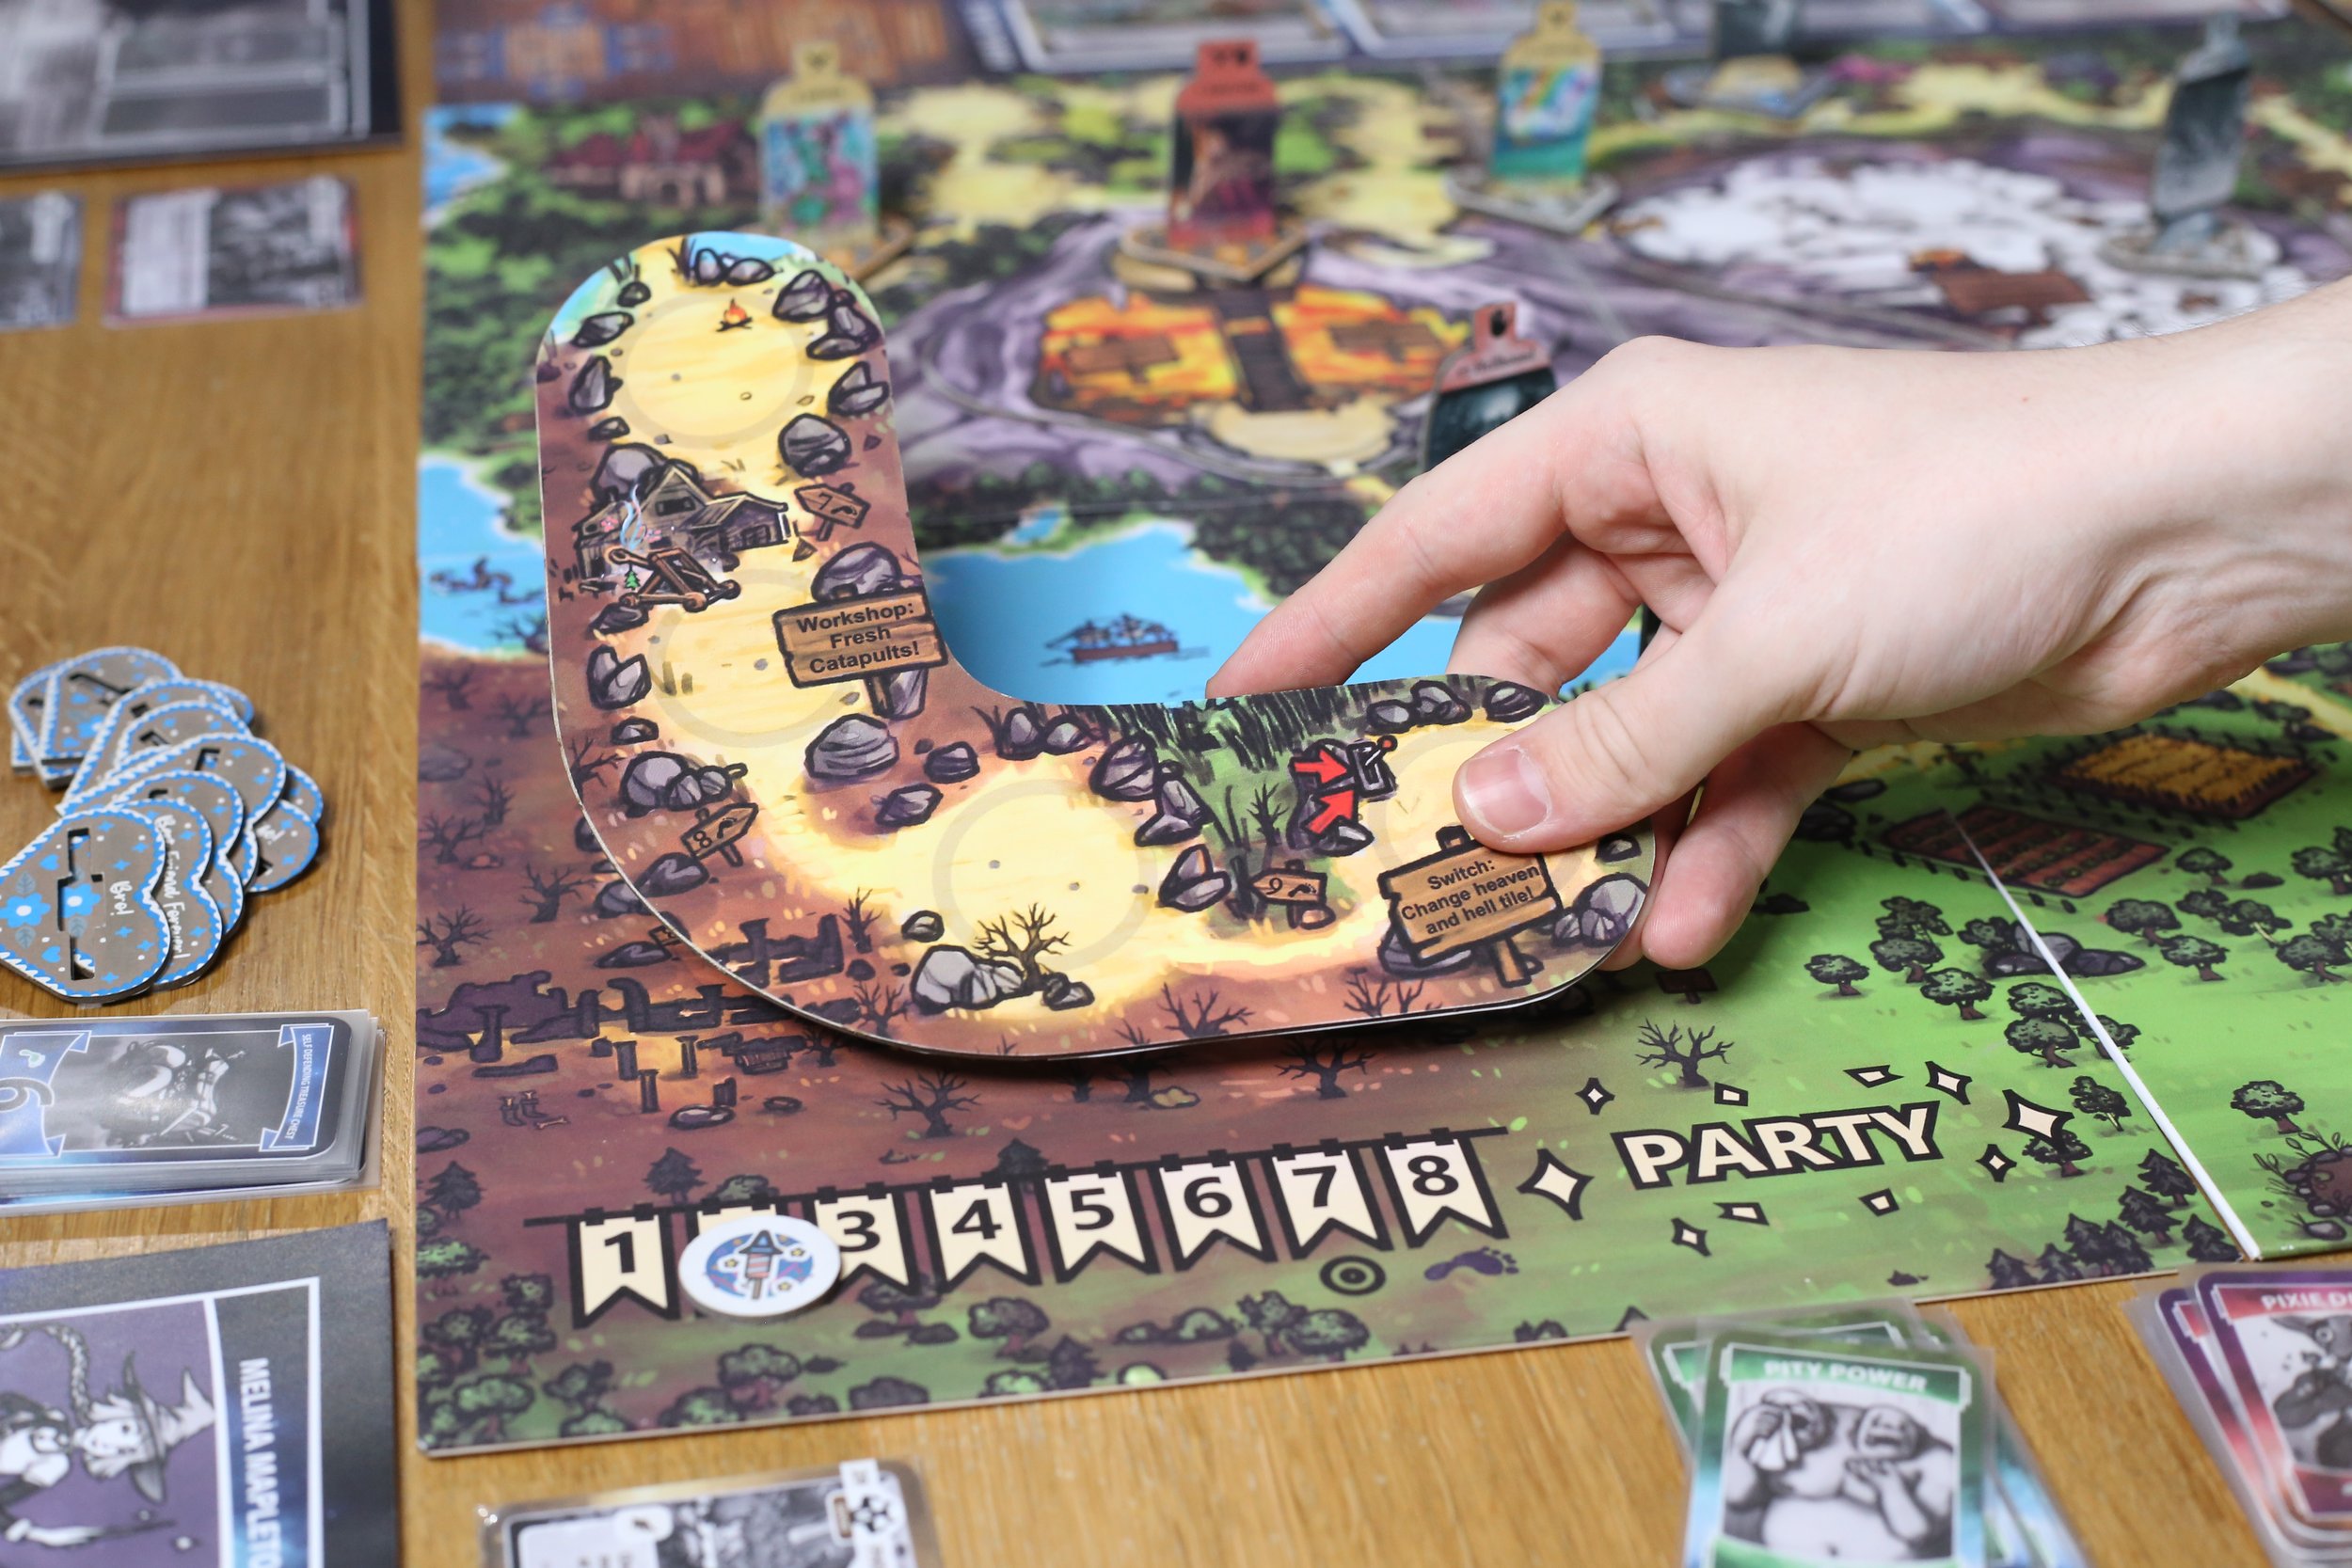
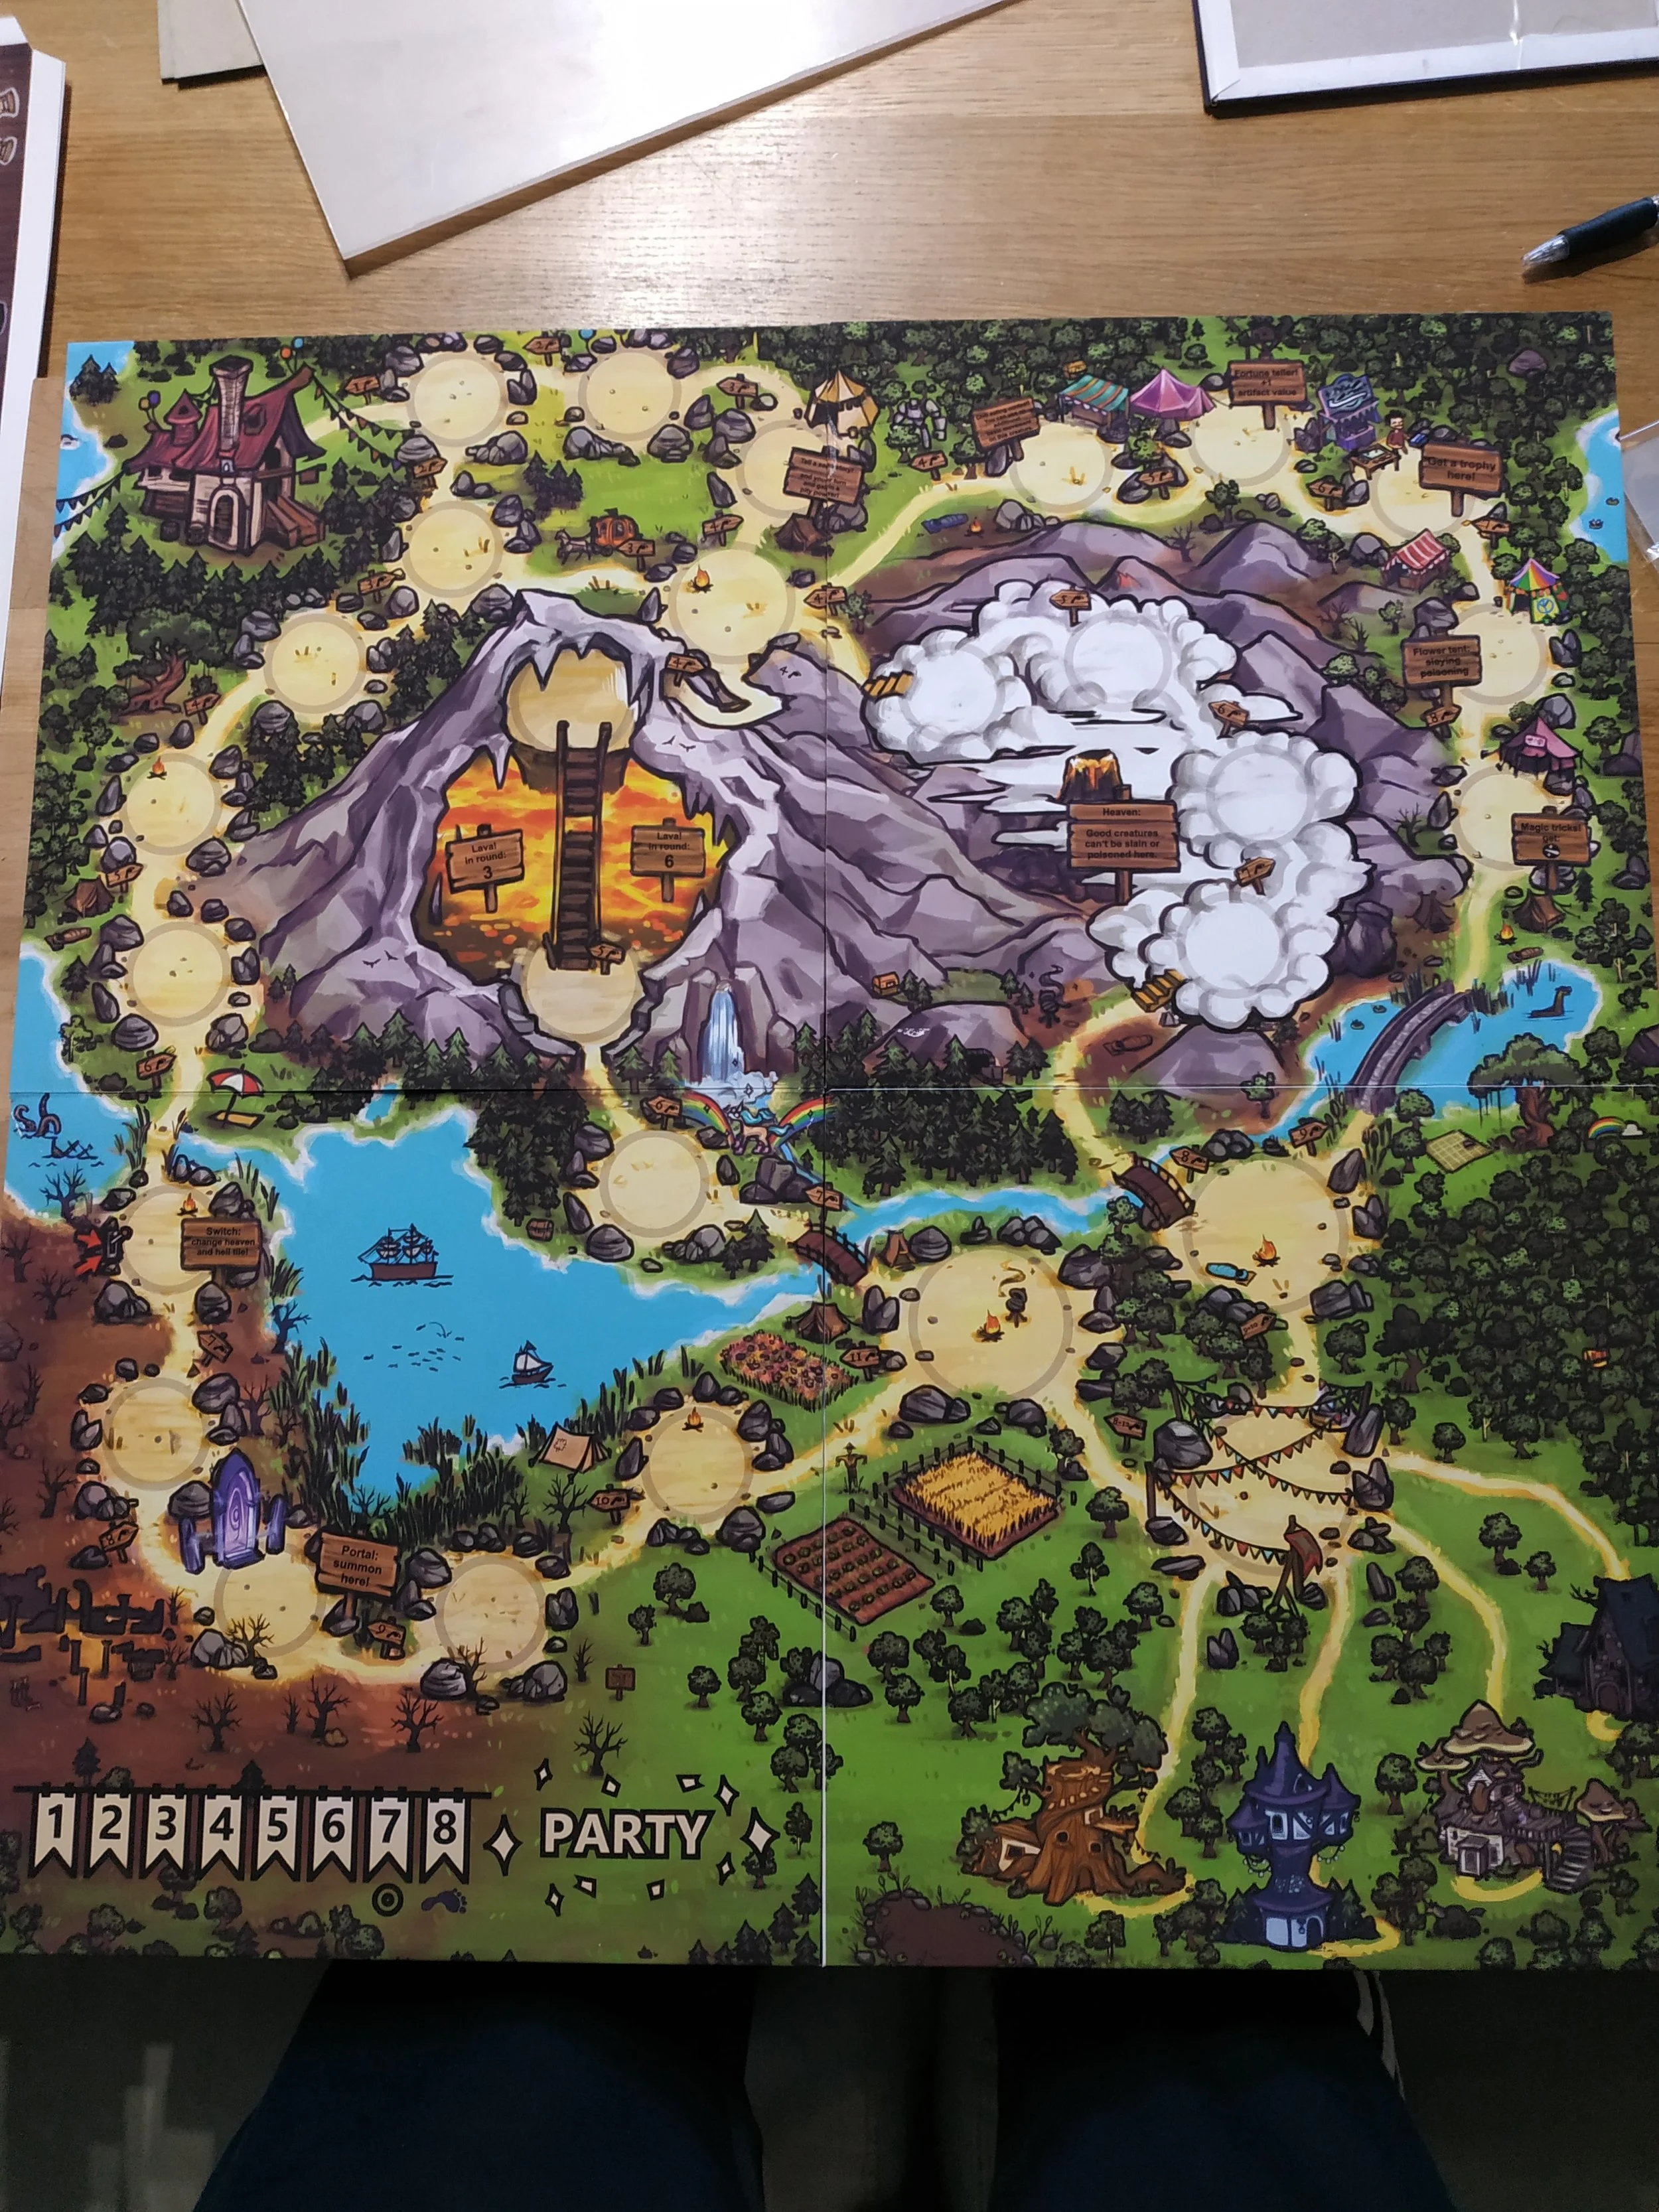
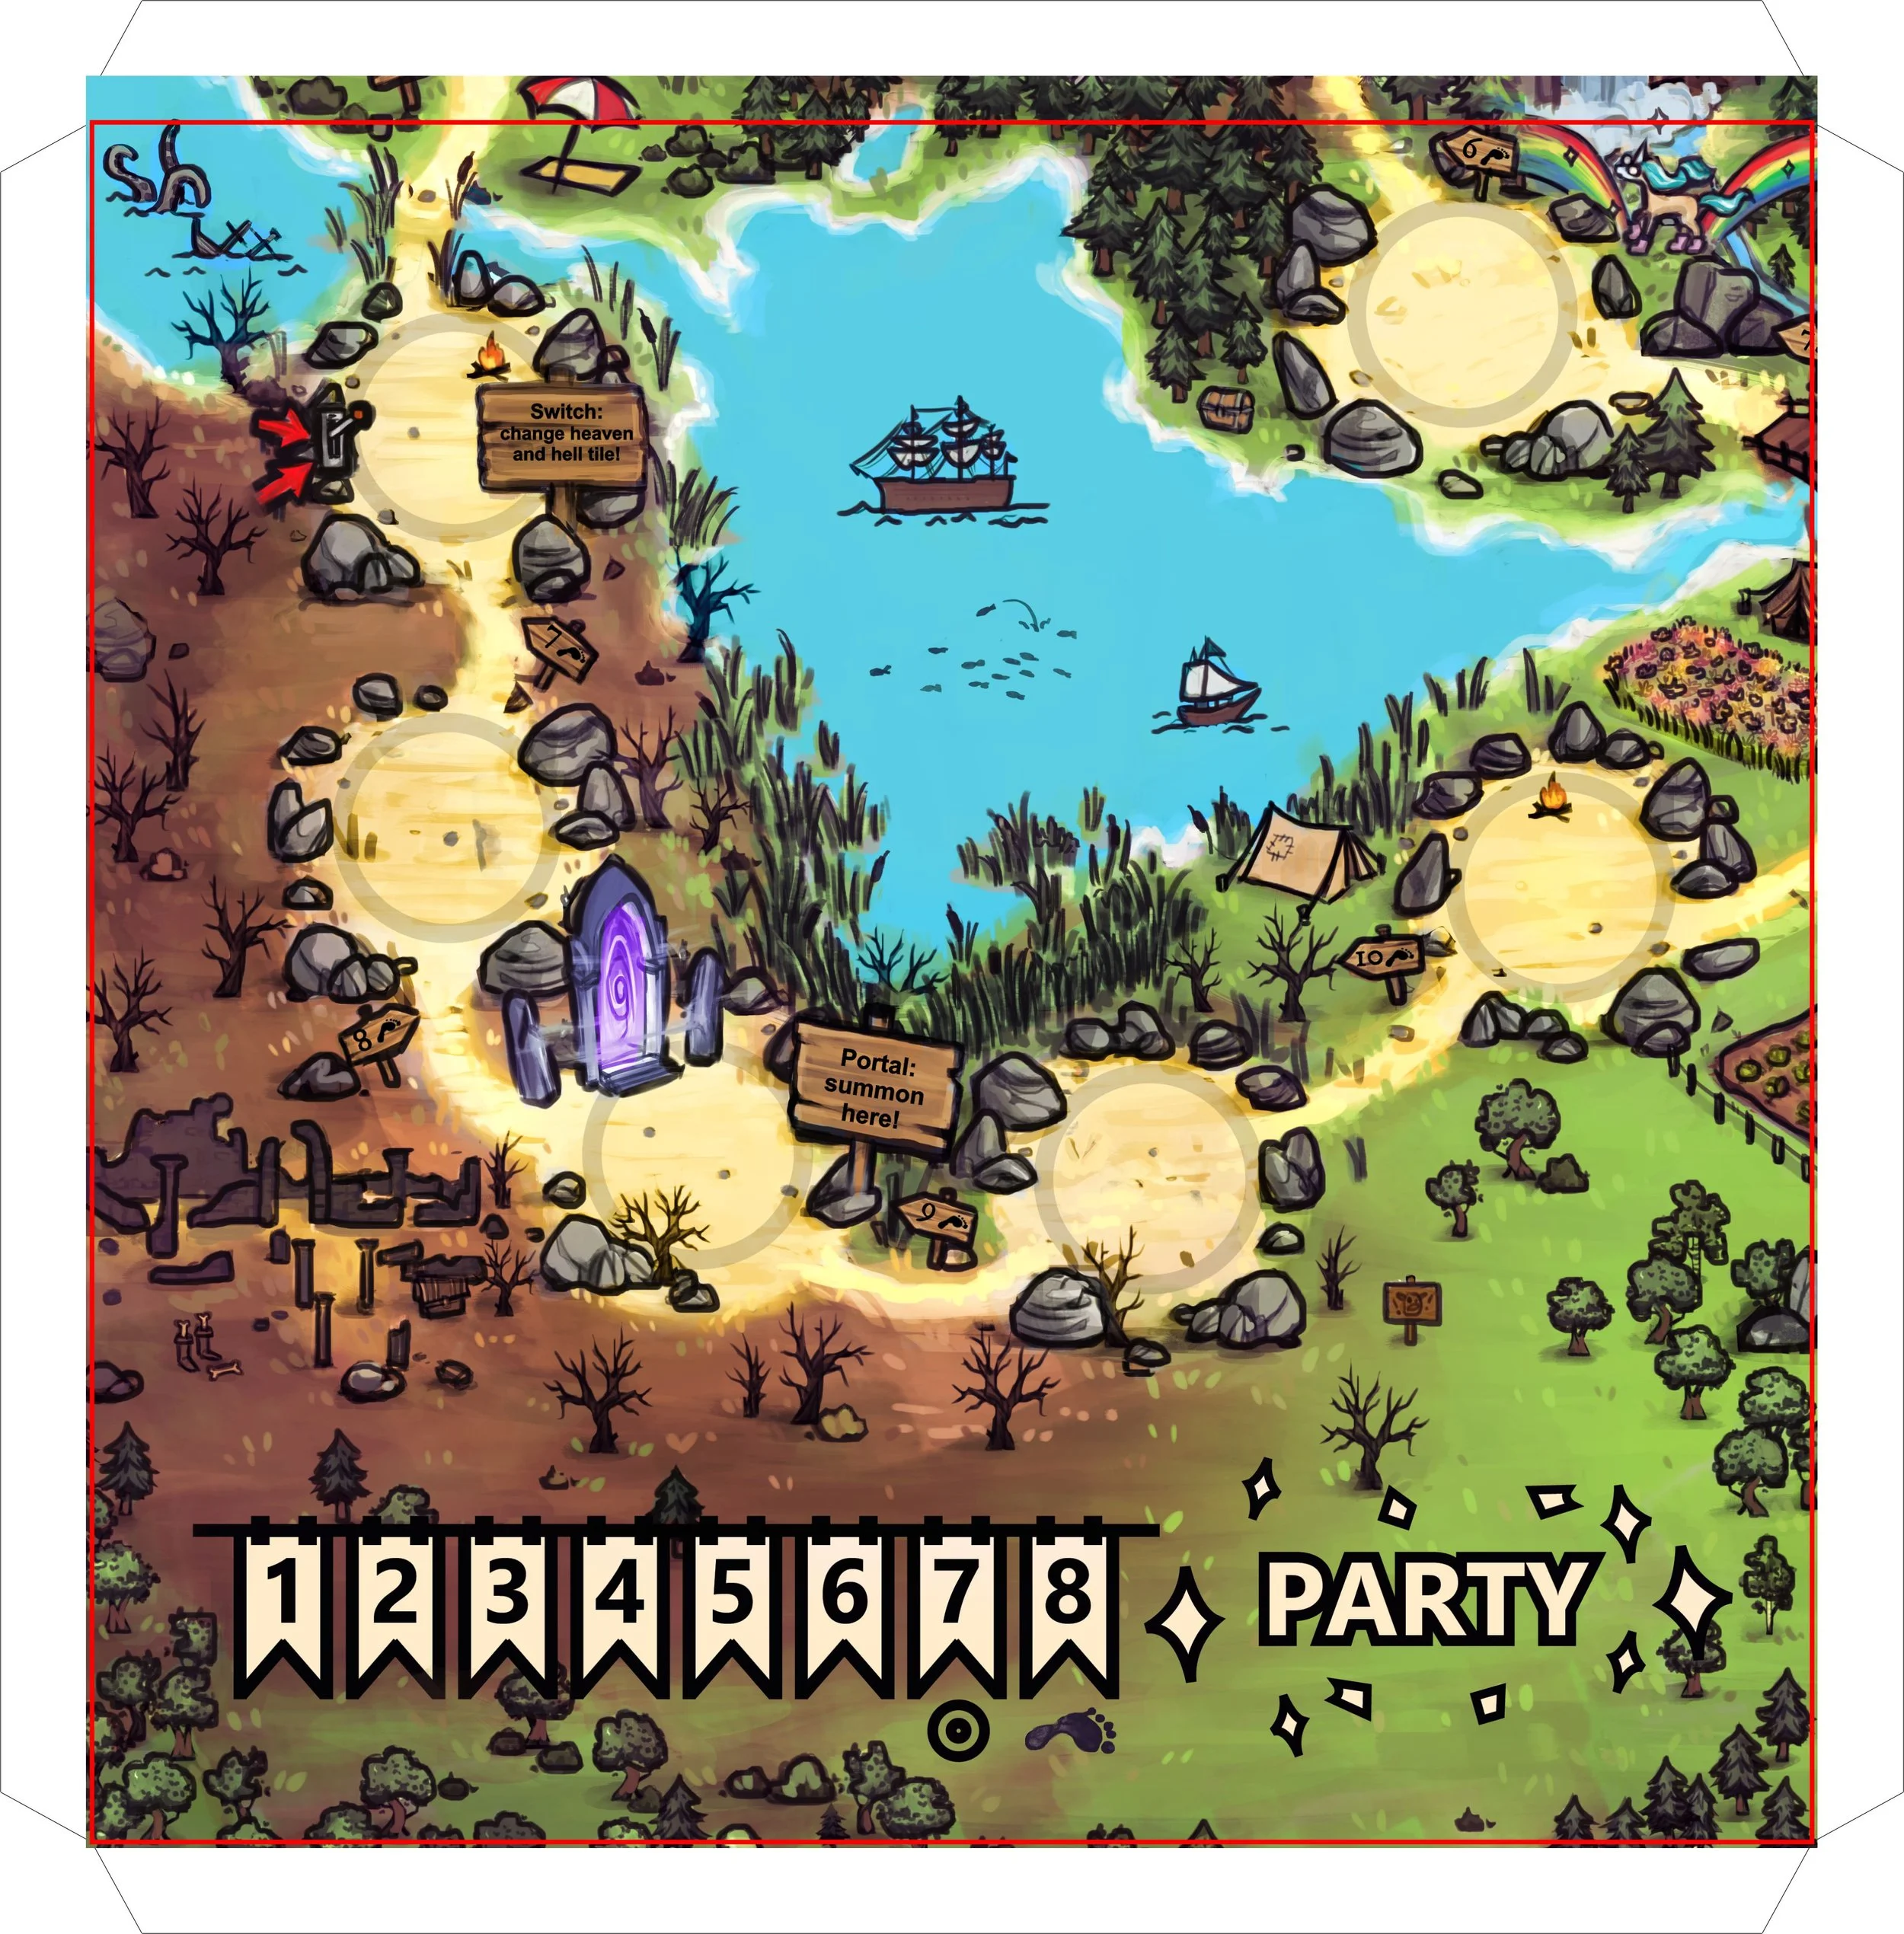
In Magical Friends, for example, there are five double‑sided paths to the goal, with the four main paths being different lengths. This creates shorter and longer routes. Naturally, depending on the group composition, some paths will be more dangerous than others — but the paths themselves should still be balanced. Shorter paths carry certain risks, while longer ones offer bonuses. The double‑sided paths create many interactions with the creatures, giving the game a high replay value. The action spaces are designed to encourage players to stop and prepare stronger moves. Of course, this comes with the risk that other players can reach you more easily and sabotage your plans. If you’ve already had the chance to test the game, you may have noticed that the Heaven/Hell path will receive some small adjustments in this regard.
In general, it’s very important to test the game board — and any changes to it — frequently. In Magical Friends, for example, it makes a big difference whether a space can be reached in a single turn or whether you need some preparation to get there. This placement alone can have a huge impact on how attractive a path is.
If you’d like to try Magical Friends, there’s a Workshopfile for it on Tabletop Simulator. If you already own Tabletop Simulator, you can play Magical Friends on it for free.
Are there game boards you particularly love? Examples where something works especially well? Leave a comment — I’d love to chat about it.
41 – What Actually Happened to the Prototypes?
41 – What Actually Happened to the Prototypes?
Lately, I’ve been asked quite often how I managed to get reviews for my board game, and how — and which — reviewers I contacted. It’s not a small undertaking and requires a good amount of time.
In earlier posts, I mentioned that I handcrafted a total of ten prototypes. Creating these prototypes alone cost me a full month of work (full‑time). Of course, this depends heavily on the scope of the game, and you can certainly outsource the production. But even then, you need to plan for plenty of time, because the print files must be prepared, and the prototypes still need to be produced and shipped. That can easily take a month as well — and naturally costs more.
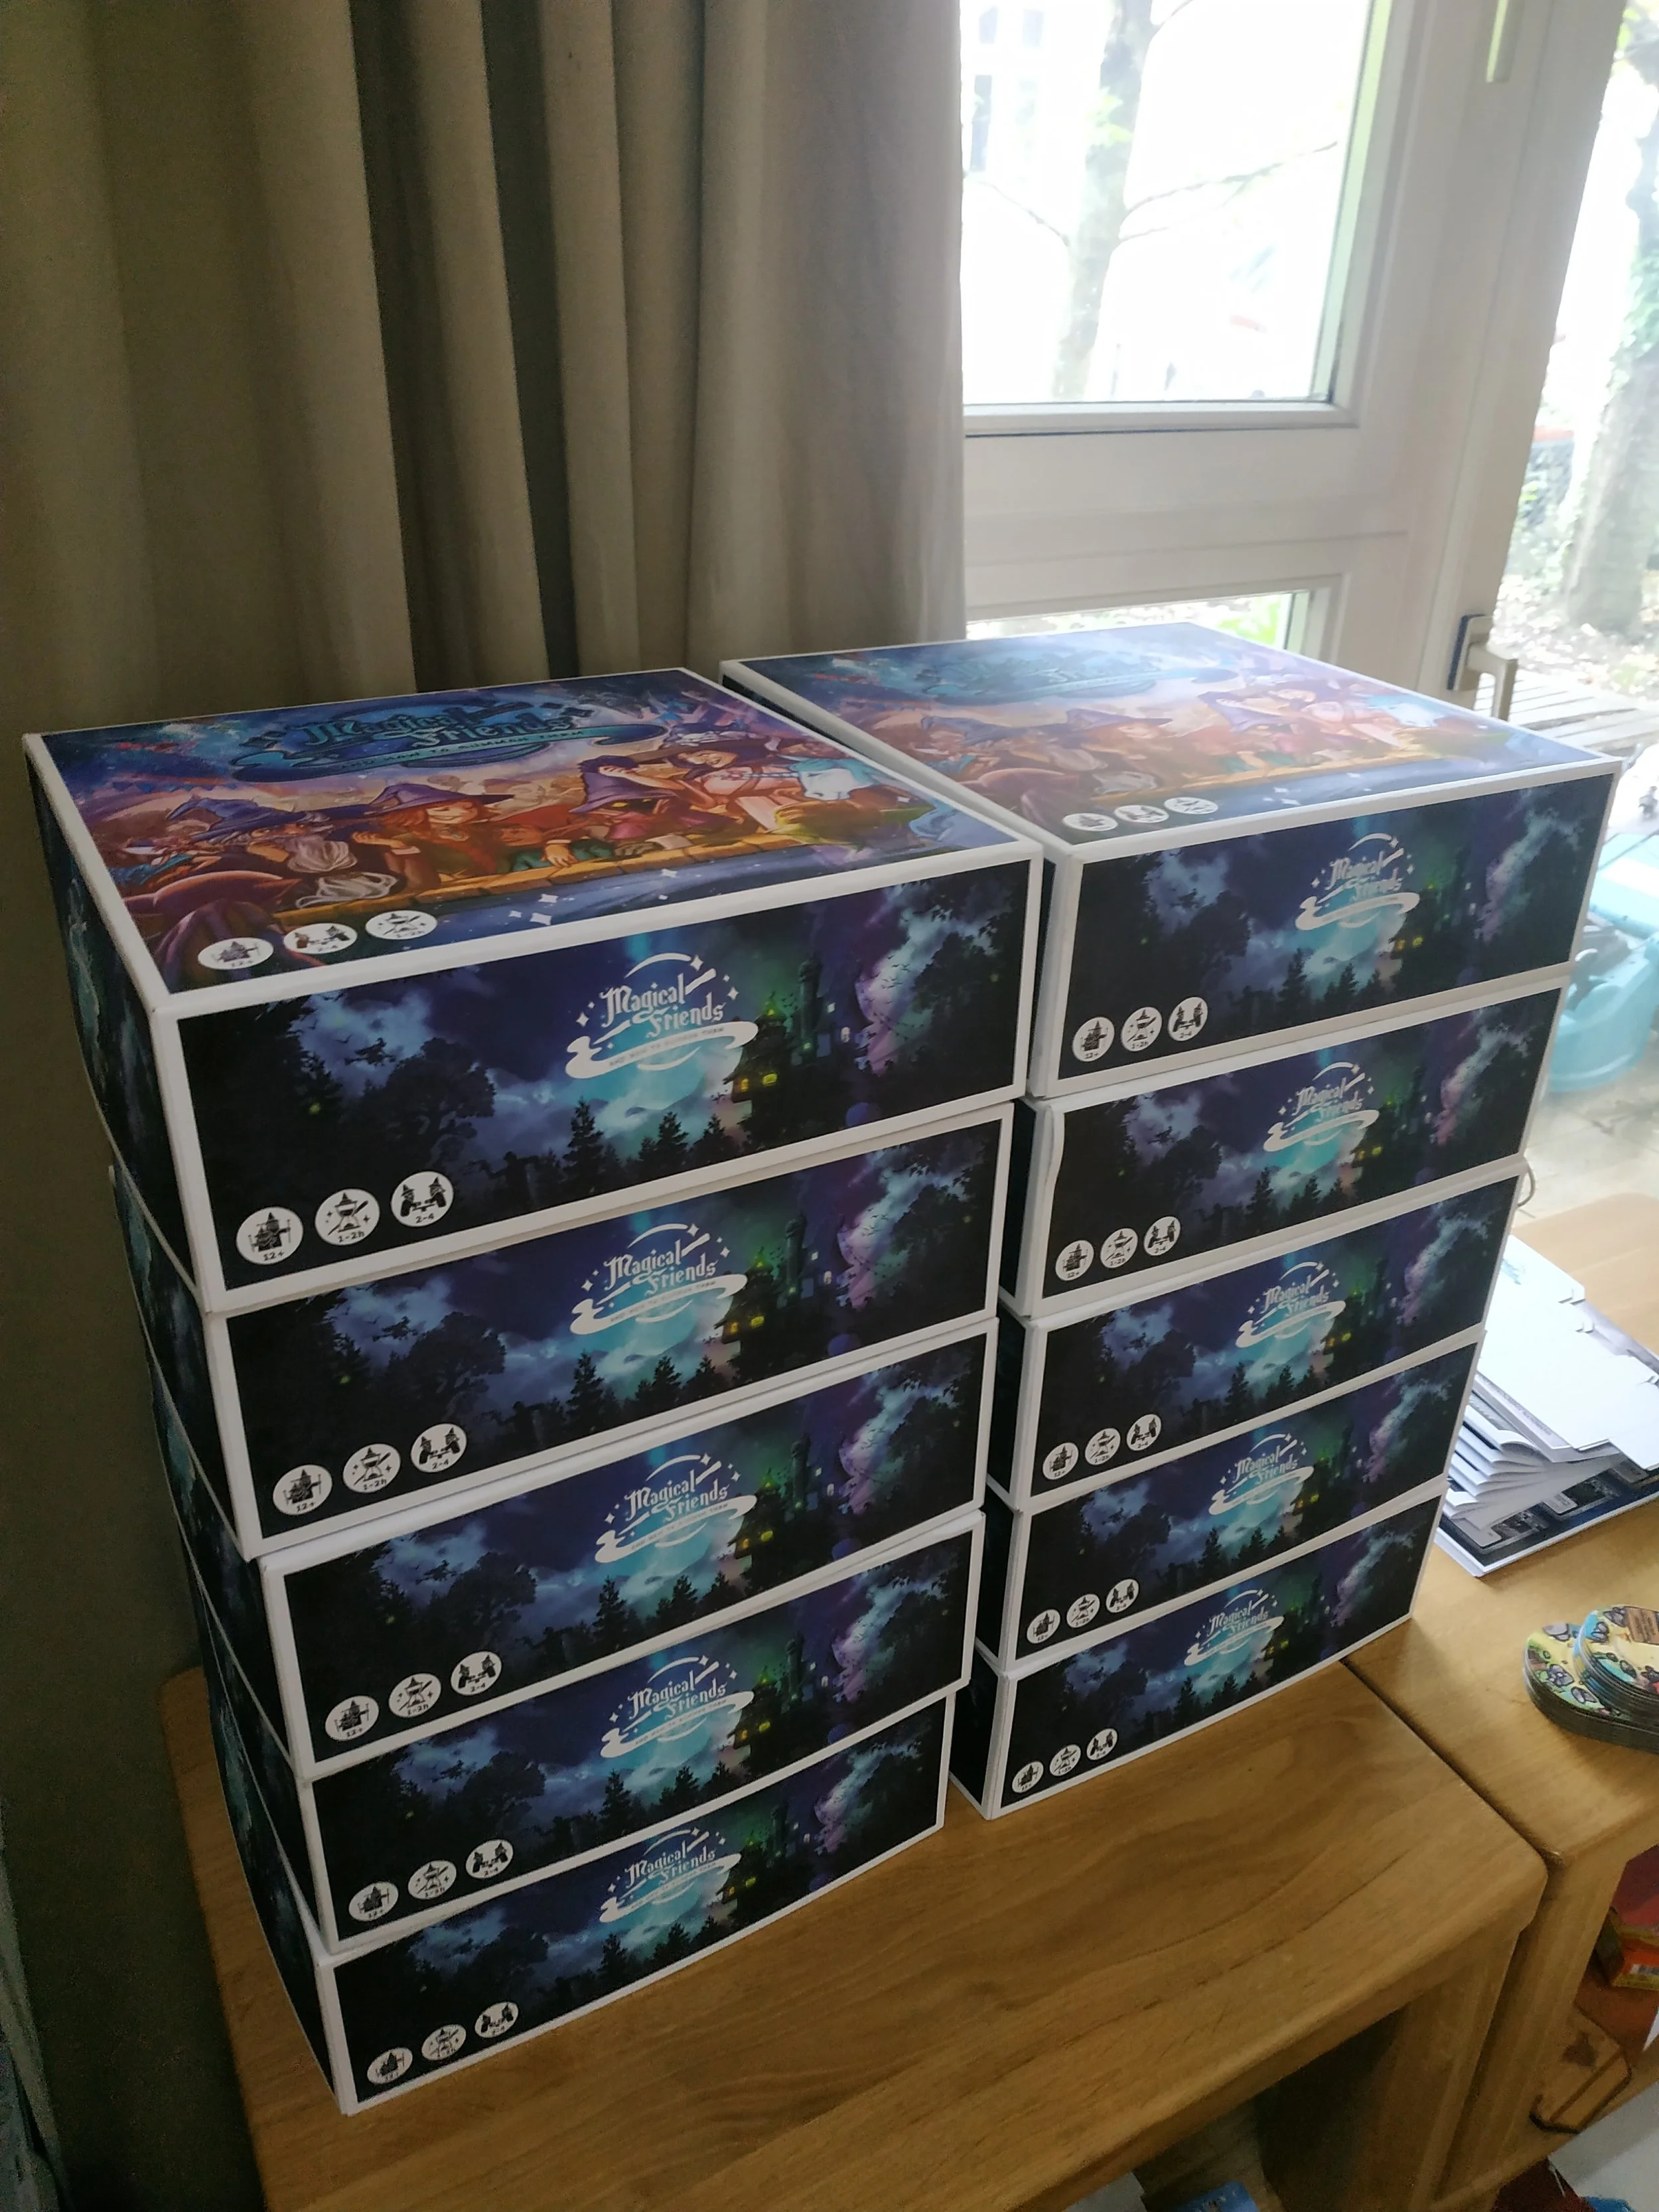
10 pretty prototypes
Over the course of 3.5 months (mid‑May to early October), these prototypes reached a total of 31 people and resulted in around 20 reviews plus several additional playtests. Eight prototypes were shipped out. I kept one German and one English copy for testing, promotion, photos, and videos.
Shipping and reviews take time, and during COVID it wasn’t exactly easy for reviewers to gather enough players around a table. I’d say you should expect about 3–6 weeks per reviewer for a prototype.
How did I contact reviewers? First, you naturally reach out directly to your favorite reviewers. They usually list contact information on their channels. However, not all reviewers do previews (for games not yet available on the market). You can find additional reviewers most quickly through Facebook groups, though there are other good platforms too (BoardGameGeek, Reddit). You can ask players which reviewers they like most, or you can contact reviewers directly.
For example, the group Brettspielwiese includes many German players and reviewers. In English‑speaking groups like The Boardgame Group and Board Game Revolution, you’ll find lots of players. Especially in The Boardgame Group, I recommend talking to Collin Spanberger about this topic. :) In the group Board Game Reviews and Media, you can directly ask for interested reviewers.
It’s also important that the game fits the channel. Not only because you’ll get better recommendations, but also because the reviewer themselves will be genuinely interested in the game. That’s why you should familiarize yourself with each channel — which, of course, takes time. I usually looked for posts about games that target a similar audience to mine, such as Small World.
A high subscriber count is nice, but the views and interactions on the videos themselves are far more relevant. There are channels with many subscribers whose videos barely get any views. That can happen because of bought subscribers, but it can also simply be due to long periods of inactivity. As a result, new posts barely show up, or the channel has one or two extremely successful videos that attracted many people who don’t actually follow the channel otherwise.
How did shipping go? Shipping to the USA and the UK is, of course, expensive, but overall it worked well. Most reviewers kept to their timeframes. Naturally, during COVID there were understandable delays here and there. There were only two annoying incidents: one reviewer kept the game for 2.5 months and repeatedly asked for extensions. During that time, he played it only once, so I eventually had the prototype forwarded without a review. Another prototype got stuck somewhere in the postal system for three months (despite having a shipping confirmation). Aside from that, shipping went very smoothly.
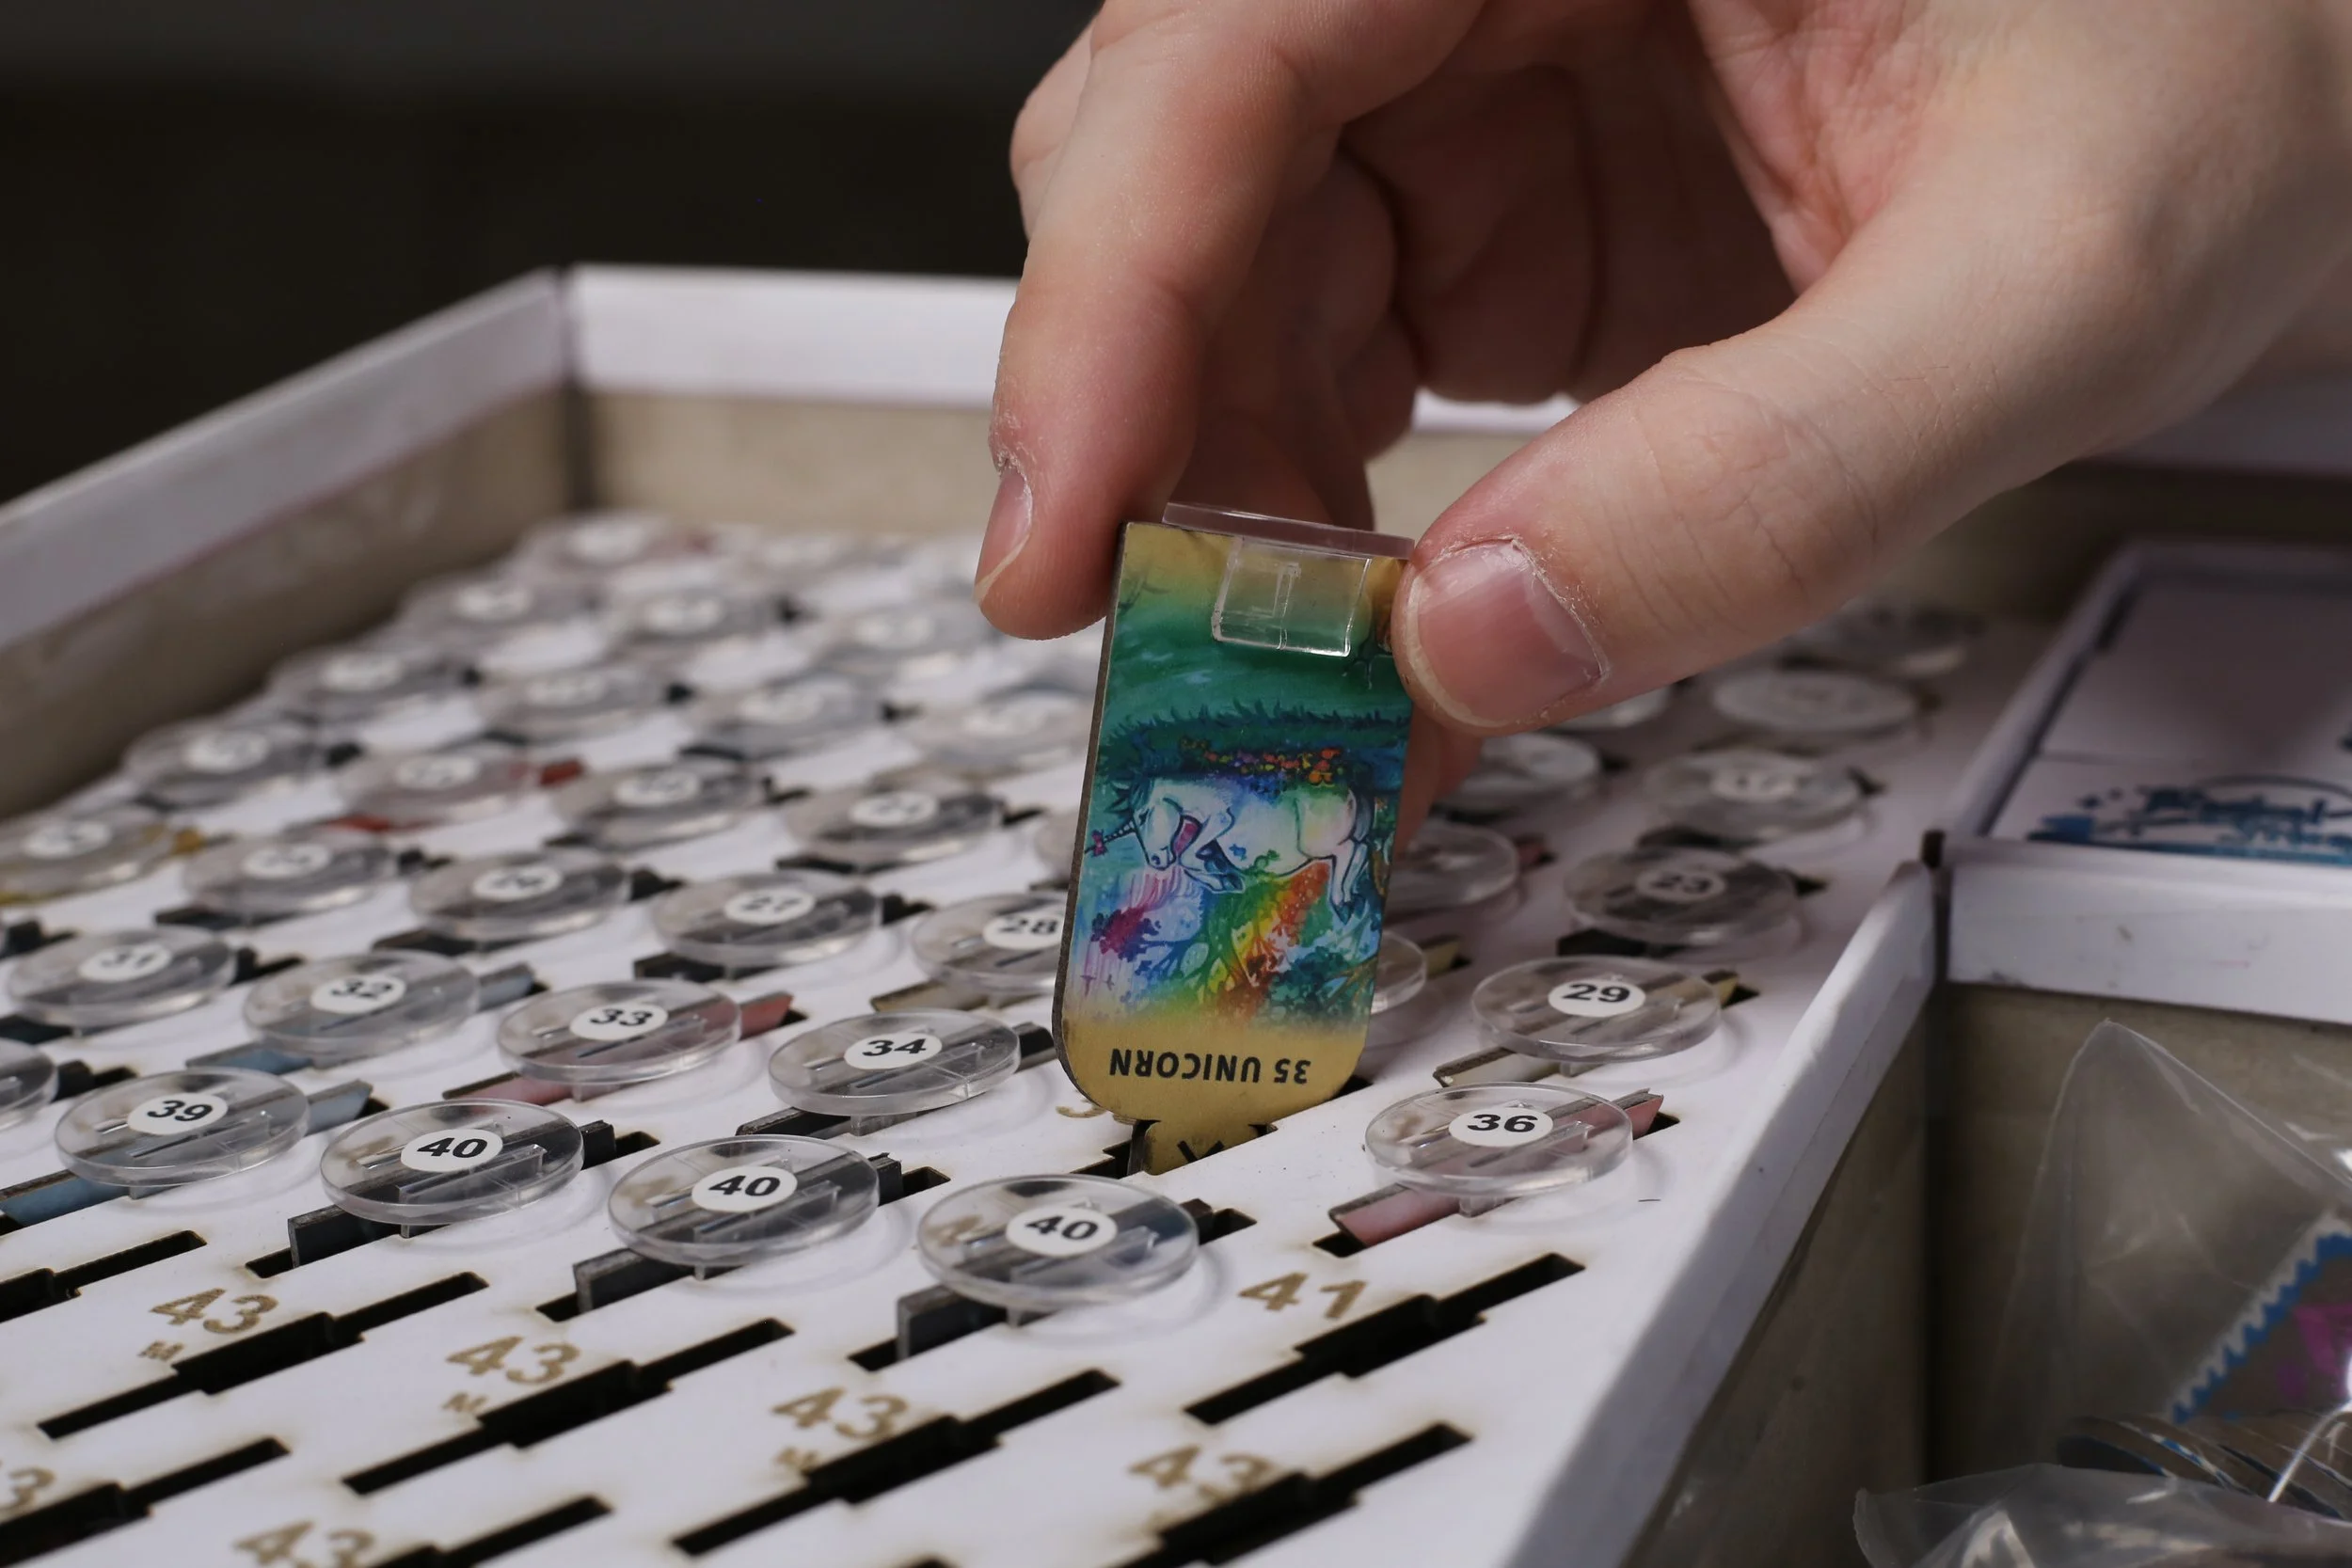
The Sorting System
One more thing to keep in mind when shipping: a prototype — even a professionally produced one — is no longer in its original condition after the first recipient. My game includes a sorting system for standees, and I’ve transported these prototypes many times. They’ve been rolled around on a little cart through Berlin and Essen and got shaken up a bit, but the standees never fell out of the sorting system. However, after the tenth transport or a flight, the shaking seems to become much more extreme. I learned this when one reviewer forgot that this wasn’t a fresh‑from‑the‑factory copy but a handmade prototype — and he made an unboxing video. The video was still lovely overall, but it’s something worth keeping in mind.
Do you have particularly good sources for reviewers? Is there someone you especially enjoy following? Leave me a comment — I’m curious!
40 – How Long Should a Game Last?
40 – How Long Should a Game Last?
From my perspective: as short as possible — while still giving every aspect of the game enough time to feel satisfying.
The longer a game lasts, the more problems arise. If a player falls too far behind, it can quickly become frustrating to have no real chance of winning for an extended period. The longer a game lasts, the more you need to think about adding a catch‑up mechanism to prevent this. But the more such a mechanism interferes with the game, the less rewarding it feels for players to build a lead.
Longer games are also harder to fit into everyday life. A 30‑minute game can be played almost anytime, but for a 4‑hour game you need to set aside an entire afternoon. Even if such a long session can feel epic, you could just as well play two 2‑hour games — the game night wouldn’t feel any less epic. And even if you do have the time, you’re not always in the mood for a long game, and if you get tired during it, the whole thing can drag on even more.
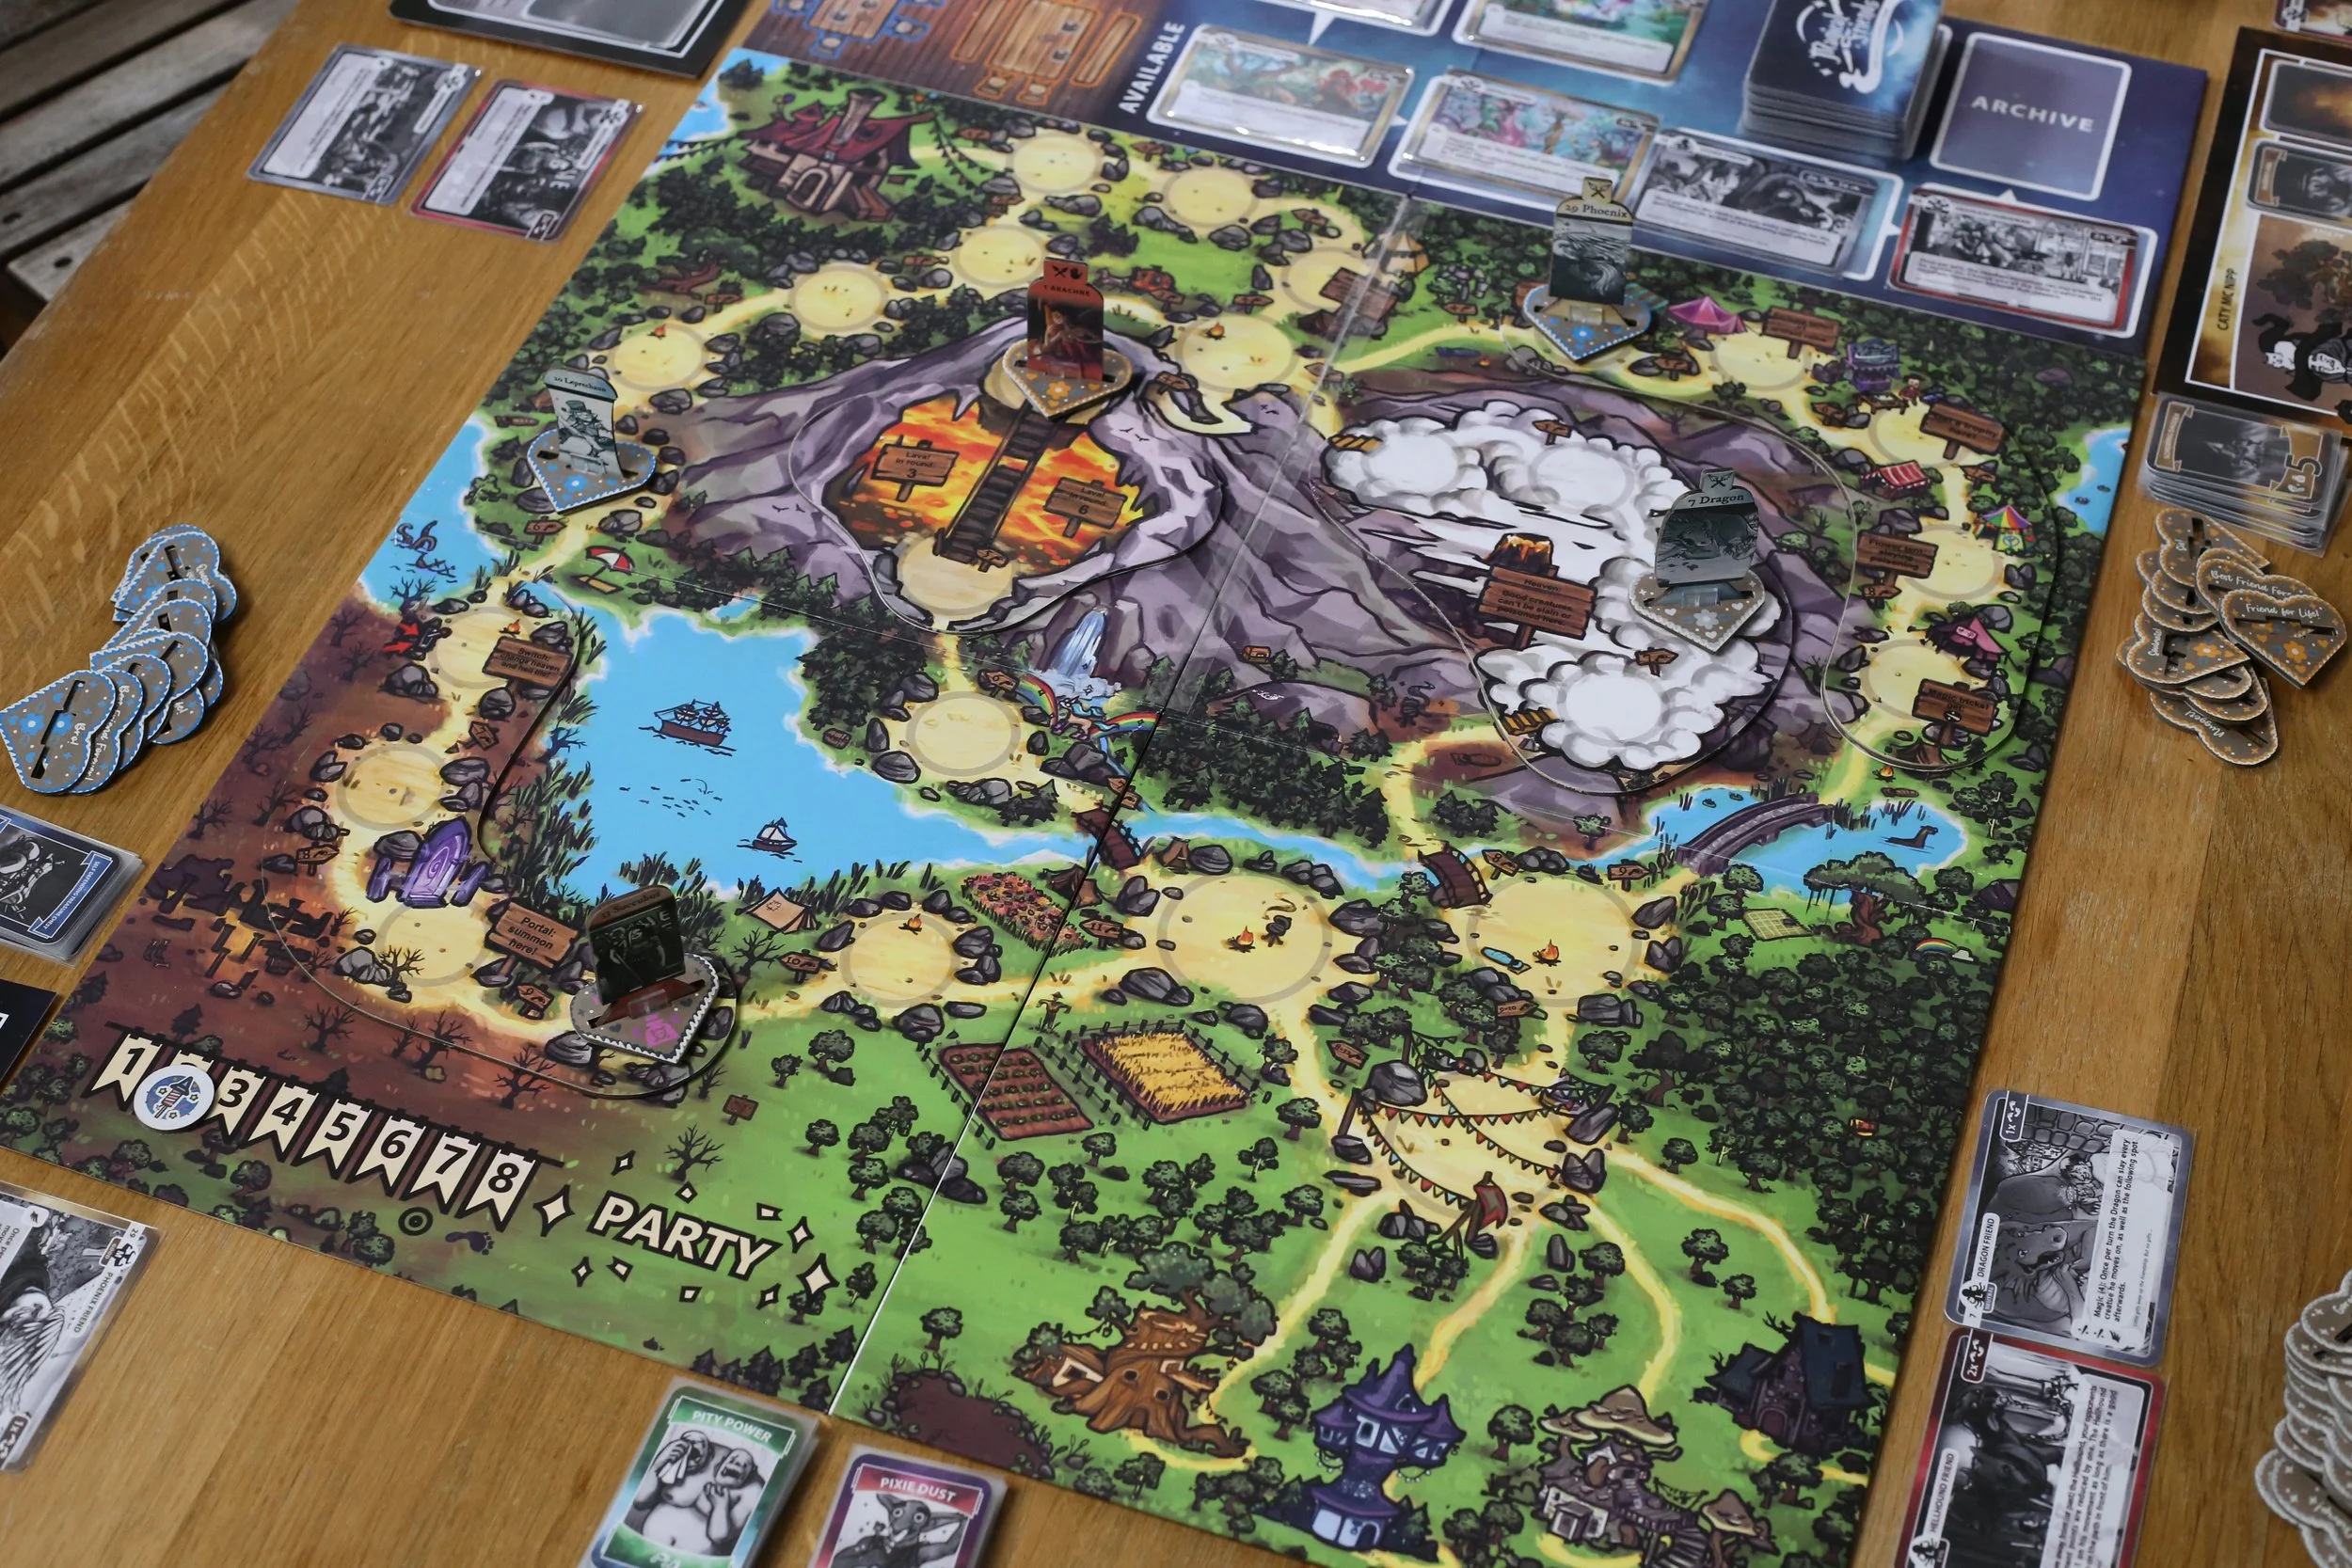
There have stil been 8 rounds of Magical Friends
So keeping the playtime as short as possible is usually the goal — as long as all game mechanics still make sense.
In some worker‑placement games, for example, I feel that the playtime is shortened at the expense of the number of rounds, especially when each round gives you enough actions to make the game interesting. But this sometimes leads to actions that are weaker in the short term but provide long‑term bonuses feeling unsatisfying, because you don’t get those bonuses often enough. Often these bonuses are very weak unless you manage to get them in the first round.
Playtime is usually hard to estimate. Different groups play very differently. A game that takes 1.5 hours with one group might take 2.5 hours with another. It also makes a difference whether it’s a group’s first play or their tenth, and how many players are involved. That’s why I prefer giving a playtime per player rather than a general time estimate.
While working on your game, you should always keep an eye on the duration, because many things can change over time. With Magical Friends, I originally set the game at 8 rounds. Since the first round has a bit less going on, and the last round also offers fewer options, the rounds in between were where most of the action happened. Six rounds were ideal for that. The tests with 8 rounds also went great. Over time, however, a few changes were made — extra rules to create a final sprint at the end of the game. This changed the game enough that the last round actually became the most exciting one. By now, we’ve tested several games with 7 rounds, and it doesn’t feel like anything is missing — but the game becomes shorter.
Of course, the game also needs to be tested frequently with fewer rounds, because the balance of certain creatures can change as a result. Sometimes this even has a positive effect on the number of components, because fewer rounds mean fewer resources entering the game.
How do you feel about game length? Do you prefer short or long games? Or would you rather play two shorter games instead of one long one? Which games have the perfect duration? Leave me a comment. :)
39 – The Kickstarter and the Marketing
39 – The Kickstarter and the Marketing
If no one knows about a game, they won’t buy it. Without marketing, you won’t get far—at least not until you’ve made a name for yourself. For first‑time creators, it’s especially difficult to judge whether the marketing is sufficient.
Usually, the number of newsletter subscribers is an excellent indicator of how well a Kickstarter will perform. Unfortunately, my number wasn’t as high as I had hoped, and that became noticeable at the start of the campaign. However, I also can’t know in advance how many potential backers I’ll reach in the month leading up to the Kickstarter—because that’s when the most happens.
There were two convention appearances: BerlinCon, two weeks before the Kickstarter, and SPIEL in Essen during the campaign. I had the impression that these conventions brought in many supporters. But if you can’t sell games at the convention yet, the financial cost is very high.
Thanks to the lovely convention players.
You also don’t know beforehand how strongly reviews will influence things. Of course, I could have scheduled them to appear well before the Kickstarter, but you can expect that people who get excited by a review will want to get the game as soon as possible. That’s why it’s usually recommended to release reviews close to the Kickstarter launch. I think that makes sense. But this timing also leaves you uncertain for quite a long time about how many interested people you’re actually reaching.
I did receive a lot of reviews. My eight prototype copies resulted in more than 20 reviews in total, and I’m very happy with the feedback I received.
And of course, there was also Facebook advertising, which reached many people.
However, during the Kickstarter campaign, it quickly became clear that something was missing. Despite the major effort put into the English version and marketing toward English‑speaking board gamers, we apparently didn’t reach enough players. Only about 20% of backers came from the English‑speaking world.
Marketing, however, costs a lot of time and money. To make a Kickstarter campaign look appealing, illustrators and graphic designers are needed again. Behind the scenes, marketing requires a lot of organization, creativity, and time. And the costs shouldn’t be underestimated. The conventions cost around €4,000. Review prototypes (handmade!), shipping, promotional videos for Kickstarter and YouTube added up to another €4,000, and digital advertising consumed another €3,000. That’s not a small amount of money—and yet it’s necessary.
One of many graphics on the Kickstarter Page
Of course, I would much rather invest all that time and money directly into the board game. I can definitely recommend that if you’re making a game, make sure you have someone on your team (or someone you can pay) who handles marketing for you.
With a budget like this, the Kickstarter should have gone better, right?
For a small game, it probably would have been enough, and the Kickstarter would have succeeded without issue. But Magical Friends is not a small game, and that means it competes with big titles on Kickstarter. Especially in October, when many companies launch their campaigns to avoid the Christmas season (Kickstarter isn’t great for Christmas gifts ;) ), you’re competing with larger teams—teams that already have the trust of the Kickstarter community from previous projects, teams with more members and dedicated marketing staff, and companies with much larger budgets.
Your own marketing budget becomes far less efficient when it’s up against massive marketing budgets. When other companies run a lot of ads, mine simply gets drowned out. For new Kickstarter projects, I would definitely not recommend launching in October.
I think a large portion of my backers were people who met me personally. Most backers came from Austria and Germany, where we attended conventions and talked to the most people—people who had the chance to build trust in us. If that’s not the case, people can only rely on the advertising and the offer itself. With a limited budget, they have to choose. They can pick a product they like from a company they trust, with lots of shiny extras in the campaign—or a product they like from an unknown creator, with fewer shiny extras.
A deluxe version brings that special “bling,” but it also carries risk. In reality, it’s just as risky as advertising, and you should probably think of it as a form of advertising. For the second Kickstarter, I’ll carefully consider whether I want to offer a deluxe version.
I’m also not entirely satisfied with my landing page for newsletter sign‑ups. I definitely want to improve it. The platform I’ve been using limits my options too much.
There may also be adjustments to the game’s cover to better show that this is a highly interactive game where players can be mean to each other. Based on the cover, some people expected a family game rather than a hobby game.
It’s definitely easier to advertise something the more finished it is. I’ve noticed that I get much more feedback and interest when the things I post look nicer. So it gets easier with every step. It’s good that Magical Friends is already so far along—that makes the next attempt next year much more pleasant.
Have you had experiences with this topic? Did you see ads for Magical Friends? How do you feel about advertising? In the next posts, I’ll return to talking about design!
38 – The Kickstarter and the Goal
38 – The Kickstarter and the Goal
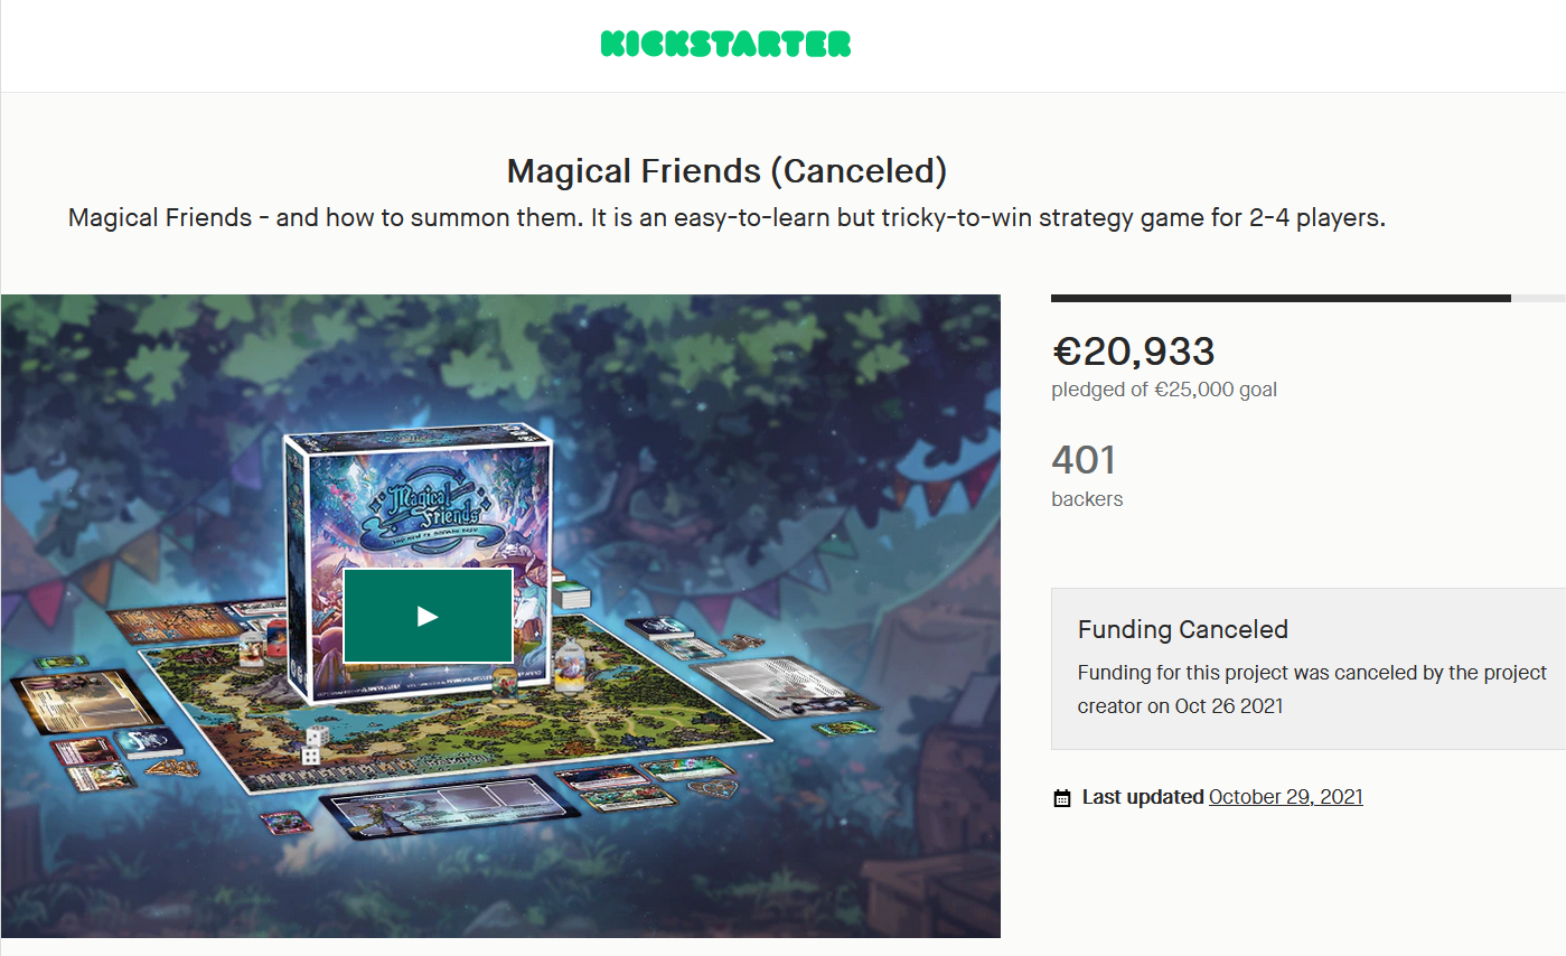
Some of you are probably wondering why I canceled the Kickstarter at €21,000 when we would have reached €25,000. Realistically, in the final week it likely would have ended somewhere around €27,000–€29,000.
But what’s behind that goal? Technically, it would have been possible to produce a small print run of the game. Sounds good, right? Well… not quite. I could produce 1,500 copies and would have already sold 500 of them. But that would leave almost no buffer for the currently very unstable freight costs. On top of that, the remaining 1,000 copies would still need to be sold — and of course, storing them also costs money. Keep in mind: for a small card game, 1,500 copies fit easily on a single pallet. For a game the size of Magical Friends, it’s more like ten pallets.
Selling the game outside of Kickstarter as a still‑unknown designer is definitely harder and very time‑consuming. If you sell to retailers, the sale price is significantly lower. Typically, you receive about 45% of the net price or 60% of the gross price. With distributors, the price is even lower.
Yes, you could still generate revenue from the remaining games, but so far only the production costs would be covered. I’ve paid all marketing costs myself, and my illustrators should be paid fairly as well. So after selling the games, I might end up with less of a loss than I currently have — but my working time (which continues to increase after the Kickstarter due to production and sales) would not be compensated in the slightest. And let’s not forget: I’ve already put 3,000 hours of work into this game. That’s two years of full‑time work without earning any other income.
Of course, it would be wonderful to have produced and sold my first game — and with a second print run, an expansion, or a second game, greater success would be likely. But then the game should also be produced really well, and with a €25,000 goal, a few features I’d like to include would still be missing.
So why not set a higher goal from the start? The higher the goal, the later it gets reached — and that’s a big problem. It’s even very likely that we would have raised more money overall if I had set the goal at just €20,000. Why? Because once a goal is reached, the project is considered successful — and successful projects attract more backers. Stretch goals, meaning upgrades for the game, can also only be unlocked once the main goal is reached.
So I chose a goal that was as low as possible while still making it technically feasible to produce the game. At the same time, it needed to remain plausible to cancel the Kickstarter if necessary. If I had found a larger distribution partner, I might not have canceled the Kickstarter at all.
In a way, the Kickstarter goal is also a marketing tool — and what didn’t work so well in terms of marketing is something I’ll talk about in the next entry.
What’s your opinion on Kickstarter funding goals? Leave me a comment.
37 – After the Kickstarter is (unfortunately) before the Kickstarter
37 - After the Kickstarter is (unfortunately) before the Kickstarter
A few months have passed since the last entry on this blog. A lot has happened, and there’s a lot to talk about. Too much to fit into a single blog post — and then there’s the question of where I should even begin …
The Kickstarter campaign was an emotional roller coaster. After working toward this moment for two years, my nerves were already worn thin. Every small setback felt huge, and every small success felt just as huge.
On top of that, an enormous amount of work goes into a Kickstarter campaign. That’s also why there haven’t been any blog entries in recent months. For 10 weeks straight, I was working 60 hours a week with no weekends off. At some point, I simply couldn’t do more — I had reached the limits of my creativity.
Where does all the time go? You spend it on the essential preparations needed to make the Kickstarter page presentable — designing the page, creating videos, preparing the reviews. And then there were the preparations for, and participation in, conventions during that time, like BerlinCon two weeks before the campaign and SPIEL 2021 right in the middle of it.
Natürlich wurde in jeder freien Minute Werbung gemacht. Postings auf Social-Media-Plattformen wollten hochgeladen, Reviews geplant und angekündigt werden. Man muss sich um bezahlte Werbung auf Facebook und Co kümmern und jede Option nutzen, die man finden kann, um das Spiel zu promoten. Außerdem bekommt man auf einmal viel Aufmerksamkeit von Herstellern, Fullfillment-Services und Publishern. Und dann war da noch die Kampagne selbst. Ich musste immer aktiv sein und möglichst viele Interaktionen setzen.
Ich habe zwar Illustratorinnen, die mich mit den Grafiken und auch auf den Messen unterstützen, ansonsten kümmere ich mich allerdings allein um all diese Dinge. Und auch wenn ich gerne kreativ bin, hat Kreativität auch ihre Grenzen, vor allem wenn so viele dieser Dinge sehr viel davon benötigen. Das war auf jeden Fall sehr erschöpfend.
Auch wenn es sehr schade ist, dass der Kickstarter nicht geklappt hat, die Pause tut jetzt auch mal gut. Dieses Wochenende hatte ich zum ersten Mal seit Langem ein freies Wochenende mit Freunden und Brettspielen ... und jeder Menge Kuchen, und das war hervorragend. :-)
Nun habe ich noch nicht viel über die Kampagne und den Abbruch erzählt, dazu mehr beim nächsten Mal. Es gab viele Erfahrungen, die ich machen durfte, darunter auch einige sehr positive. Magical Friends geht nächstes Jahr auf jeden Fall in die nächste Runde, so viel ist sicher.
Ich werde euch in den nächsten Einträgen viel zu erzählen haben, außerdem möchte ich alte Einträge mit den neuen Erfahrungen ergänzen, das werde ich aber auch immer in den neuen erwähnen.
Welche Fragen zu Kickstarter oder zum Abbruch würden dich denn am meisten interessieren? Schreib uns einfach einen Kommentar und ich werde entweder dort oder in einem eigenen Blog-Eintrag antworten.
Update: Das ist natürlich schon ein alter Blog Eintrag. Das Spiel ist natürlich schon veröffentlicht. Der Eintrag hat aber trotzdem Relevanz, da es eben auch passieren kann das ein Kickstarter abgebrochen wird.
36 – Illustrations and Functionality
36 – Illustrations and Functionality
I’m incredibly happy with my illustrators, Hannah and Nessi, because their artwork is truly beautiful. For a board game, illustrations are extremely important. They give the game atmosphere and make you excited to play.
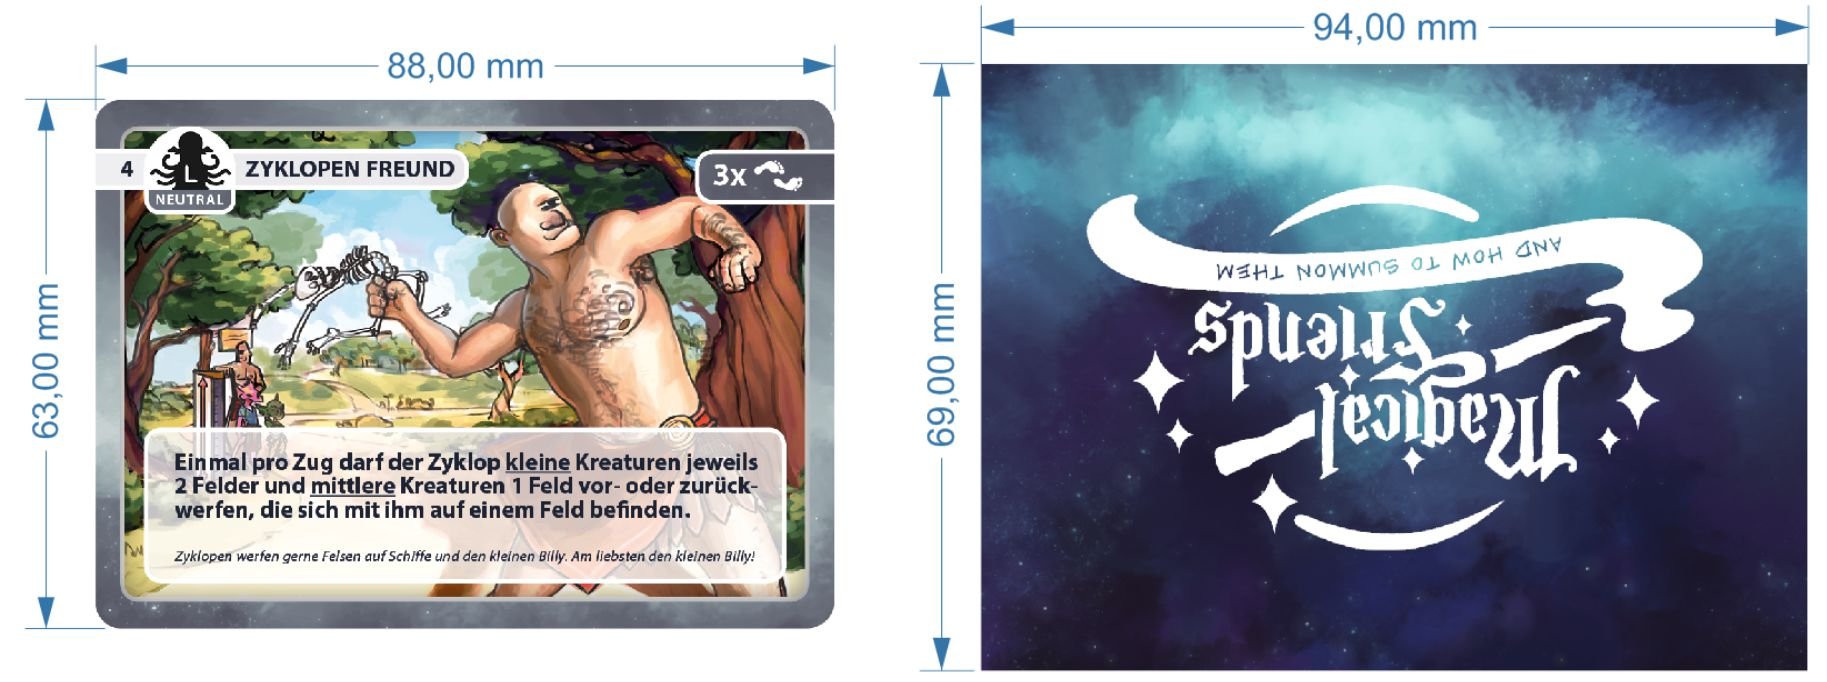
However, the functionality of the components also has to be ensured. Sometimes it’s about making sure the same graphics are clearly visible across different components. But above all, it’s essential that information can be easily recognized. That’s why you sometimes have to make compromises with the illustrations — there’s just no way around it.
Since Magical Friends is a crowdfunding game, it’s absolutely possible to produce some extras, and I’ve decided to highlight the artwork even more.
Because I believe that functionality — in this case, the visibility of information — is a must, the base version of the game will include a card set where this aspect is the top priority. As an optional extra, you’ll be able to order an additional set in which the artwork is emphasized. Whether this will be well‑received or not is something I’ll find out during the Kickstarter. In any case, I’m really looking forward to seeing more of the beautiful artwork.
What do you think of the idea? Leave me a comment — and if you like my game, I’d be thrilled if you subscribed to my newsletter. It helps a lot with planning the Kickstarter.
35 – Government Funding
35 – Government Funding
Board‑game designers and Kickstarter creators are incredibly helpful when it comes to pretty much any question that comes up. But one thing I’ve never seen anyone talk about is government funding. This topic is discussed far too rarely! I know that the available funding varies from country to country, from state to state, and even from city to city. But these grants can be incredibly helpful. We’re talking about a significant amount of money, and they exist to support small companies or new founders — not just big companies that grab every opportunity.
Photo by Fabian Blank on Unsplash
At least in Austria, there are many different types of funding, and many different organizations, associations, and institutions offer them. But they’re hard to find, because even these organizations often don’t have an overview of who is offering what. Many people don’t know anything about them. Please talk about this topic more! I received funding for starting my company and also for international advertising. These grants are, of course, only available in Austria — but if you want to know more, feel free to write to me. They do come with extensive requirements and regulations, which I’m happy to explain. Don’t let the rules scare you off. The contact persons will tell you whether your company qualifies anyway.
I’ve also heard of several grants for tech companies and research support in Austria, which don’t apply to my company, but they might be interesting for yours. In Germany, there also seem to be startup grants, research scholarships, and support programs for tech companies. Usually, all these funding programs have one thing in common: you need to have a clear picture of your product or company.
If you’re founding a company or have already founded one, write to me and I’ll share my experiences with you. And if you’ve received funding in Austria, Germany, or anywhere else, I’d love to hear about your experiences — I’m in close contact with many German designers, and your tips might be helpful for others as well. Maybe there are even EU‑wide grants, though I don’t know anything about those yet.
34 - Testing and Feedback
34 - Testing and Feedback
When you design a game, a lot of testing is necessary — and with testing comes a lot of feedback. The nicest feedback, of course, comes from people who really enjoyed the game and for whom it truly clicked. Incredibly helpful are the constructive suggestions that can fix small flaws with minor adjustments. Then there are the big suggestions — the kind that would essentially turn the game into something completely different. By now, I could probably make five to ten entirely different games just from those ideas. And then, unfortunately, there are also the occasional people who are very unhappy with the game. That can be quite frustrating. More on that today.
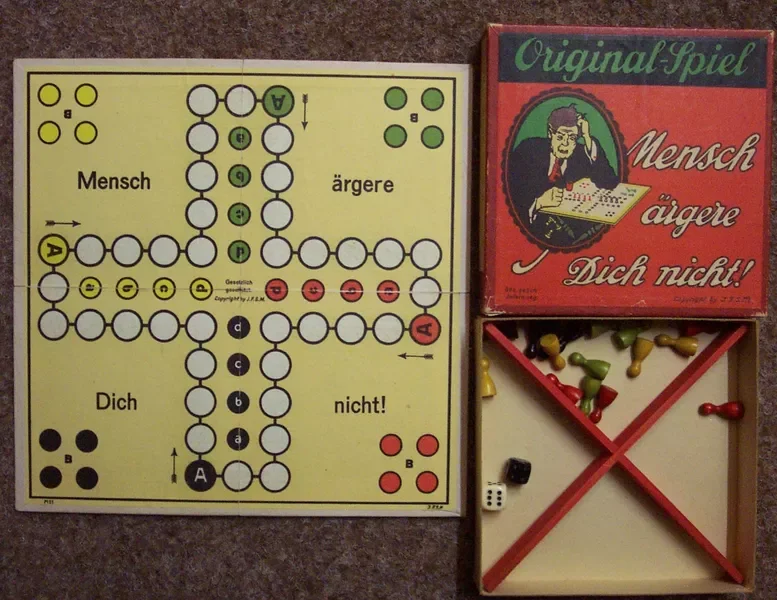
By now, I’ve done a lot of testing — plenty with friends, but also plenty with strangers. Recently, I received feedback from an unhappy tester who compared my game to Ludo (in German: Mensch ärgere Dich nicht). I had actually heard this comparison once before, and I simply didn’t understand where it came from. Some testers just struggle to describe the feeling they had while playing. So I start thinking about where this feedback might come from. I really don’t want people to think of Ludo when they play my game.
Boardgamegeek
Sure, my game is also a race, and you can knock out other pieces. But aside from that, the two games have nothing in common. One is a luck‑based game, and the other is a strategy game where you practically don’t need to roll dice at all.
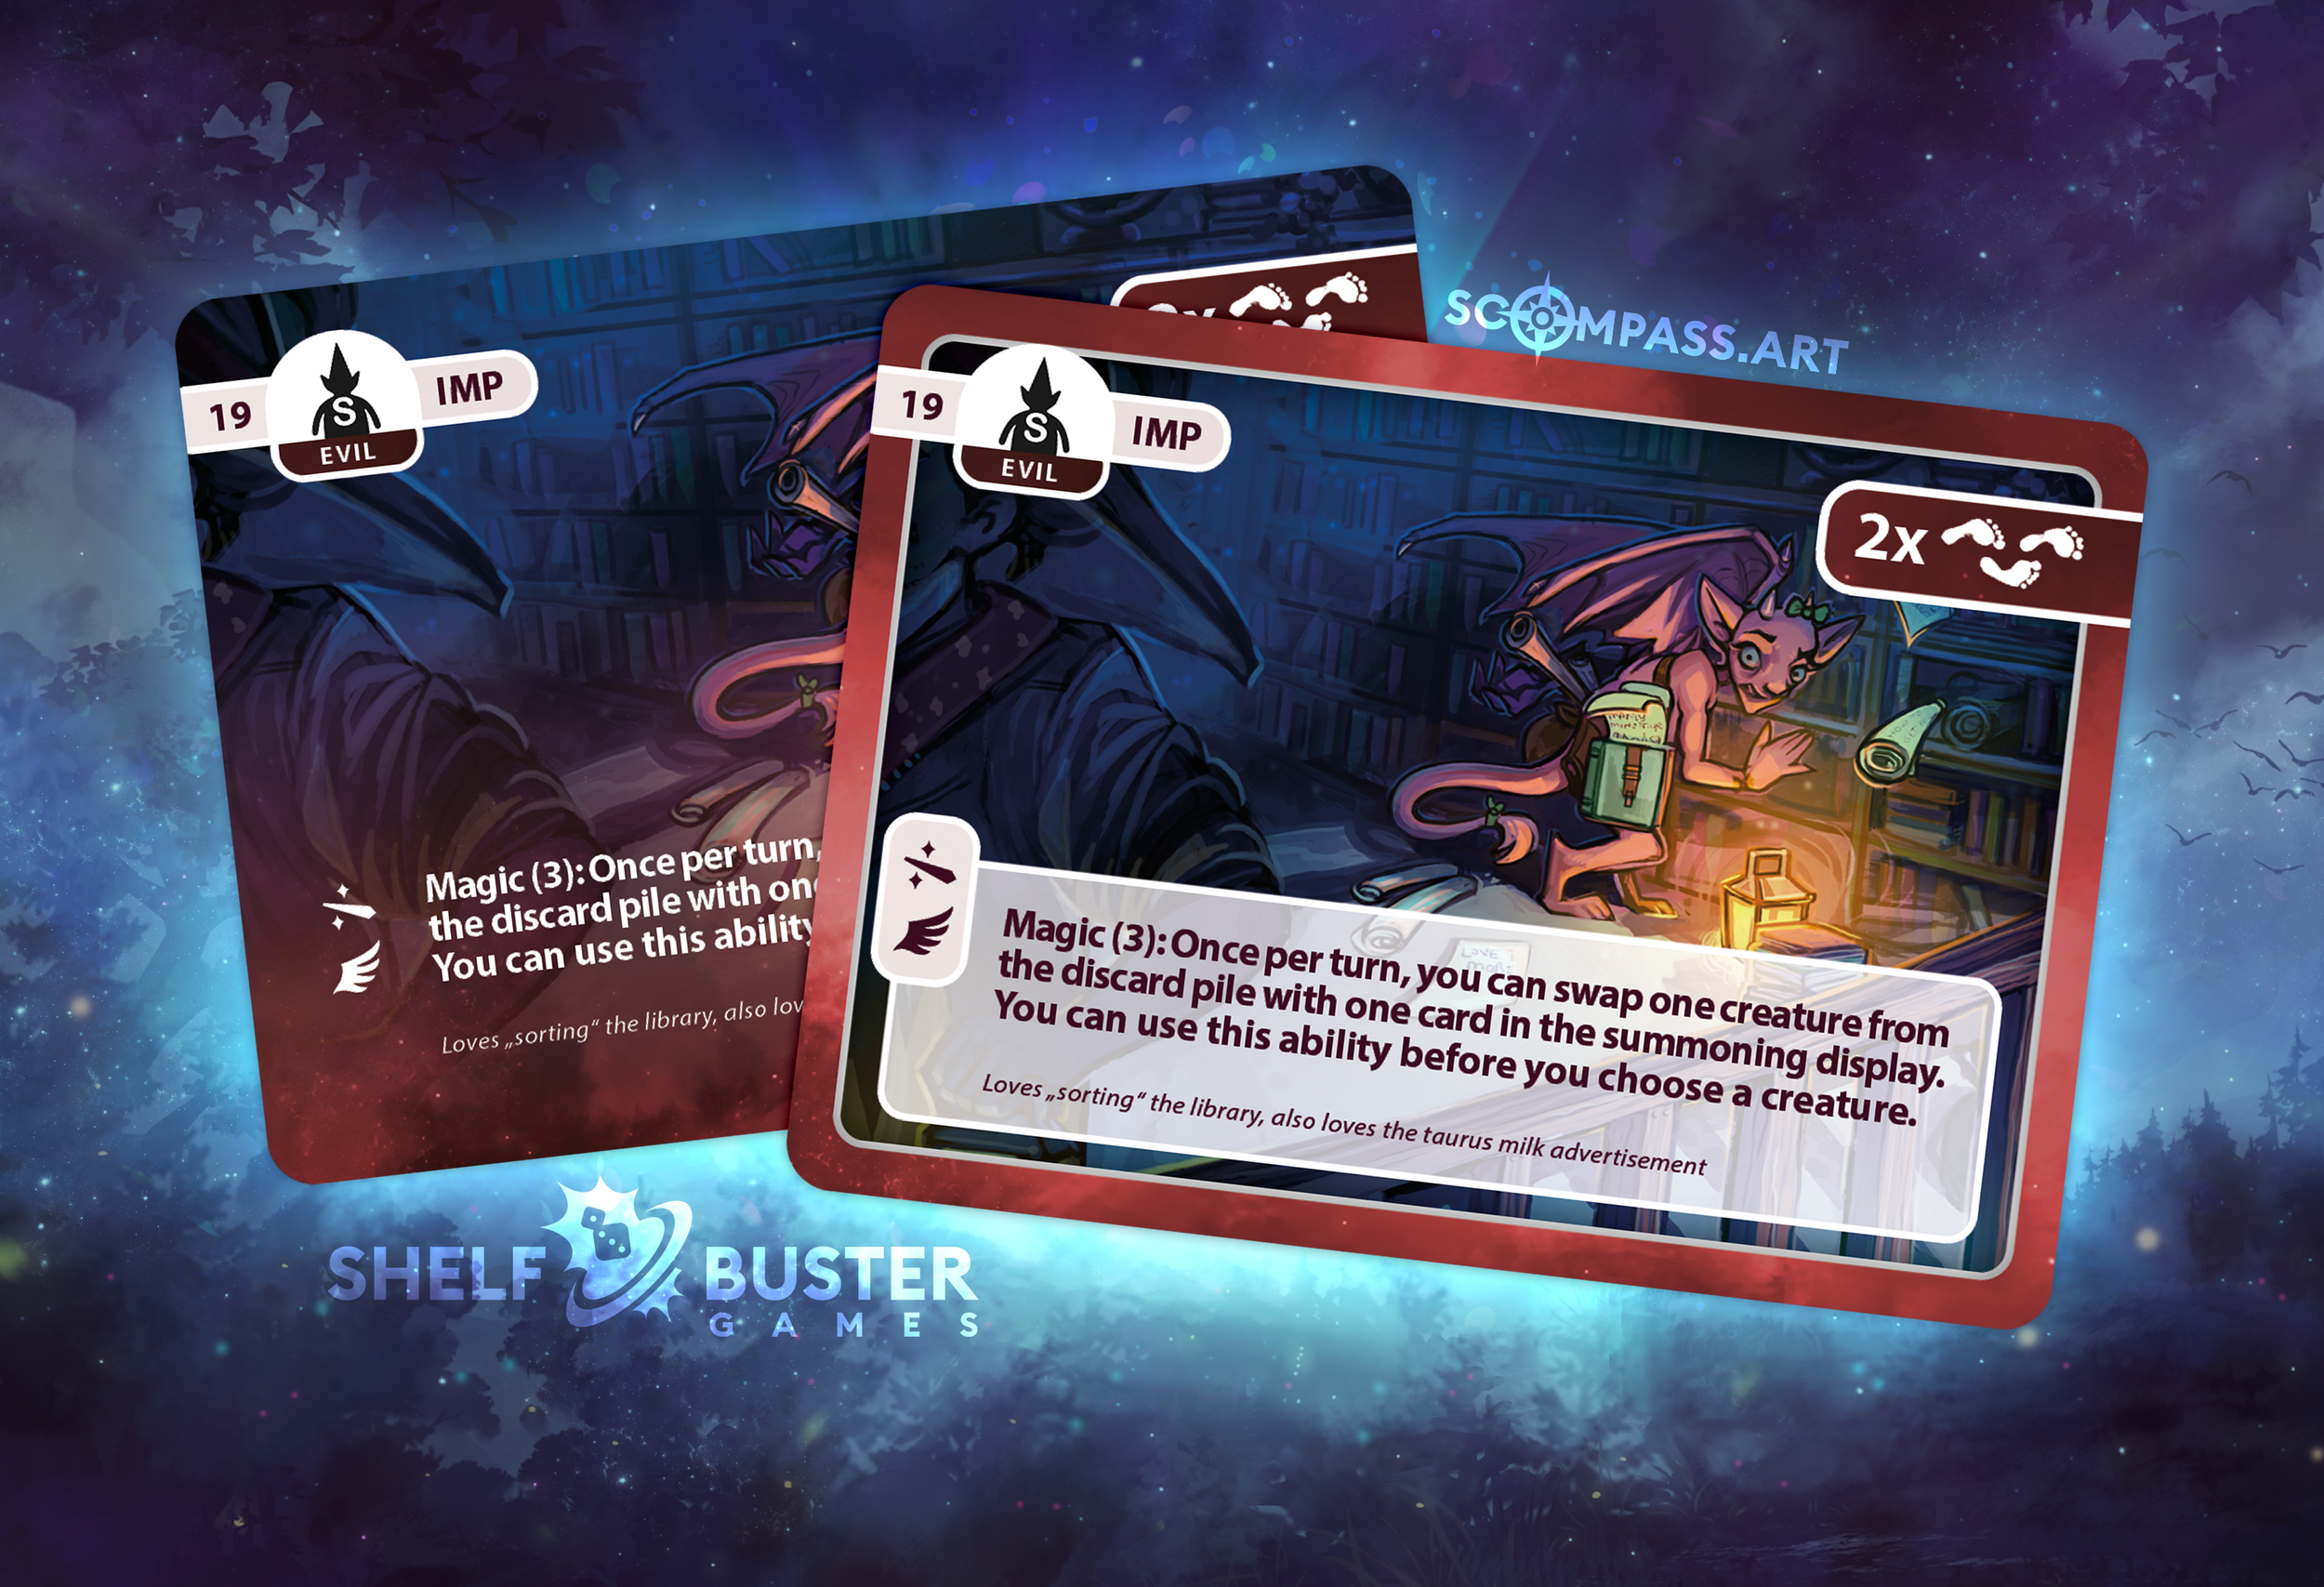
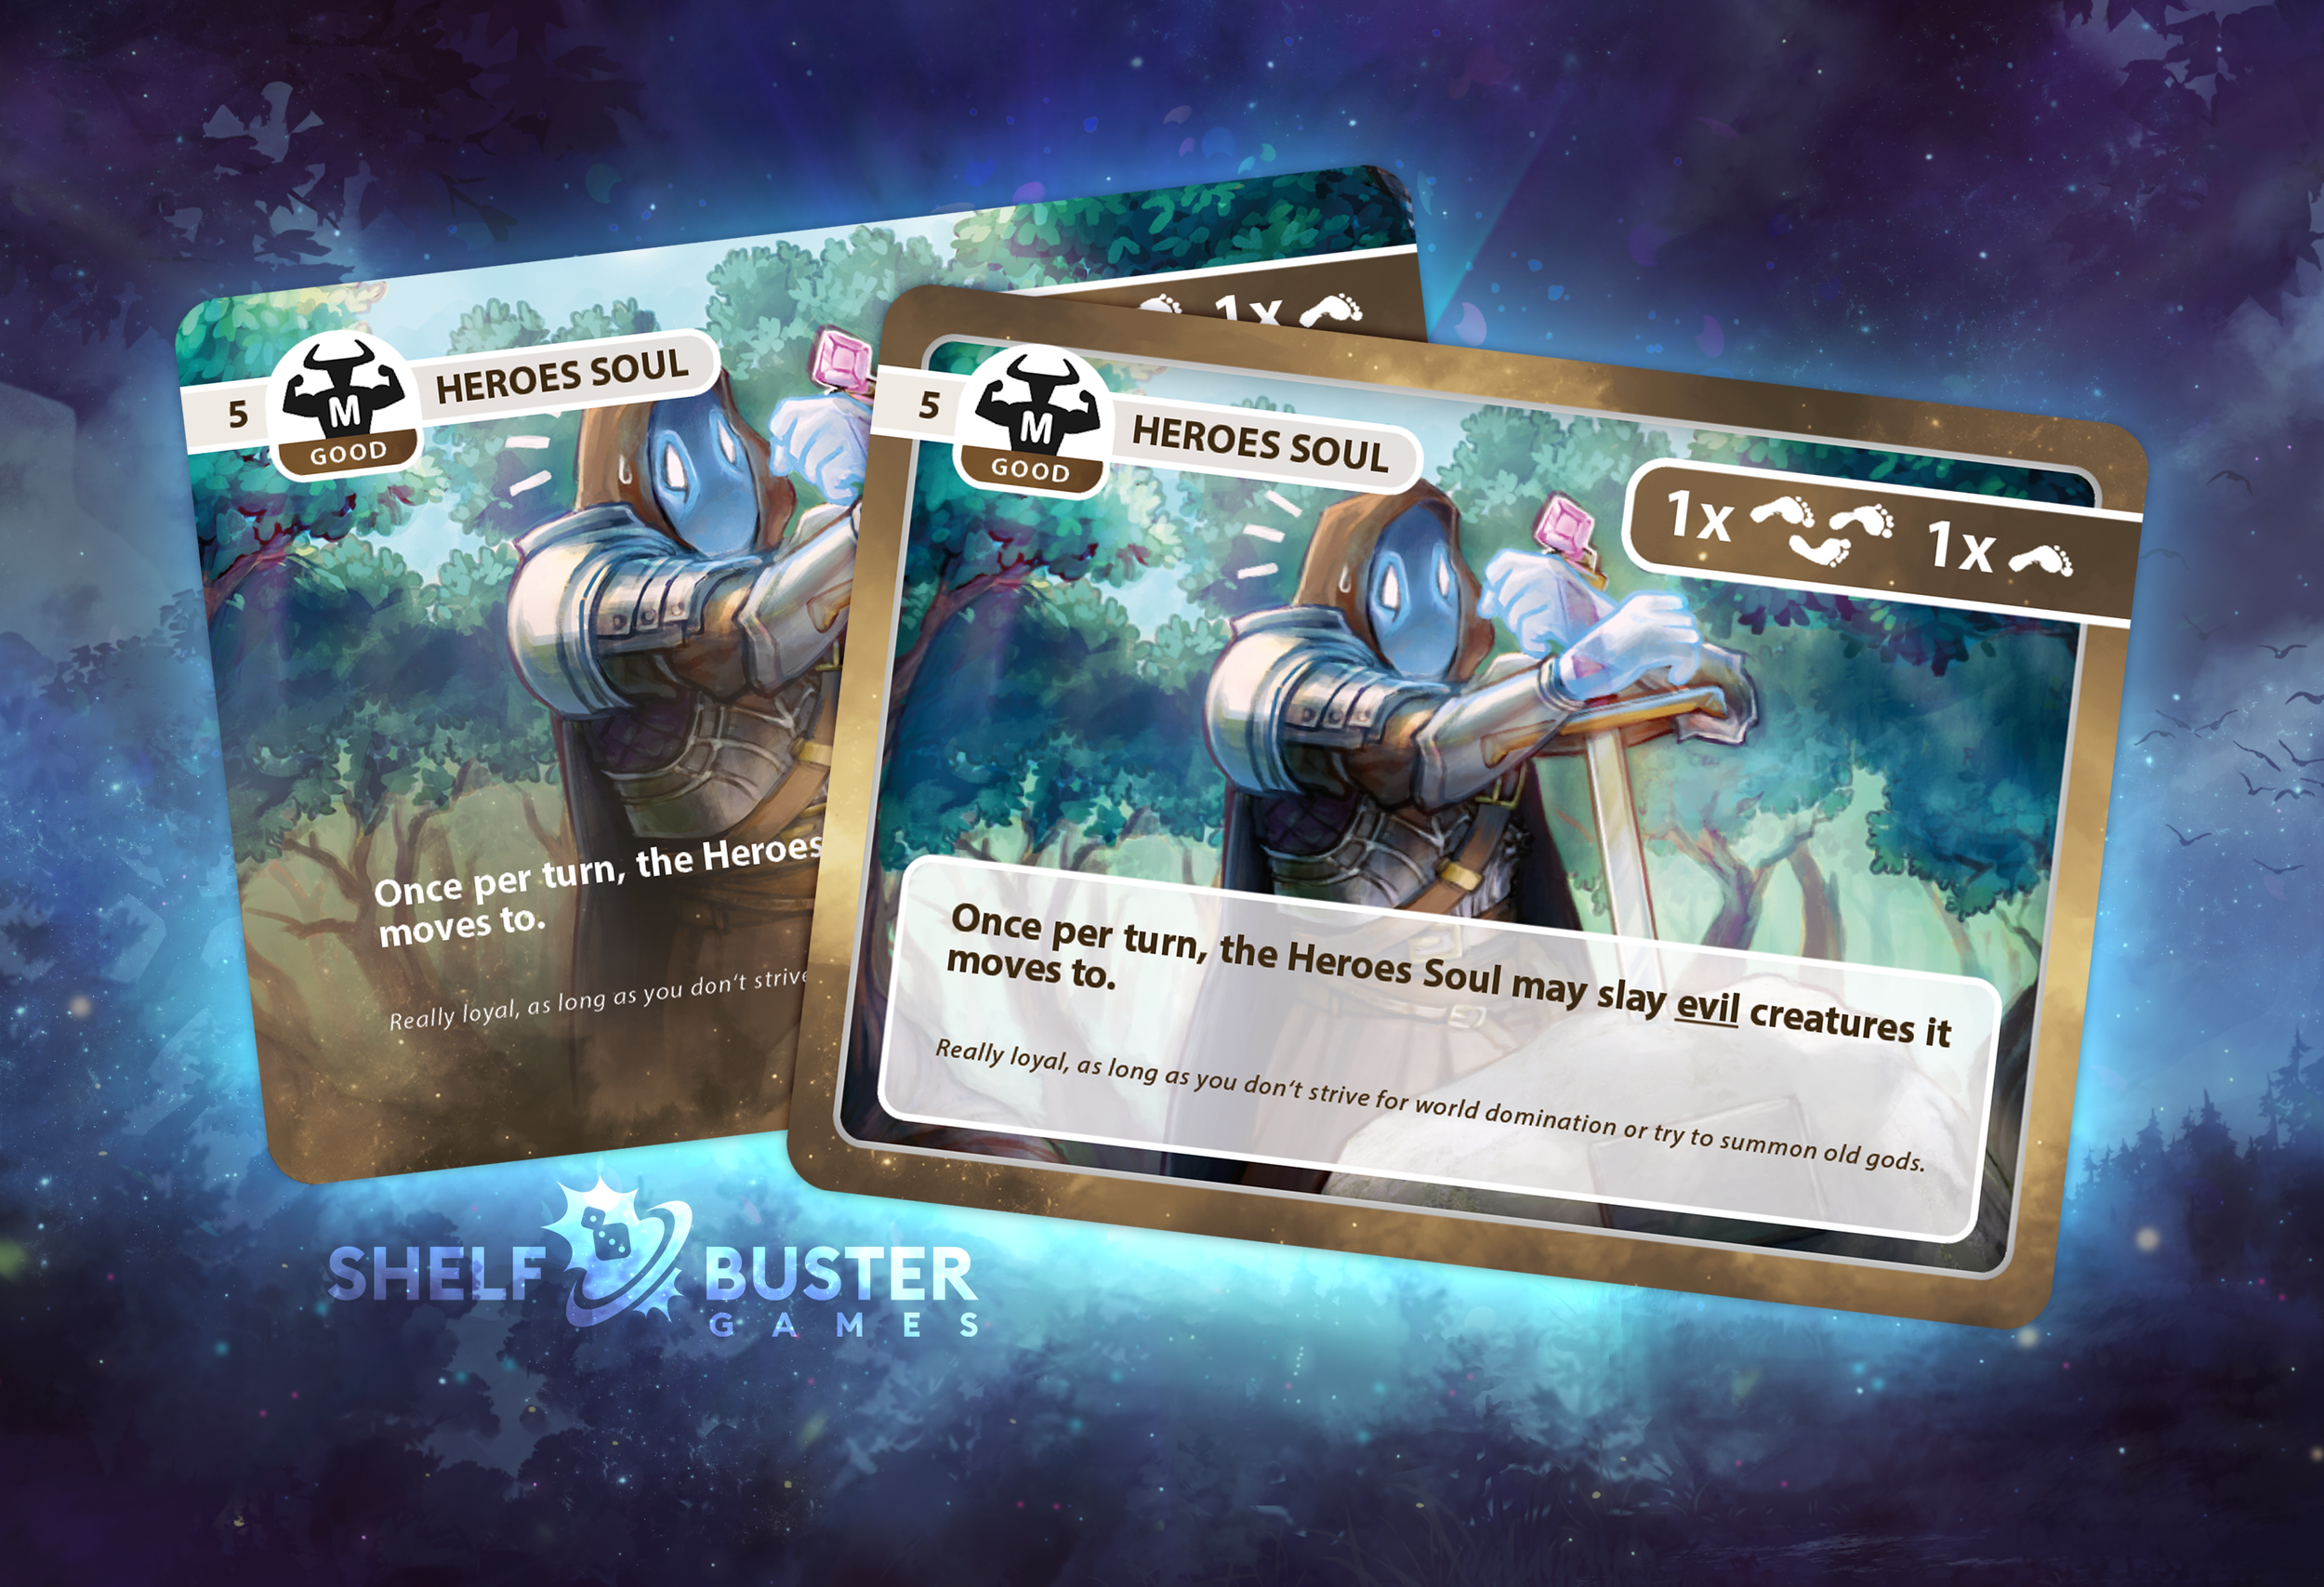
So where does this comment in the feedback come from? At some point, the chaotic nature of the game was also mentioned. And suddenly, the comparison made sense to me. In my definition, a chaotic game is one where a lot happens while it’s not your turn, and it’s often hard to predict what will happen next. I can imagine that for some people, this feels like a luck‑based game — even though it isn’t one. In Magical Friends, you can plan how to reach your goal as safely as possible through different interactions, and you can also try to outsmart your opponents with clever tricks. There are just so many possibilities that it becomes difficult to predict what your opponents will do. In most tests, it was exactly these interactions that led to truly astonishing moves.
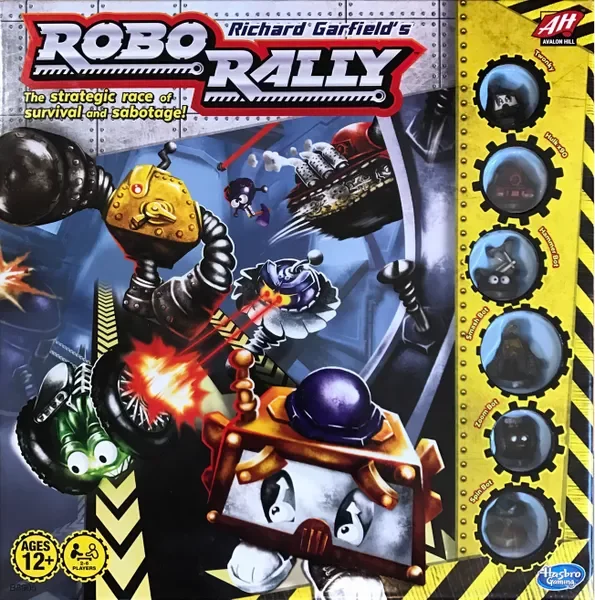
This explanation — that the chaos can feel like the randomness of a luck‑based game — was confirmed to me, and suddenly the feedback (including the one I received some time ago) became much easier to accept. The chaos, just like in many great games, is a central part of the experience. In some games, it comes from dice or cards; in others, it’s mainly the many options available to the players that create the chaos. For example, games like Robo Rally, Smallworld, or Millennium Blades.
Boardgamegeek.com
Of course, the game becomes better when the level of chaos is well‑balanced — but that’s exactly why you test, and the majority of testers enjoy that aspect of the game. So the frustration of this particular tester doesn’t necessarily point to a flaw in the game; it simply means the style of the game doesn’t match the player’s taste — and that’s perfectly fine!
Usually, you play games you’ve researched beforehand, or you’re invited by friends who know what suits you. But when testing a game that isn’t on the market yet, you’re thrown into cold water, and it’s easy for a game not to match the tester’s taste. That’s unfortunate, but it happens. As a designer, you really can’t take that too personally.
In the board‑gaming hobby, there is an enormous number of games. You often see those 3×3 challenges where players show pictures of their nine favorite games. I’ve seen countless of these collages, and I’ve never once come across one where I thought, “All of these are among my favorites.” Even when I felt someone had a very similar taste to mine, there were never more than five overlaps. That might sound disappointing at first, but even with players whose taste seemed completely different from mine, I always found one or two games that I really enjoy. And that’s the beautiful thing about this hobby: when you explore games, you can find something for almost any group that everyone will enjoy and that lets you have a great time together.
Are there types of games, genres, or mechanics that you really dislike — or especially love? Leave me a comment.
33 – First Convention Booths
33 - First Convention Booths
A big decision has been made! I’ve booked convention booths for Magical Friends at both BerlinCon and SPIEL in Essen this year. Together with my two wonderful illustrators, Nessi and Hannah, we won’t just be attending the conventions — you’ll actually be able to meet us there!
17. - 19. September
Station Berlin
https://berlin-con.de/
The decision wasn’t an easy one. As I’ve mentioned before, convention booths are very expensive when you don’t yet have anything to sell at the booth. The most interesting aspect of conventions, however, is the long‑term connections you can build. Back in 2019, I was able to connect with 19 board‑game manufacturers. That helped me tremendously in understanding how factories operate and what to expect in contracts.
The plan is for the Kickstarter campaign to launch at the beginning of October. That means at BerlinCon (mid‑September), the campaign will be prepared and announced. We’ll also use the event to test the booth decorations for SPIEL. During SPIEL, our campaign will already be running — in fact, it will be right around the halfway point, which is usually a quieter phase in a Kickstarter. I’m very curious to see what impact SPIEL will have on the campaign!
https://www.spiel-messe.com/de/
I might be able to build interesting connections with publishers we could work with after the Kickstarter campaign. There will certainly be reviewers there as well who may want to promote the game on-site or before the campaign ends. And hopefully we’ll meet lots of wonderful fans at the conventions who will accompany us a bit on our journey. For Hannah and Nessi, there may even be new clients for future projects.
We’re definitely already super excited and really looking forward to the conventions. We also have a few exciting ideas for how we can make our booth interesting. It’s sure to be a lot of fun!
Will we see you at the convention? Is there anything—besides the current prototype—that we should definitely show at our booth?
32 – Kickstarter Preparations
32 - Kickstarter Preparations
There’s naturally a lot to prepare for the Kickstarter launch. Above all: marketing. Review prototypes are on their way, and social media posts are starting up again. But the Kickstarter page itself also needs to look great and requires banners, GIFs, and videos.
For the introduction of the Kickstarter video, I came up with three short clips that each tell a little bit about what Magical Friends is all about. Why three clips? Each one is only about 20 seconds long, which also makes them perfect for Facebook ads. We’ll try our luck on TikTok as well.
In the first clip, viewers will learn something about the goal of the game; the second clip focuses on one of the main tasks in the game; and the third is meant to reflect the action and chaos that unfold during play.
First, I created storyboards together with my illustrators, Hannah and Nessi. I explained to them that in the first clip, I’d like the wizards to learn about the Midsommar competition at the marketplace, a rivalry breaks out between them, and they immediately set off to prepare for the contest.
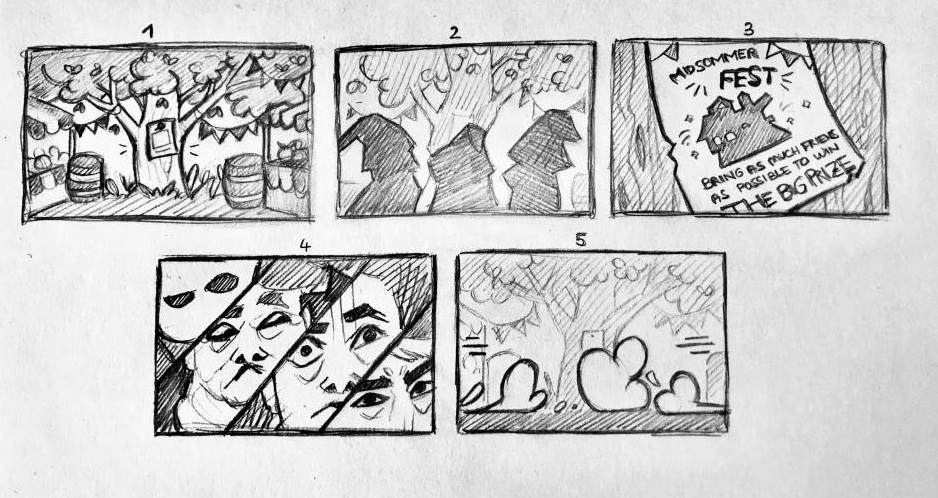
The clips shouldn’t contain much more than five images, because the more images there are, the more time‑consuming the whole project becomes. With five images and various animatable layers, you can already create a lovely little video.
This is what the final concept looked like:
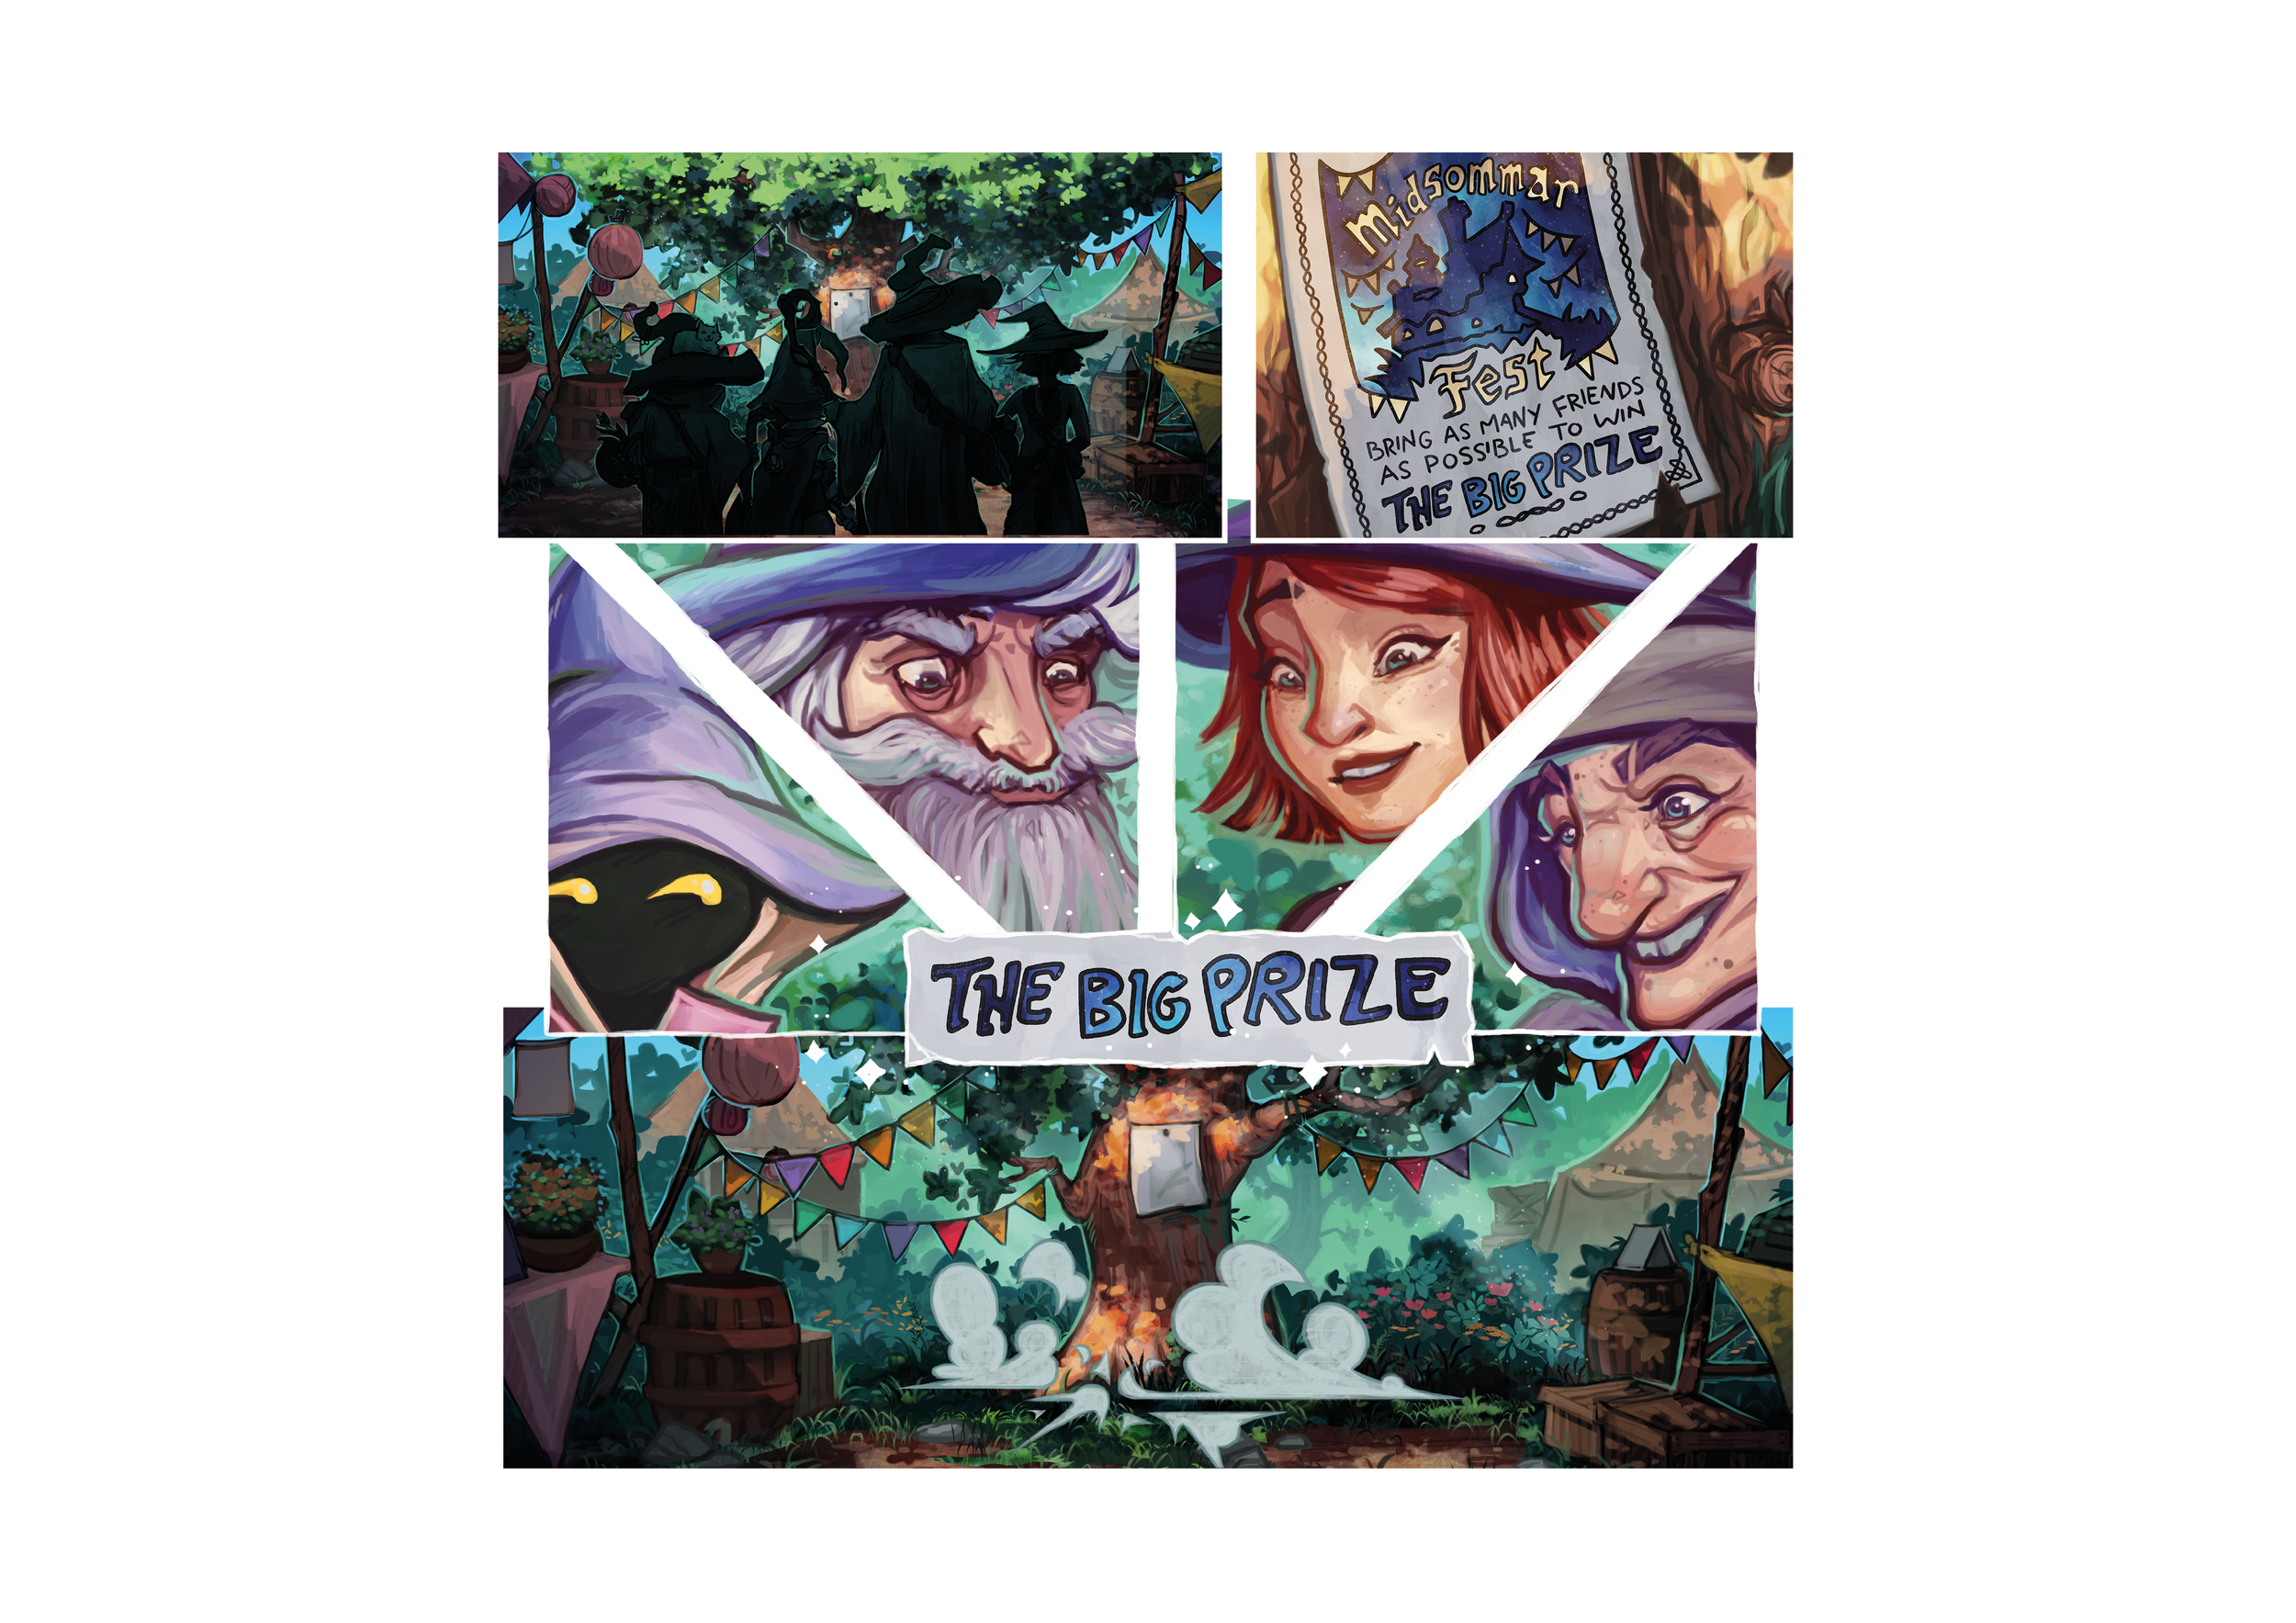
Its also a nice comic!
With this, we can create our own video clip, have a piece of a larger intro, and at the same time a cute little comic.
At the moment, we’re working on sound and text for the video. It already looks very cool. More on that as soon as it’s finished.
Of course, there are many different approaches to creating videos like this — some simpler, some much more elaborate. What do you think of our plan? Leave us a comment.
31 – Reviews and Previews
31 - Reviews and Previews
… are extremely important for introducing an unknown game to the world. There are a huge number of great reviewers on various social media platforms, magazines, podcasts, and of course on YouTube. Today I’d like to give you a look at what goes on behind the scenes. One thing to keep in mind is that many of the larger channels only create reviews — meaning they only cover games that are already on the market and accessible to everyone. But there are also some who create previews for games that haven’t been released yet, like my prototype.
Previews, especially in video format, are very time‑consuming. To build a YouTube channel, you need regular uploads so you show up in the search algorithm. Naturally, you also want to play the game a few times beforehand. And to produce a video with the quality people expect on YouTube, you need some equipment, preparation, and often quite a bit of editing. Since you know how many games are released on the market or on Kickstarter, you can imagine how much work there is. Many do it out of passion, but for some it becomes a profession. That’s why some of the larger channels charge a fee for reviews/previews — and that’s completely understandable.

But there are also many people who create previews as a hobby and are simply excited to have a prototype on their table and support designers. The feedback from the board‑gaming community has been incredibly positive. So many people responded to my call for previewers that my few prototypes probably won’t reach everyone before the Kickstarter begins. I just hope they make it to several people at all, since they’re being passed from one player to the next. With so much shipping, something can easily happen to a game. Two English prototypes are now on their way to the USA, one to England, and two within the EU — and three German prototypes are traveling around Germany and Austria. I’m very curious to see how far their journey will take them.
I’ll definitely keep you updated. If you have questions about this topic, I’d be happy to answer them in the comments — as long as I’ve already gained some experience with it.
30 – When You Finish Multiple Prototypes…
30 - When You Finish Multiple Prototypes…
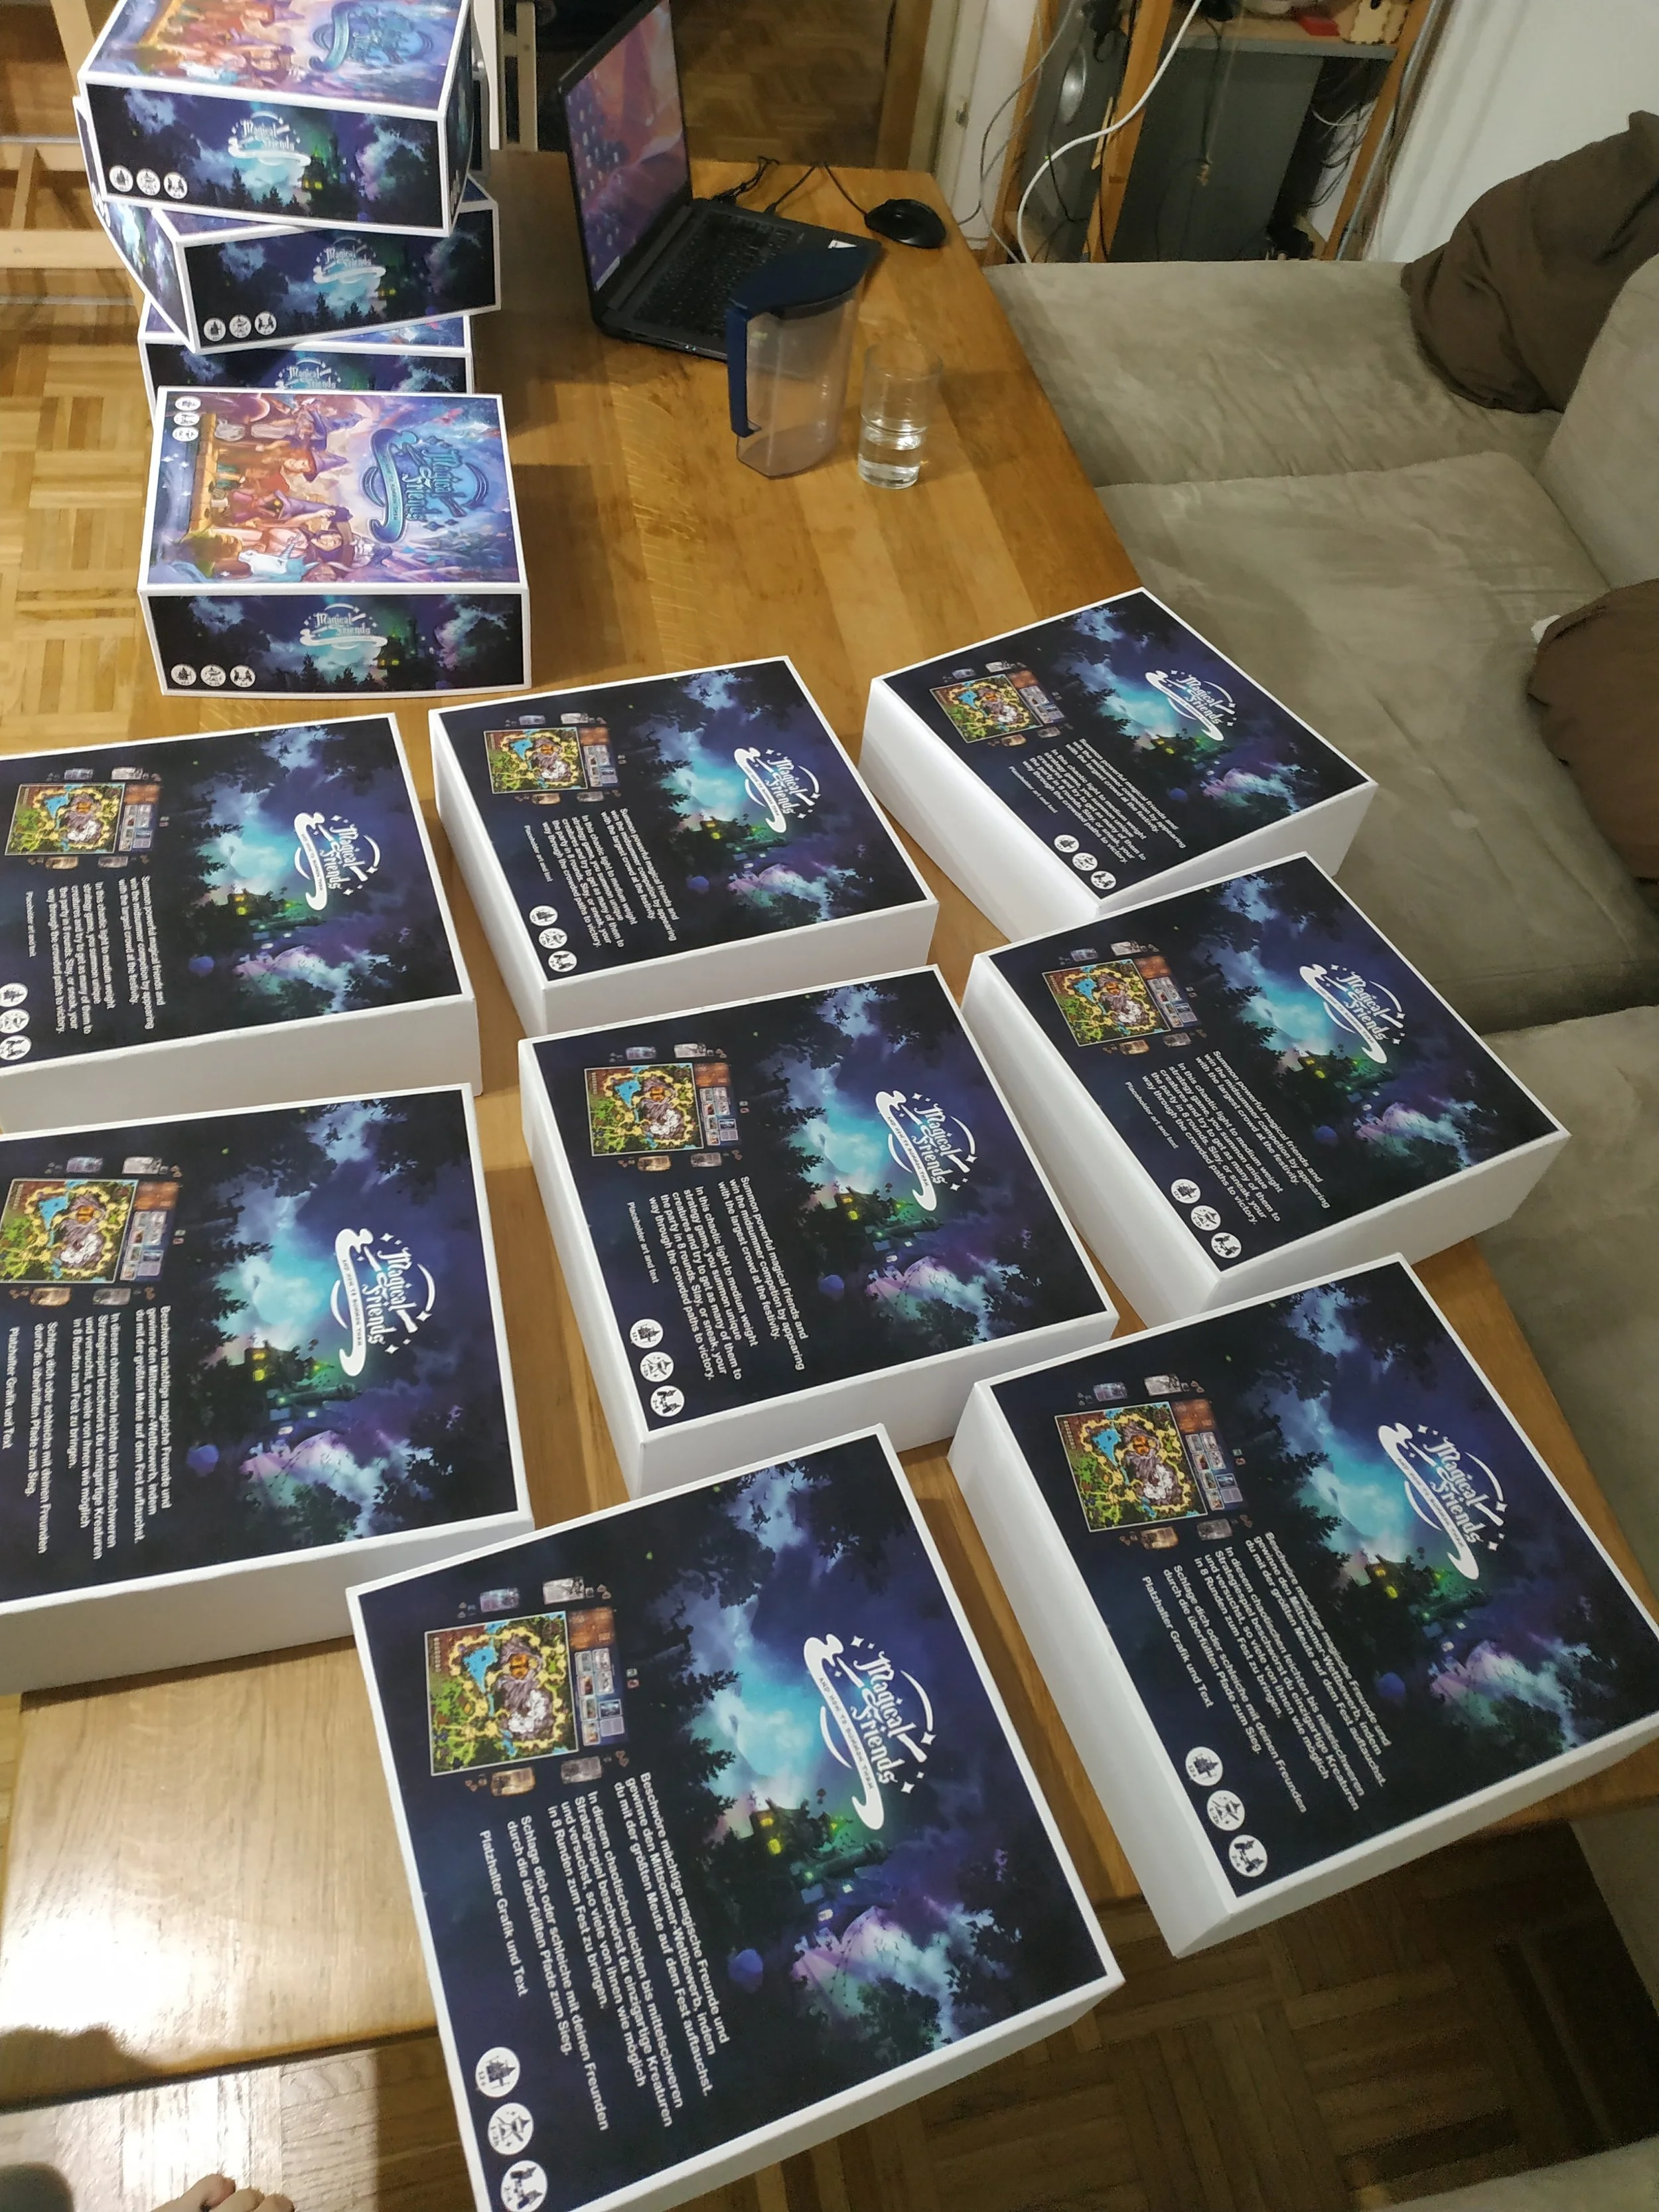
… you’re busy for quite a while. My set of review prototypes kept me fully occupied for the last three weeks. And they really had to get done, because the 12 m² of cardboard and 14 m² of paper were taking up a huge amount of space in my apartment.

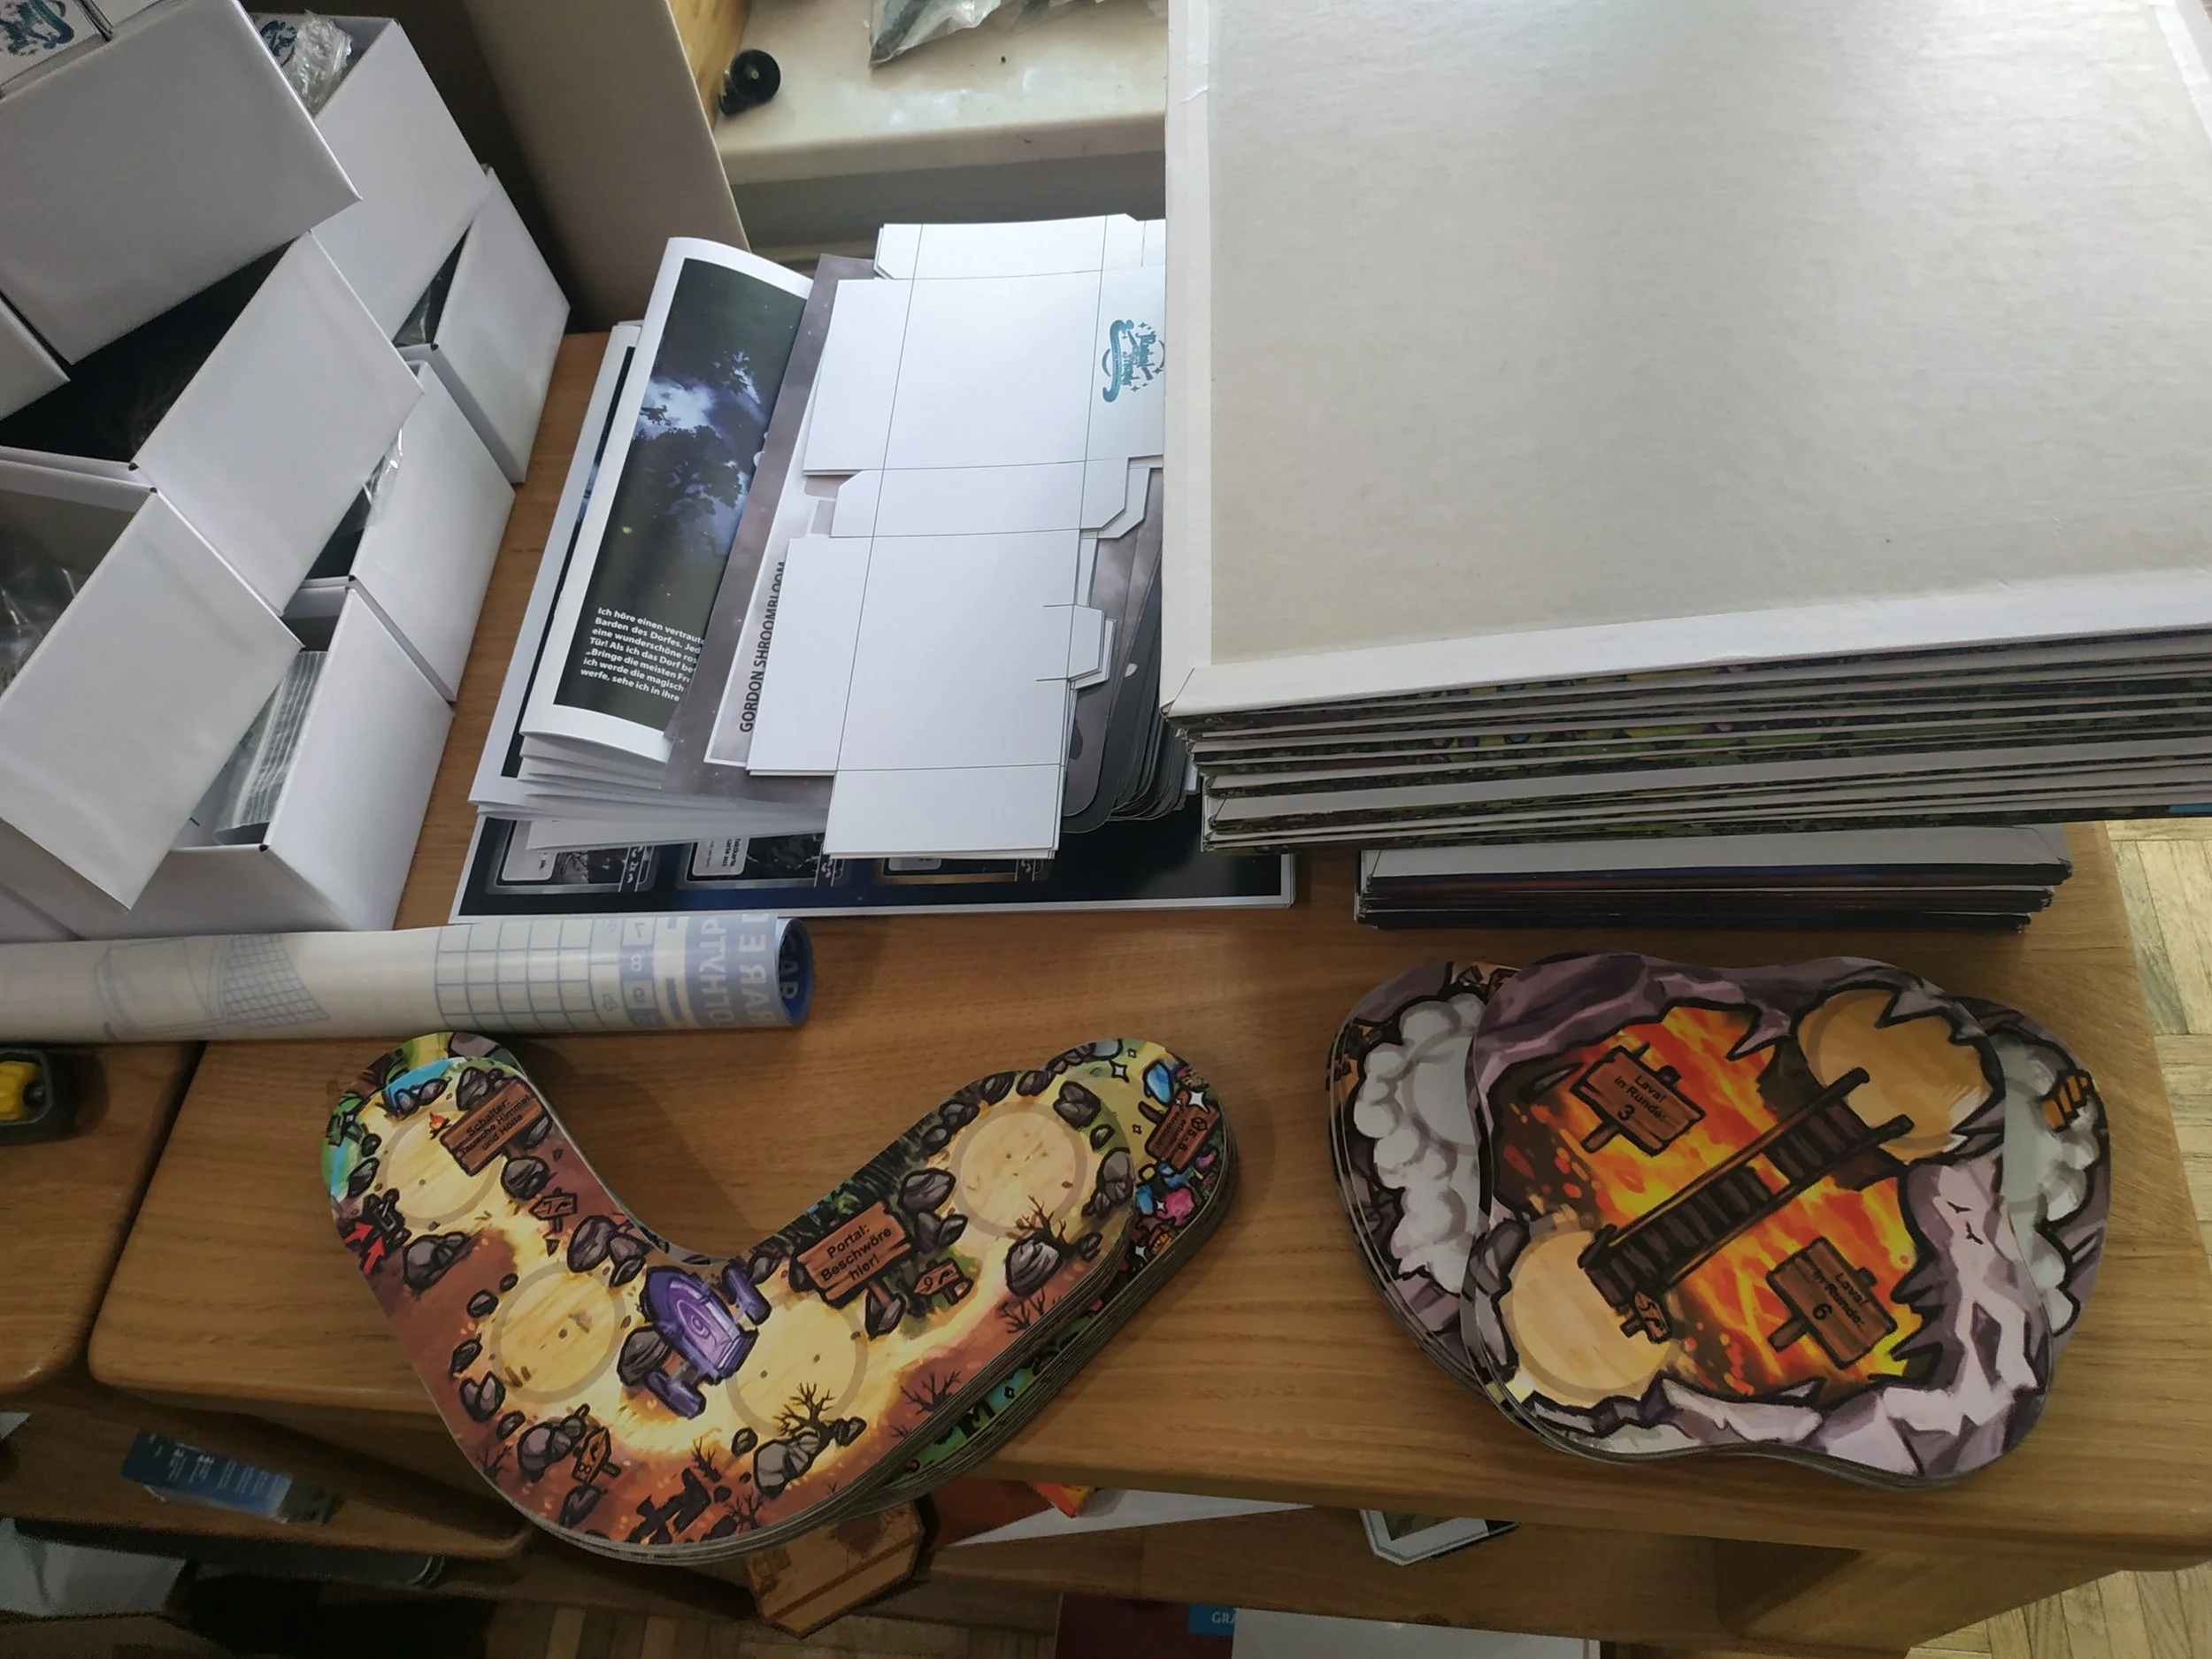
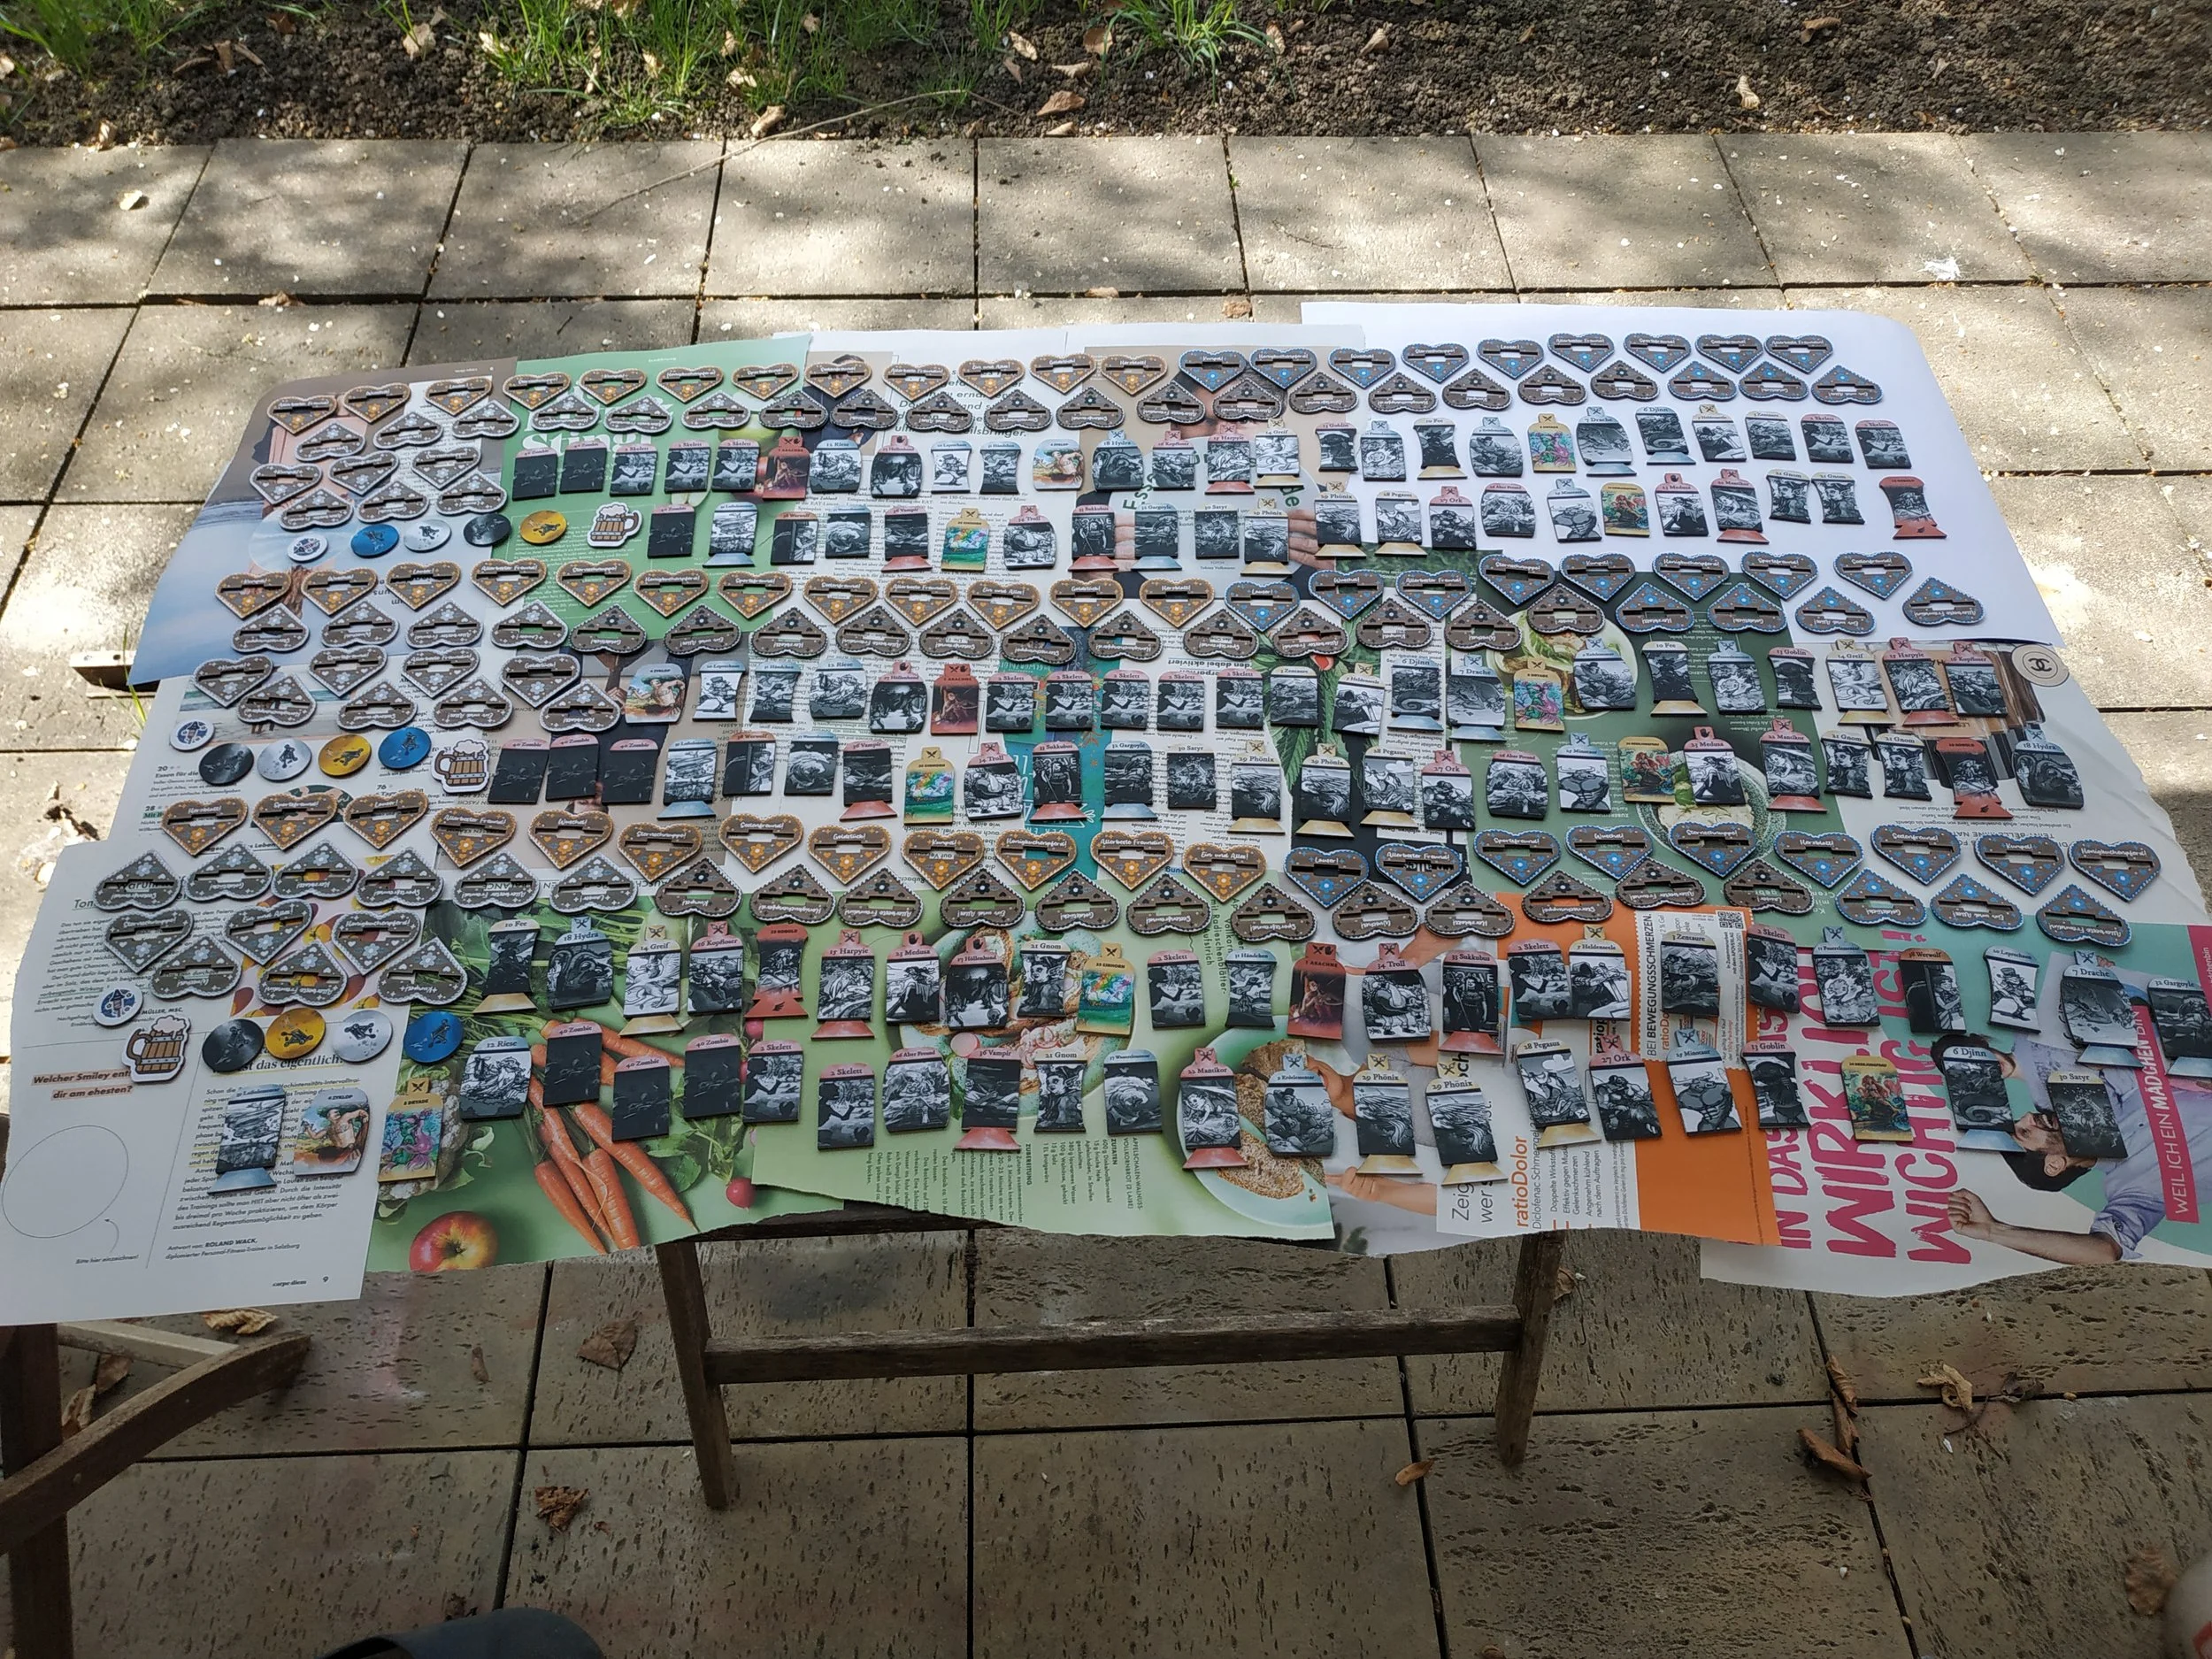
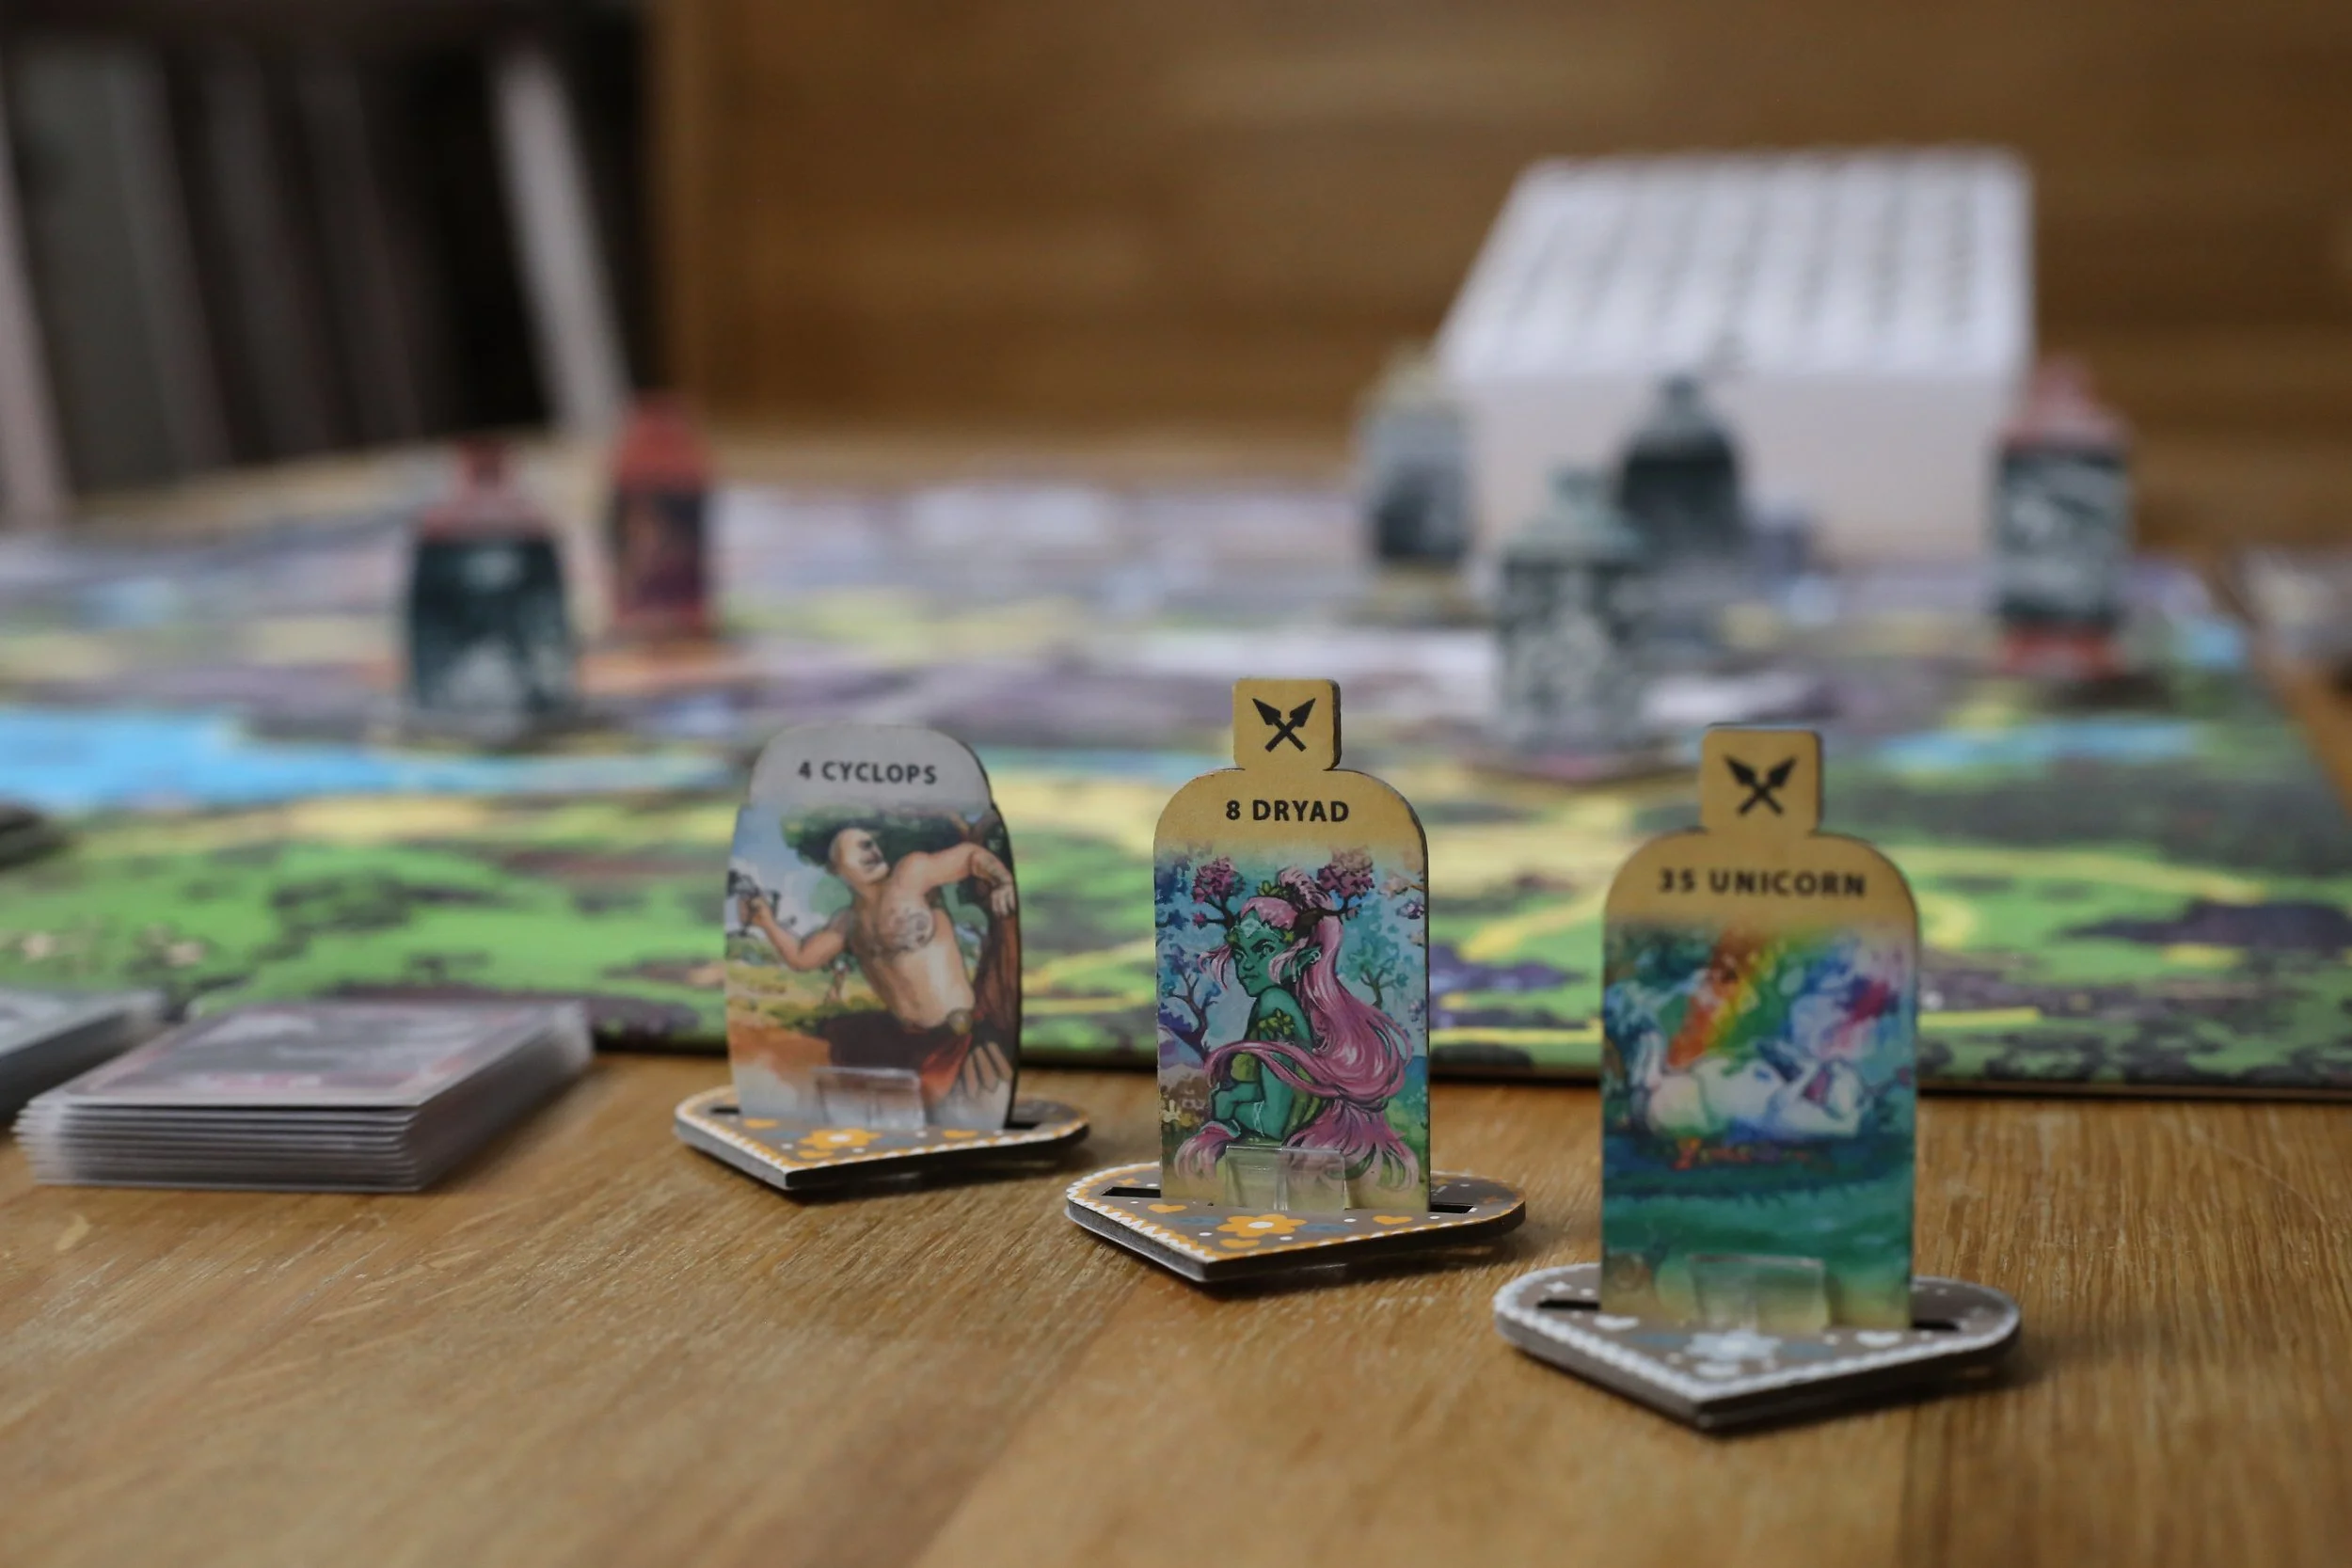
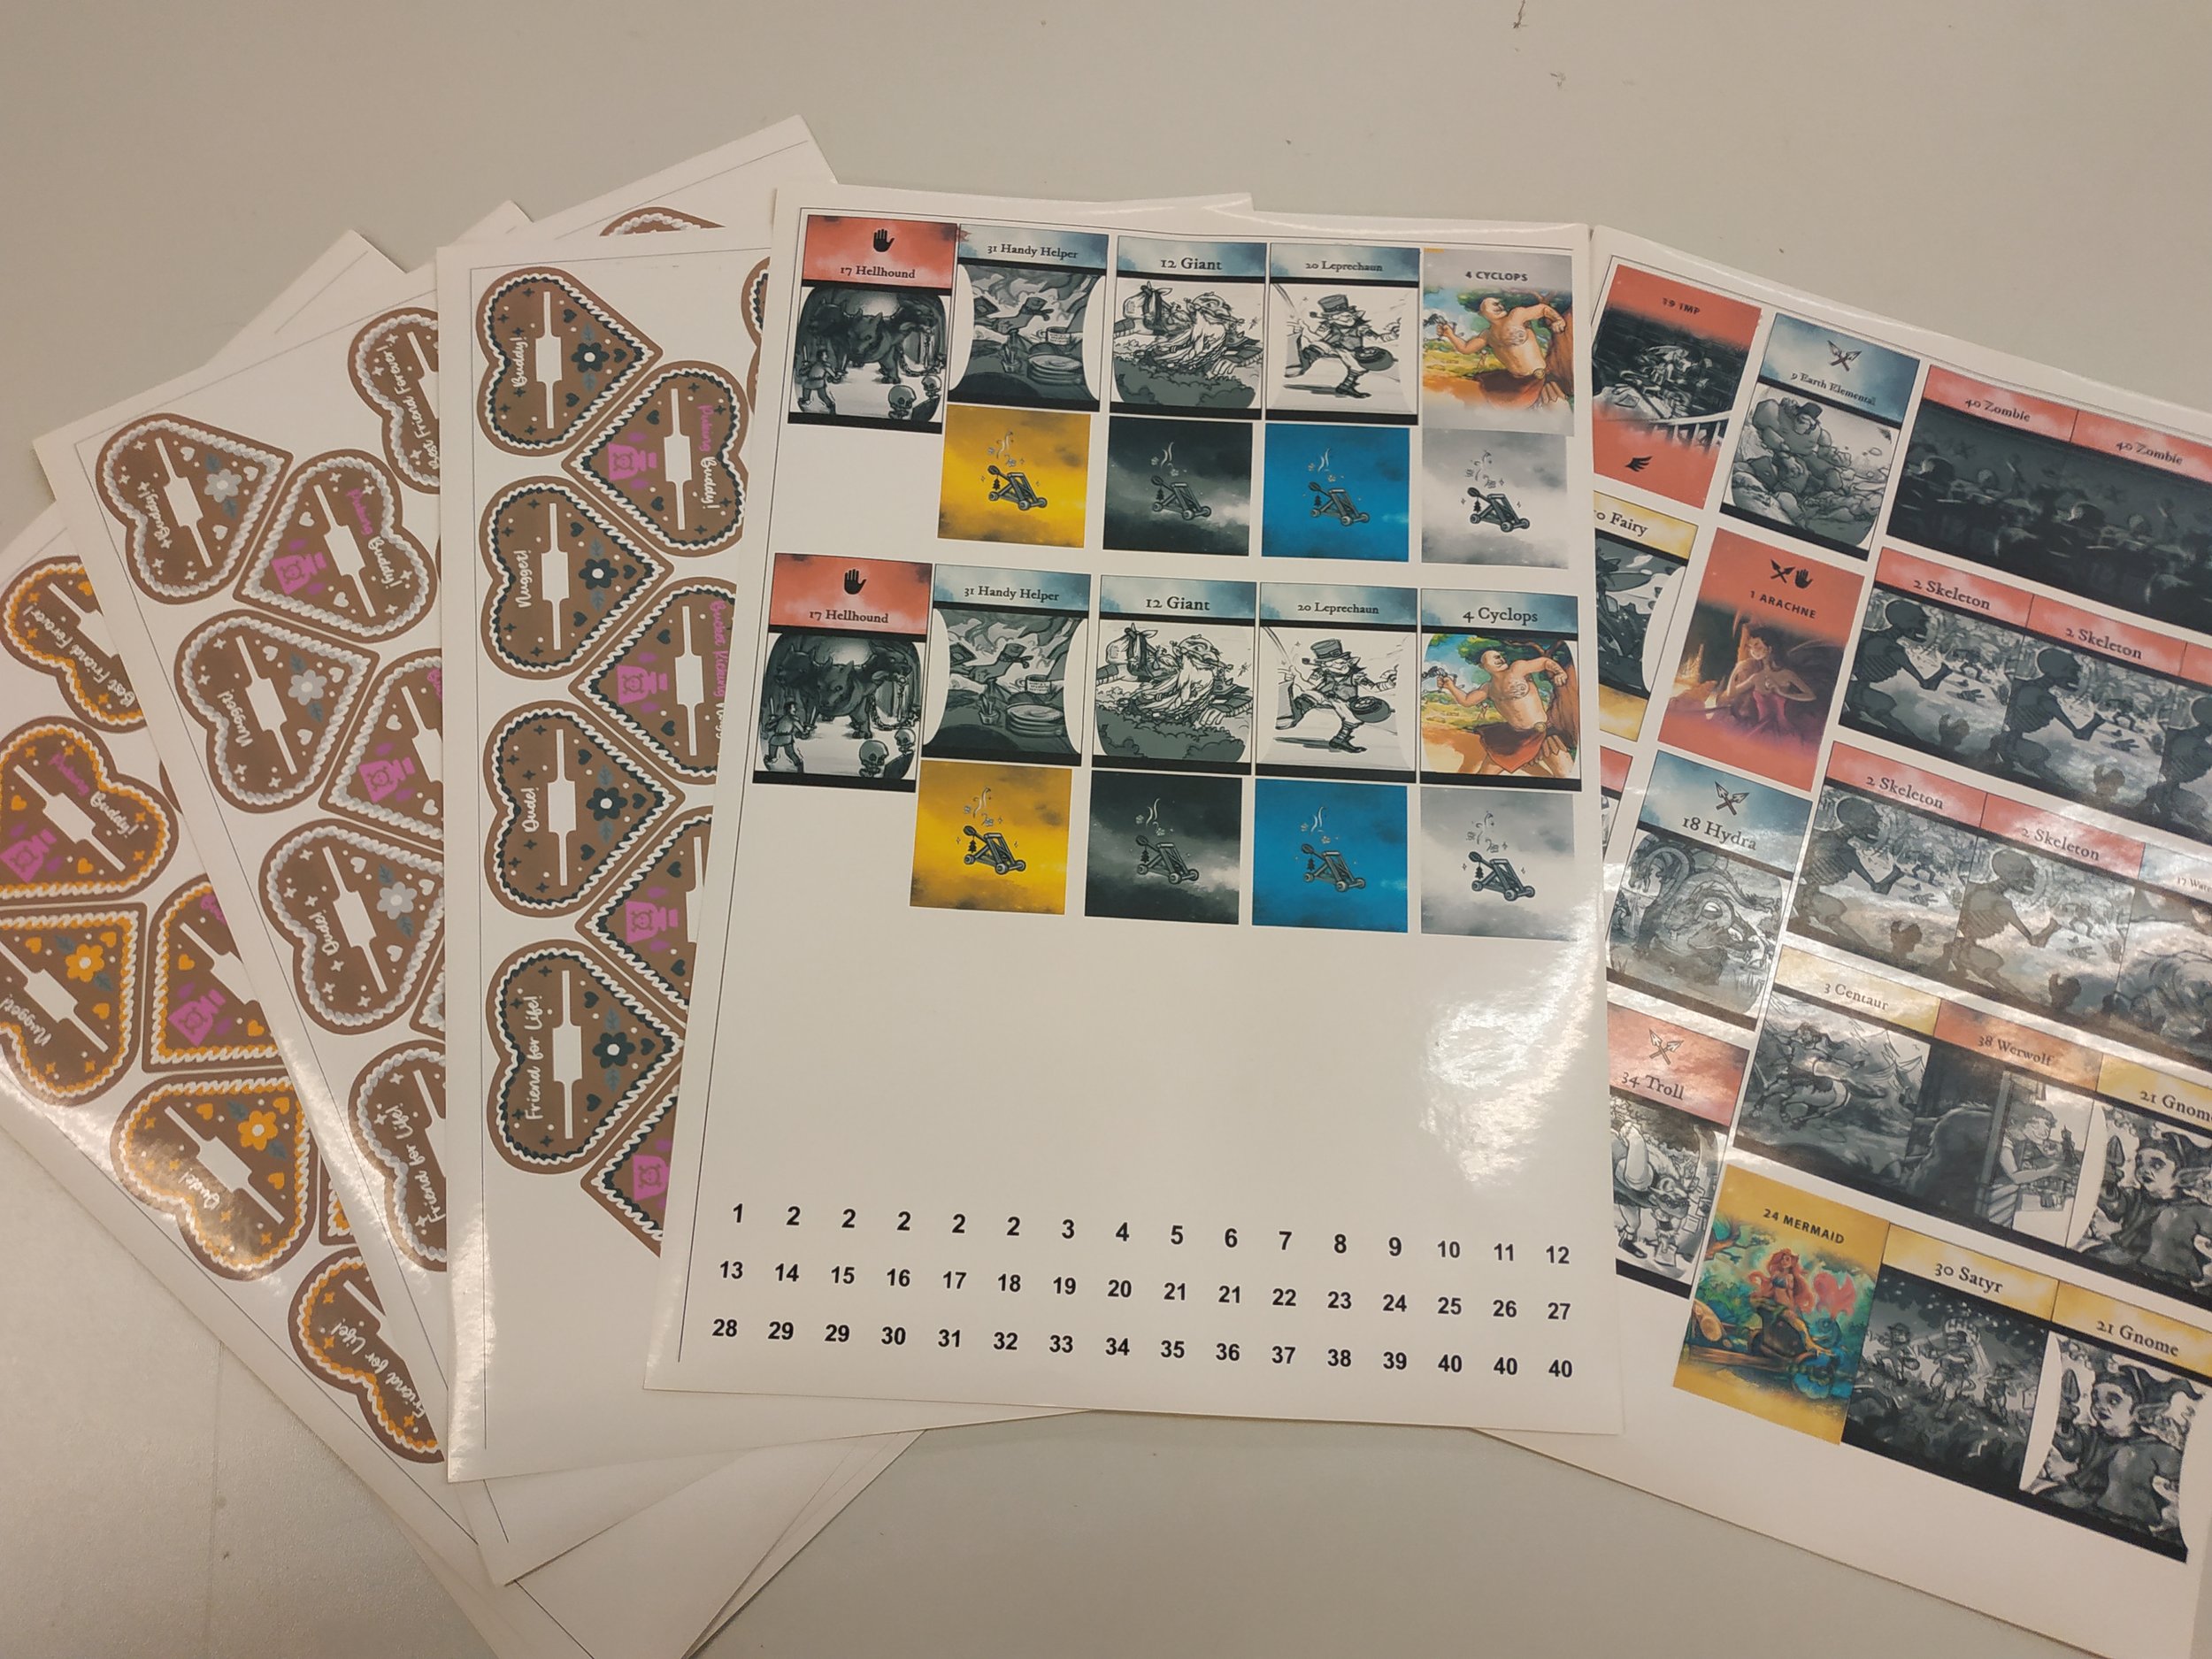
Creature standees and color hearts for 3 games
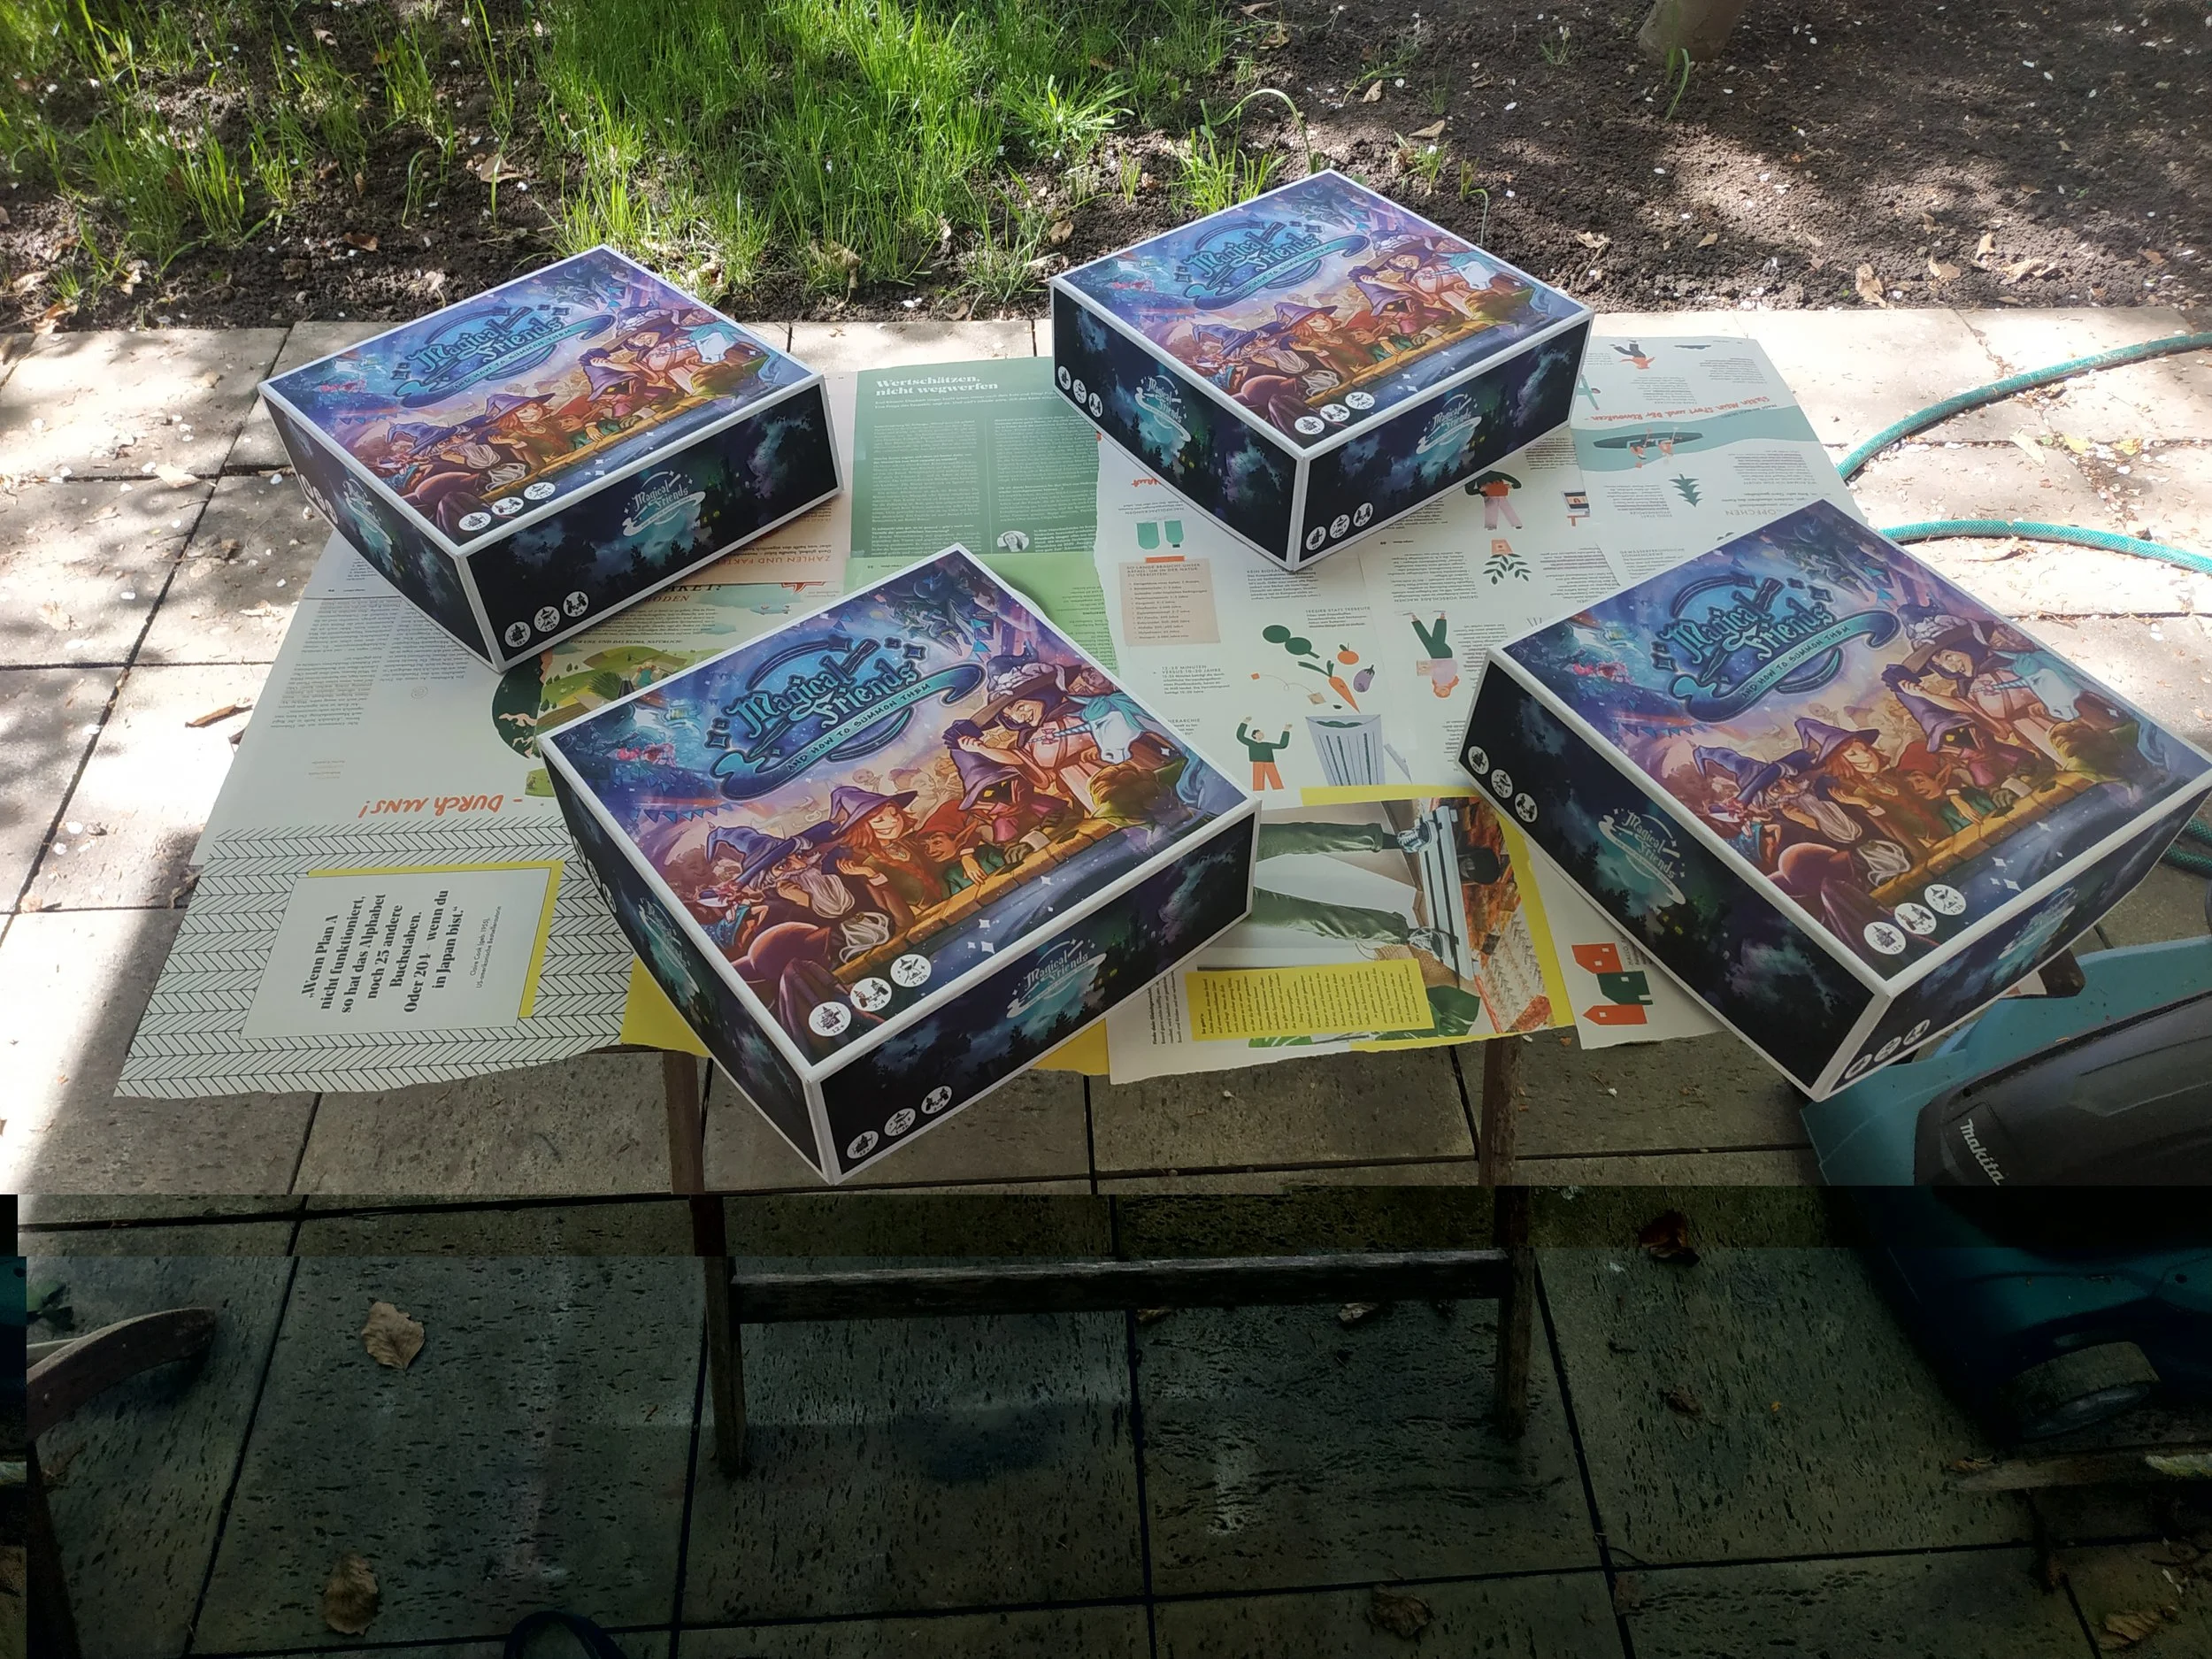
Matte varnish for the boxes so they’re less sensitive to water
Boxes drying and waiting to be filled
Components ready for packing
If I hadn’t made them myself and had ordered them from my manufacturer instead, 10 prototypes would have cost me €2000–3000. I also would have had to wait around 2–2.5 months for them. On top of that, I would have had to interrupt my illustrators’ work to adjust some graphics for printing — all for prototypes where many illustrations aren’t even in full color yet. Prototypes from a manufacturer aren’t always that expensive, but my game — even without miniatures or complex plastic components — is quite elaborate and definitely not small. The materials cost me about €55 per game, and in total I processed around 650 individual parts (cardboard, cards, paper, stickers, card sleeves…).
The finished mountain of games
They still take up a lot of space, but seeing them completed is a huge relief. Now it’s time to ship them out. I’m excited to see what happens next.
Do you have any questions about crafting prototypes? Just leave a comment — I’d love to hear from you!
29 - When the Prototype Turns Out Beautiful … (finished)
29 - When the Prototype Turns Out Beautiful … (finished)
… you immediately want to show it to everyone! I mean everywhere — on all channels! But even then, a little patience is needed. It would be a shame to post mediocre photos online when you’ll have really good ones just a week later.
For the photos, I borrowed a friend with a good camera and professional lighting. You shouldn’t underestimate how much time that takes. For about 45 nice photos (after sorting), showing the game, the atmosphere, and the components, we needed an entire day.

Depending on the components or the game setup, we rearranged the table and lighting countless times. It really helps to plan ahead which components you want to show from which angle, and to organize the photo sequence based on those angles. Constantly setting up and taking down the game board would waste a lot of time.
Even if everything is handmade, you shouldn’t underestimate the cost and effort. I spent about €55 on raw materials (though two‑thirds of that was from the copy shop). The time I needed to build everything: about three days. Most of that was due to the drying times of the spray adhesive. With bookbinding glue, the gluing process is much faster.
If you still have any questions, feel free to ask. I’m also very happy about any other feedback. That’s it for now regarding the prototype.
28 - When You Want the Prototype to Look Pretty … (Part 5: Cardboard Tokens / Markers / Standees)
28 - When You Want the Prototype to Look Pretty … (Part 5: Cardboard Tokens / Markers / Standees)
With my cardboard components, things get pretty difficult using regular tools. The shapes of my tokens are a bit more complicated than simple rectangles.
As you can already see, these shapes are much harder to cut out of cardboard with a knife — at least if you want them to still look nice afterward.
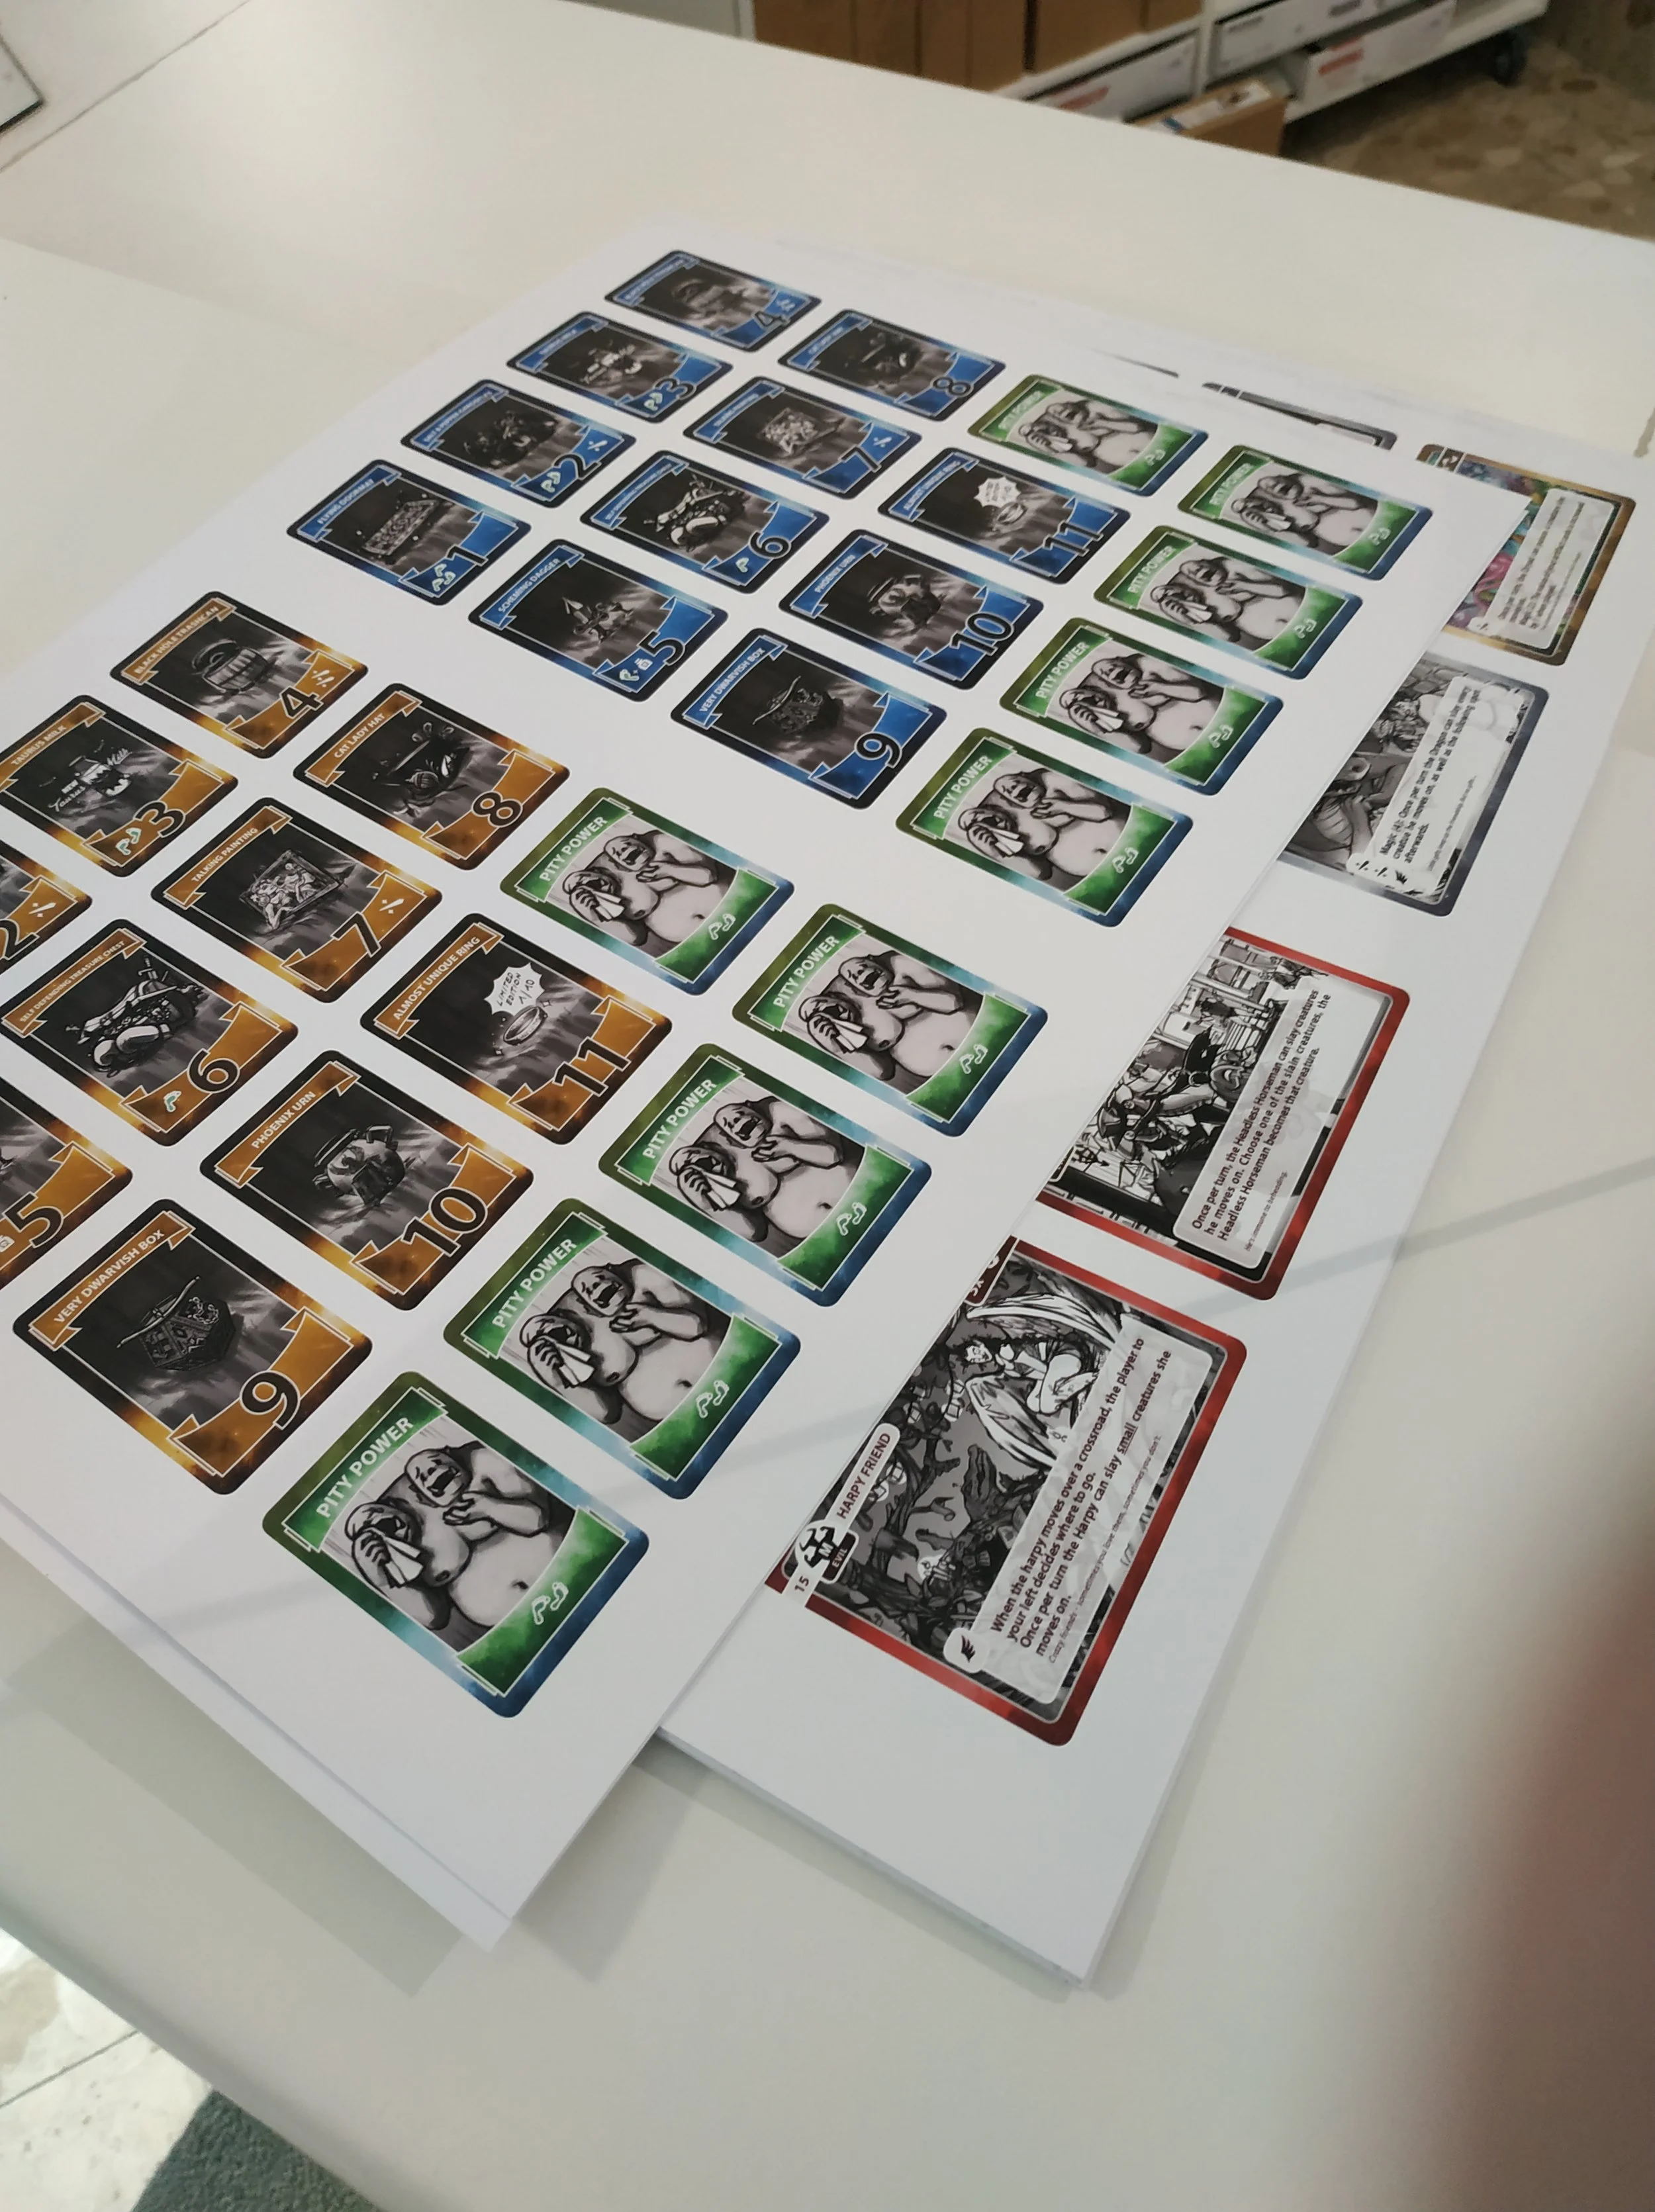
Unfortunately, the print quality for these cardboard pieces isn’t great. I used my home printer and sticker paper, but it’s good enough for a prototype.
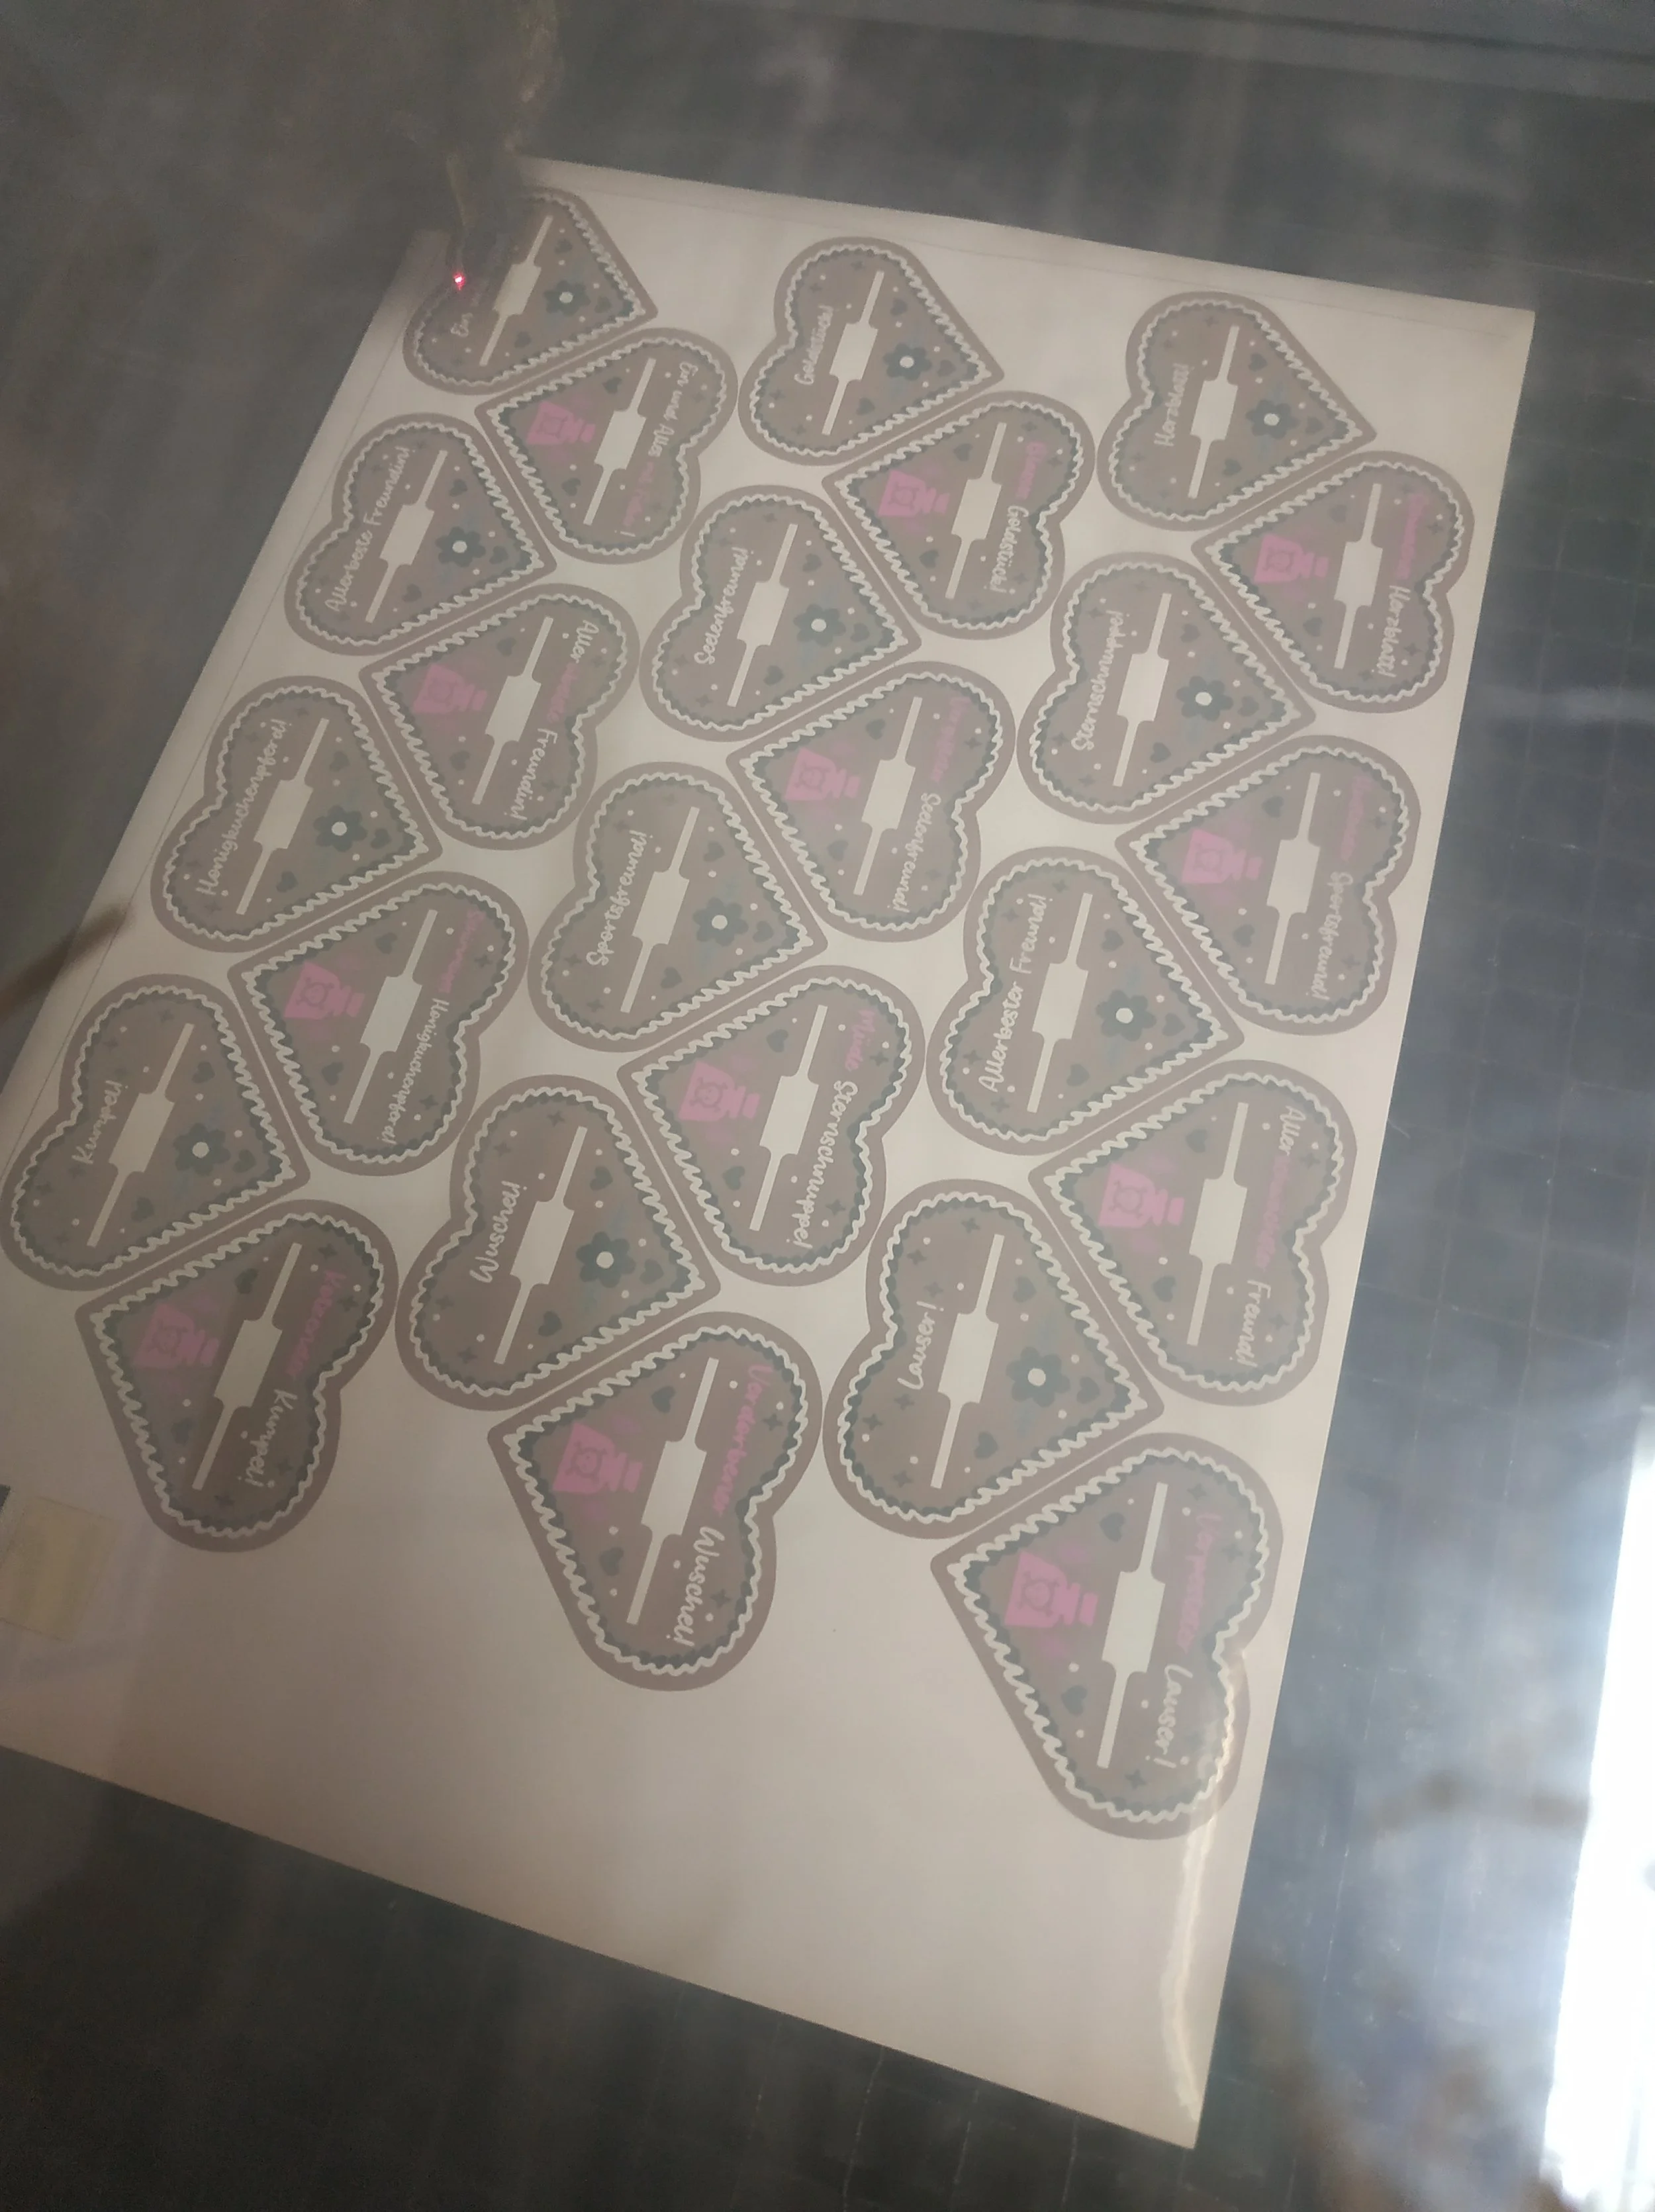
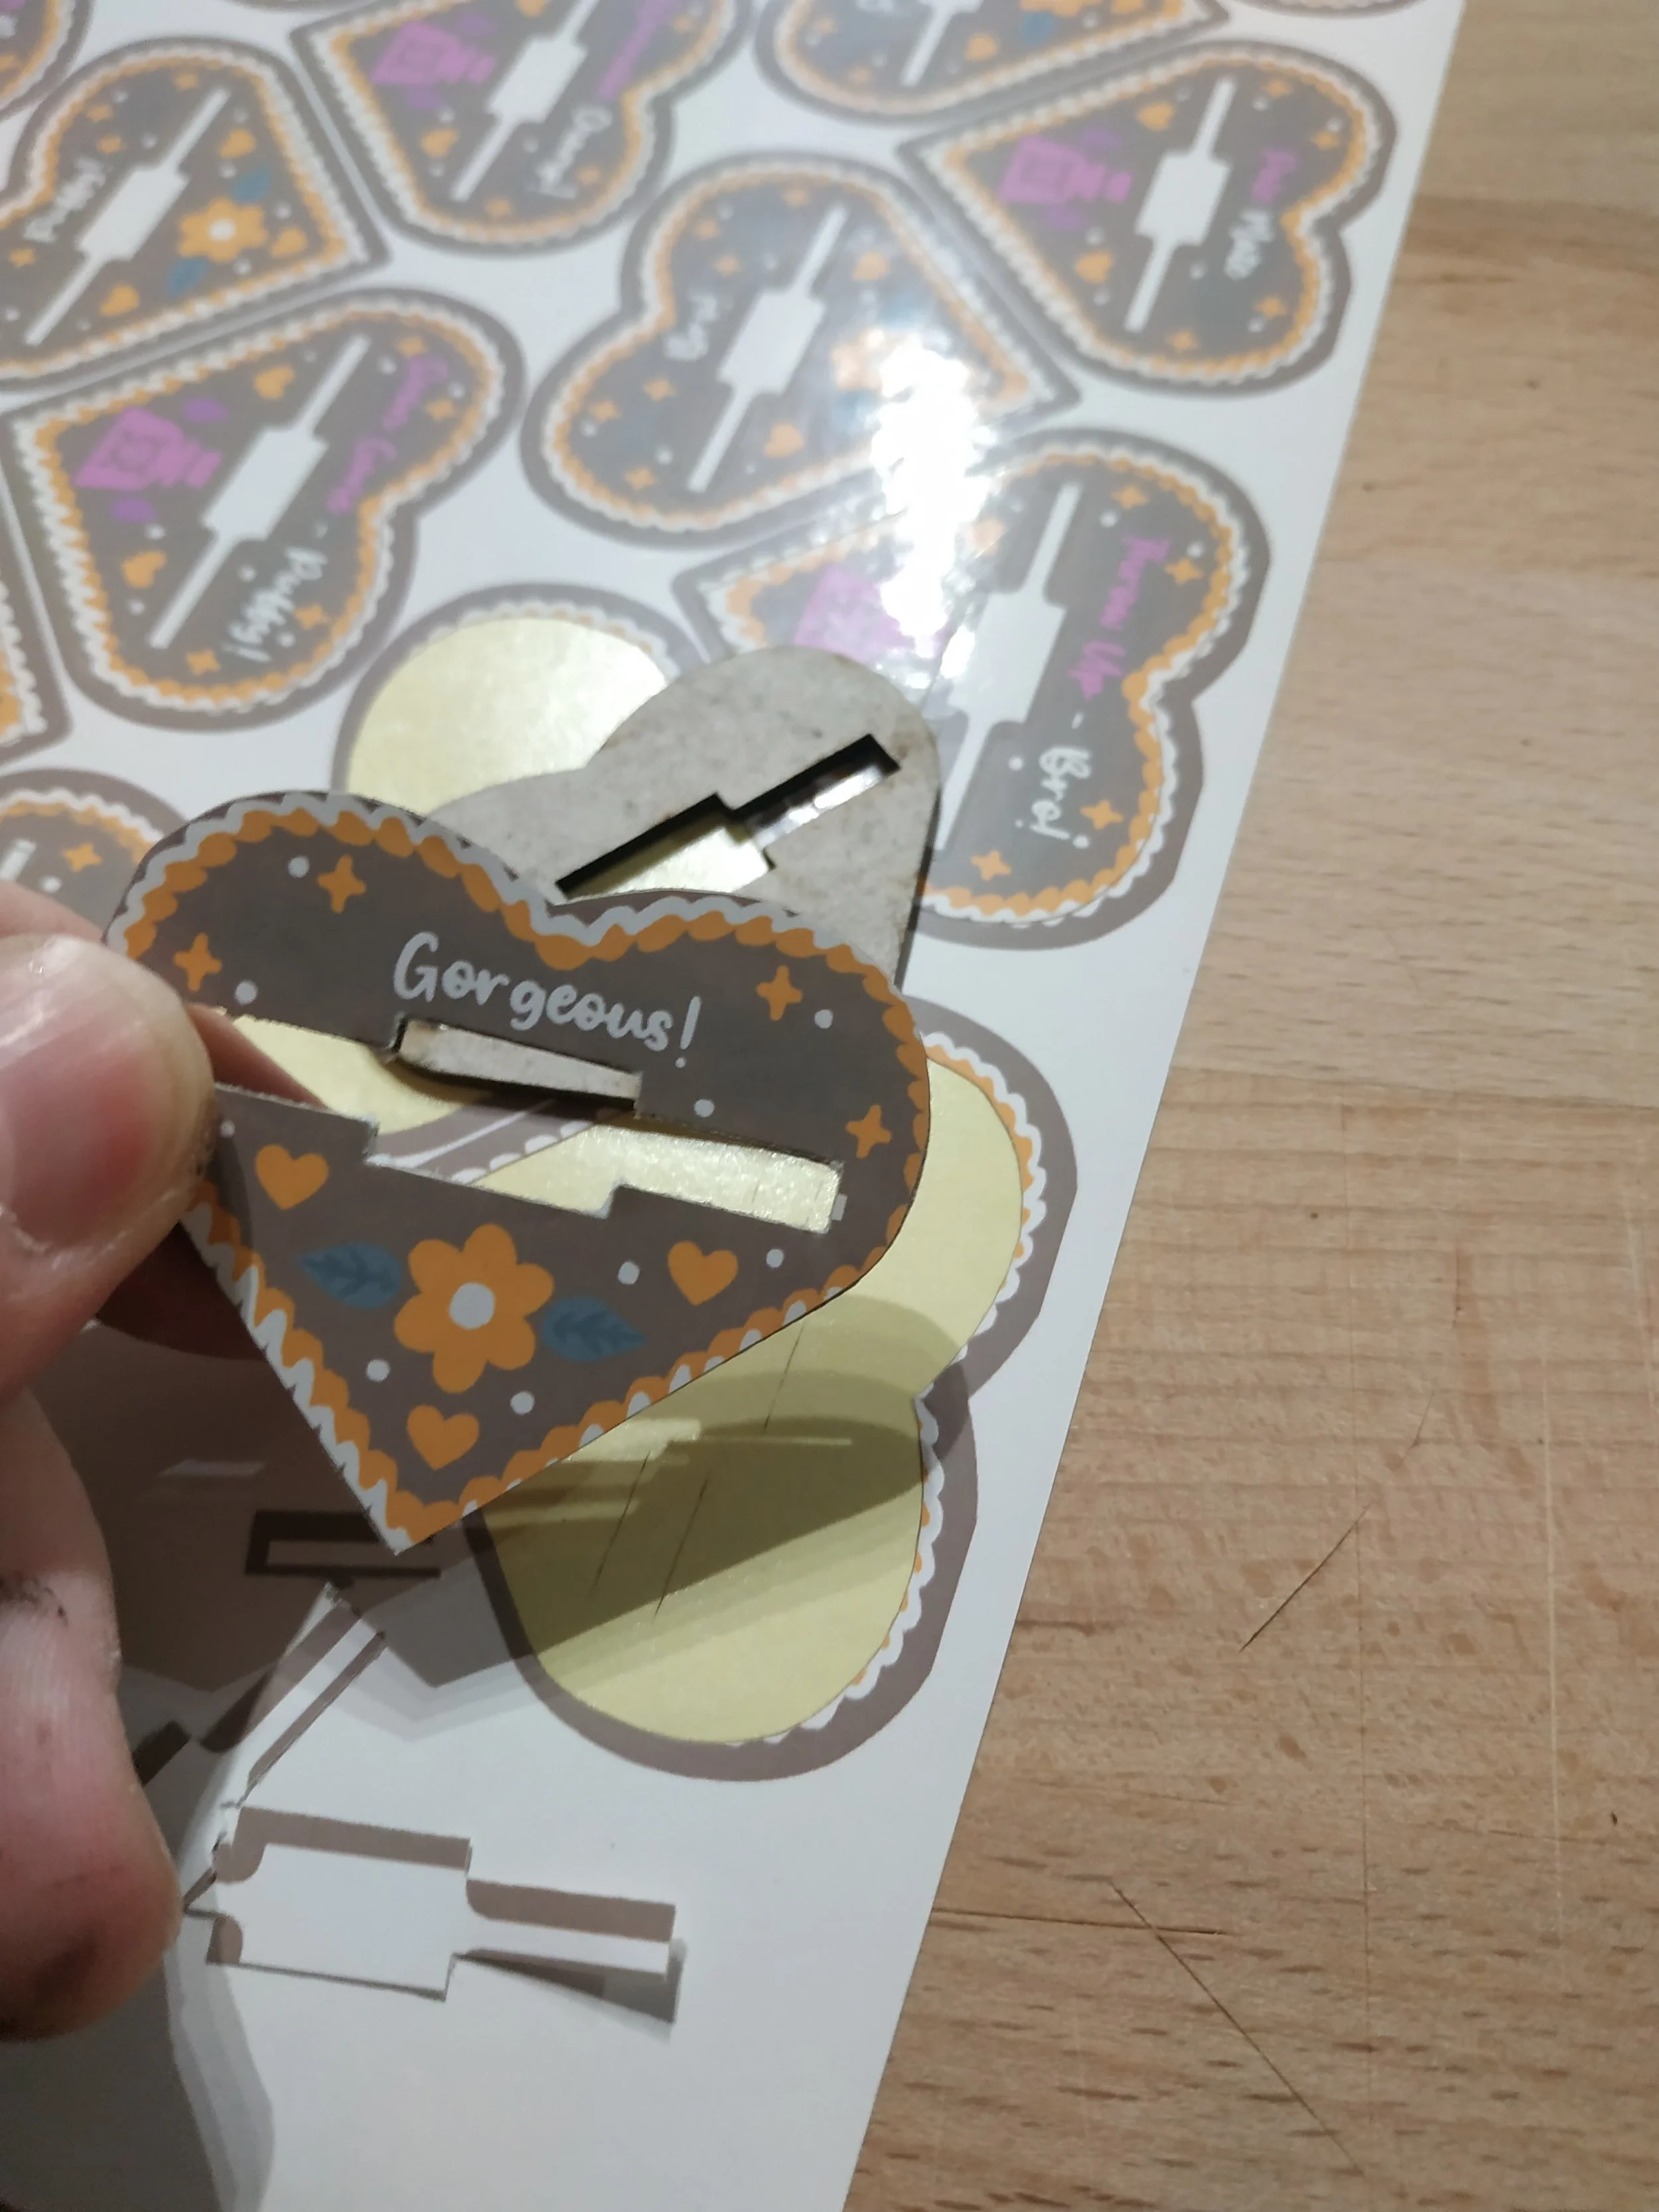
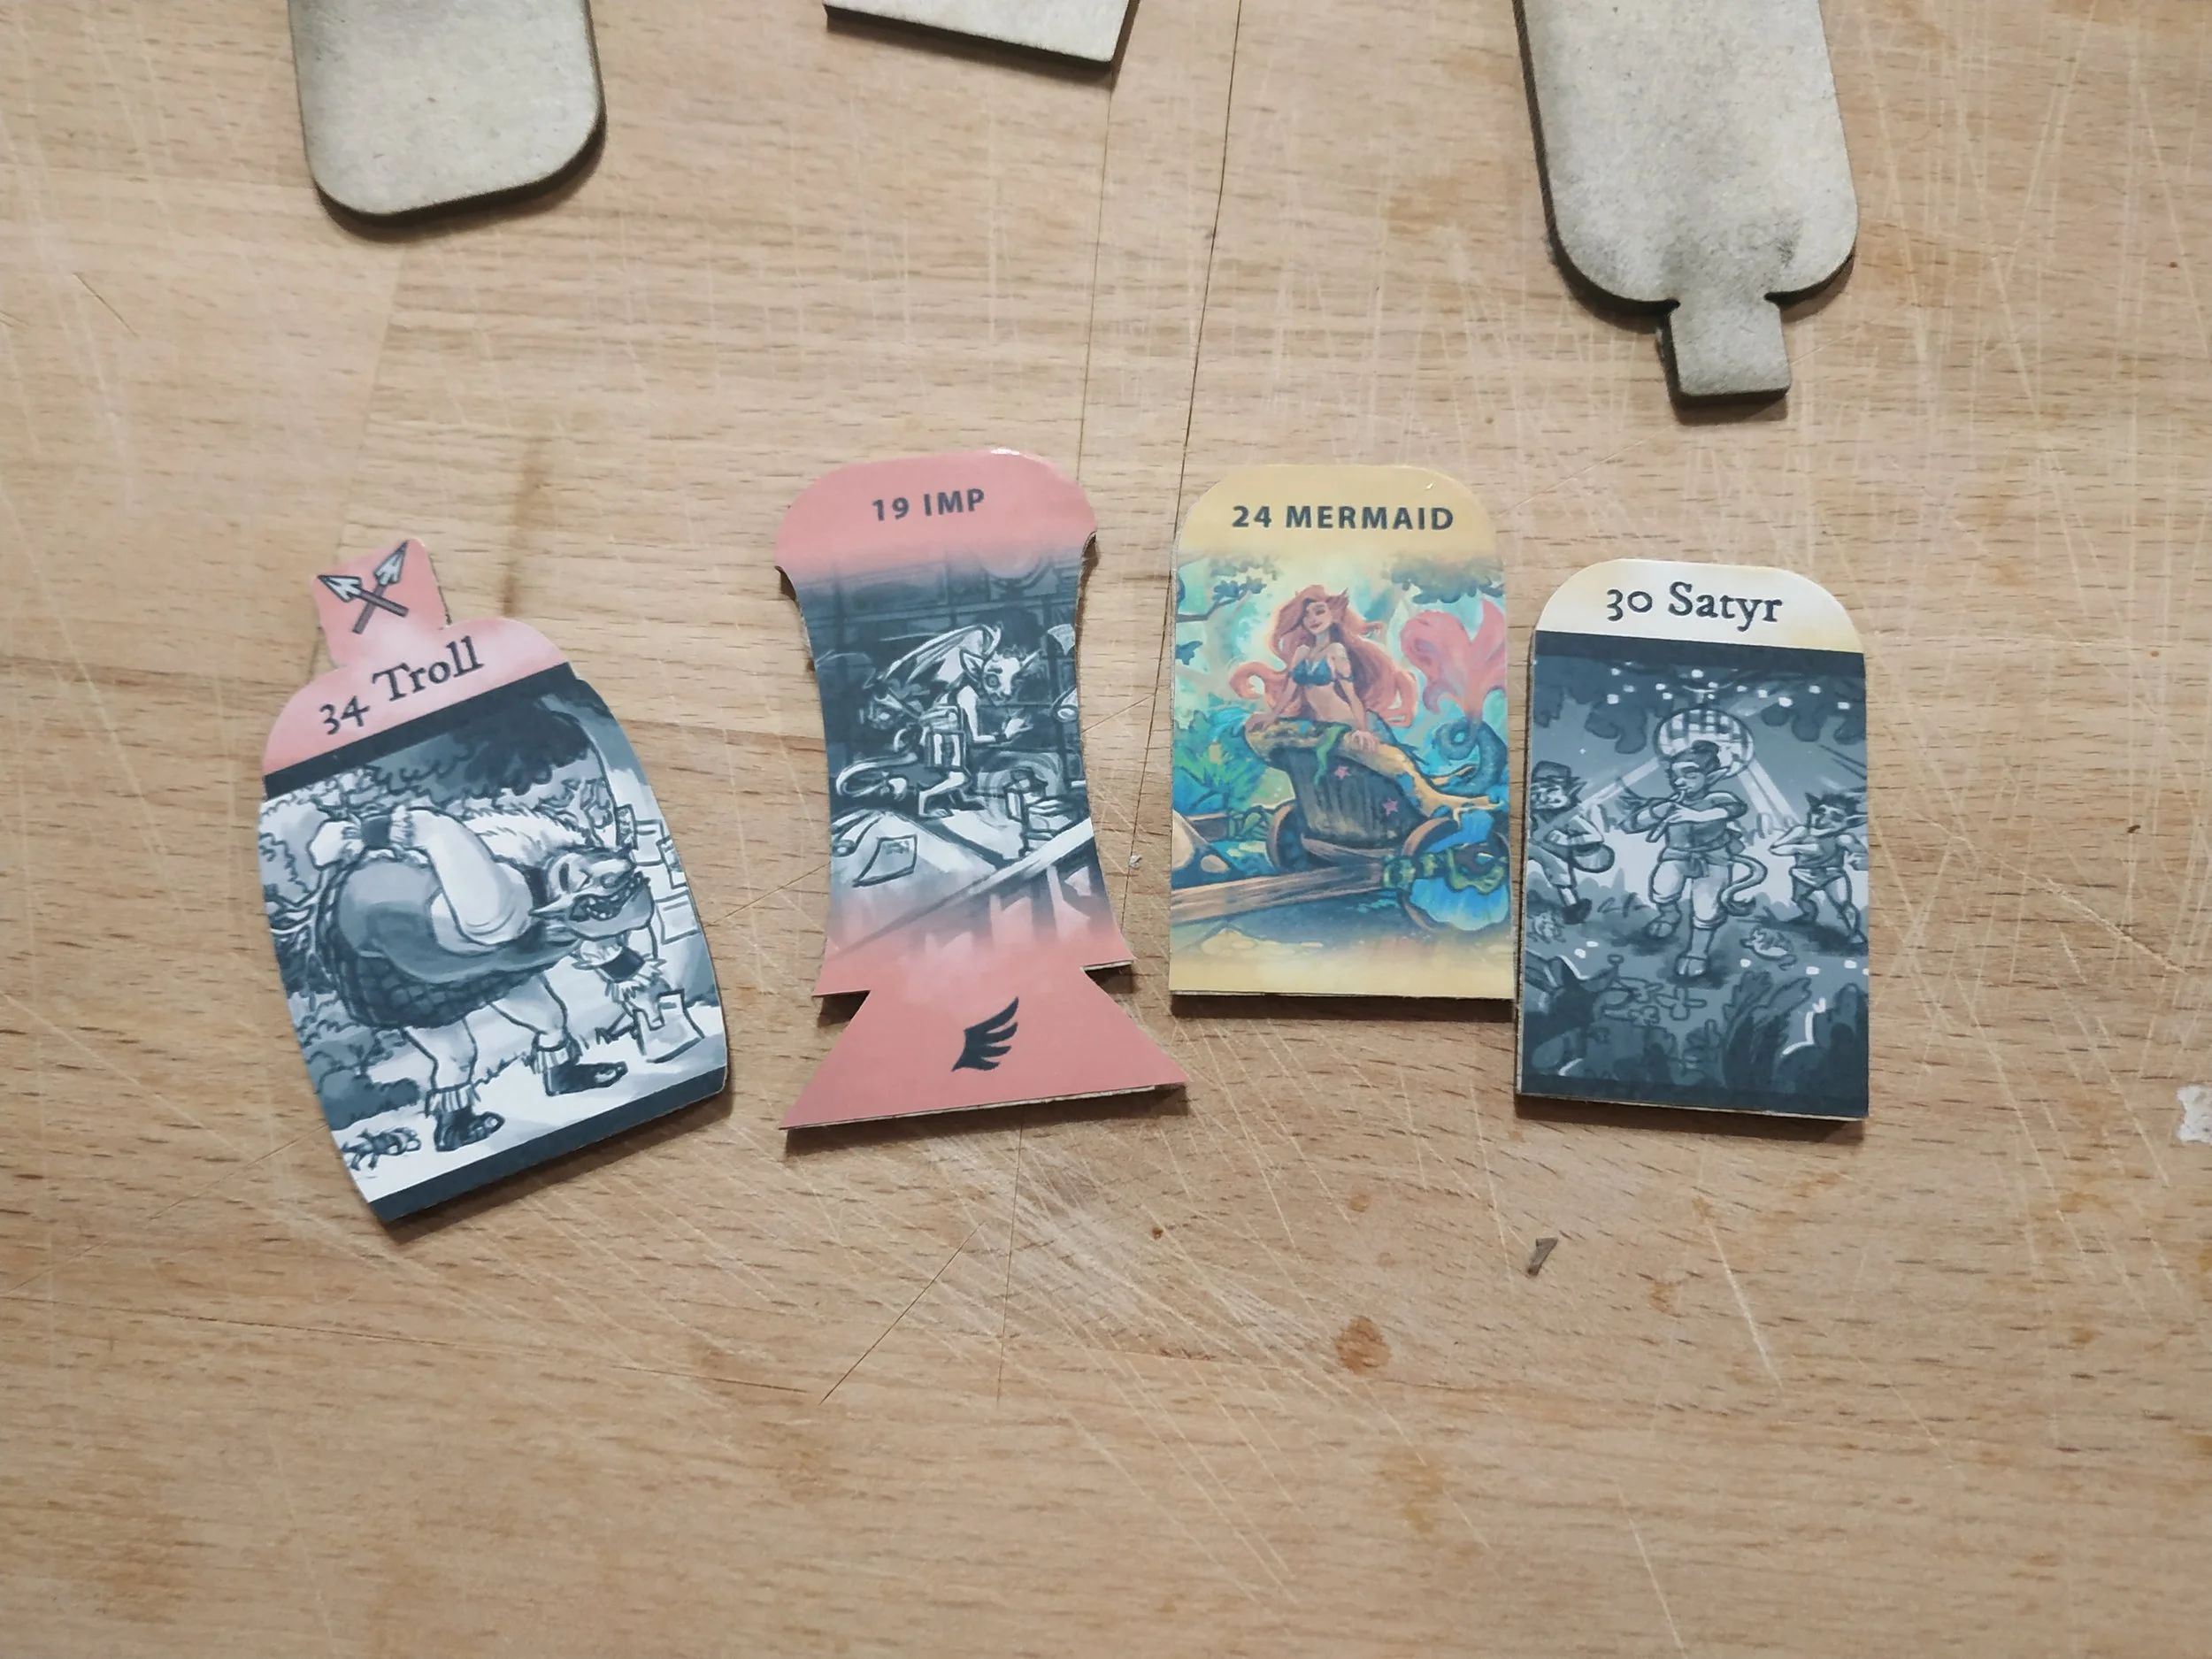
I cut both the cardboard pieces and the stickers with a laser cutter. Because of that, bleed and margin are important here as well. With these irregular shapes, bleed and margin are trickier, so we decided on a color gradient that still looks good even if it’s slightly misaligned. Even though the laser is very precise, I still have to align everything manually — and every tiny inaccuracy becomes noticeable.
After cutting, I simply stuck the stickers onto the cardboard. Yes, it’s tedious and takes a while, so it’s best to put on a show in the background. But the result is fairly precise and looks reasonably good.
2 mm cardboard is not easy to work with — a laser cutter helps tremendously. Do you have any other ideas on how to achieve something like this with a reasonable amount of effort? I’m open to suggestions.
27 - When You Want the Prototype to Look Pretty … (Part 4: Game Board)
27 - When You Want the Prototype to Look Pretty … (Part 4: Game Board)
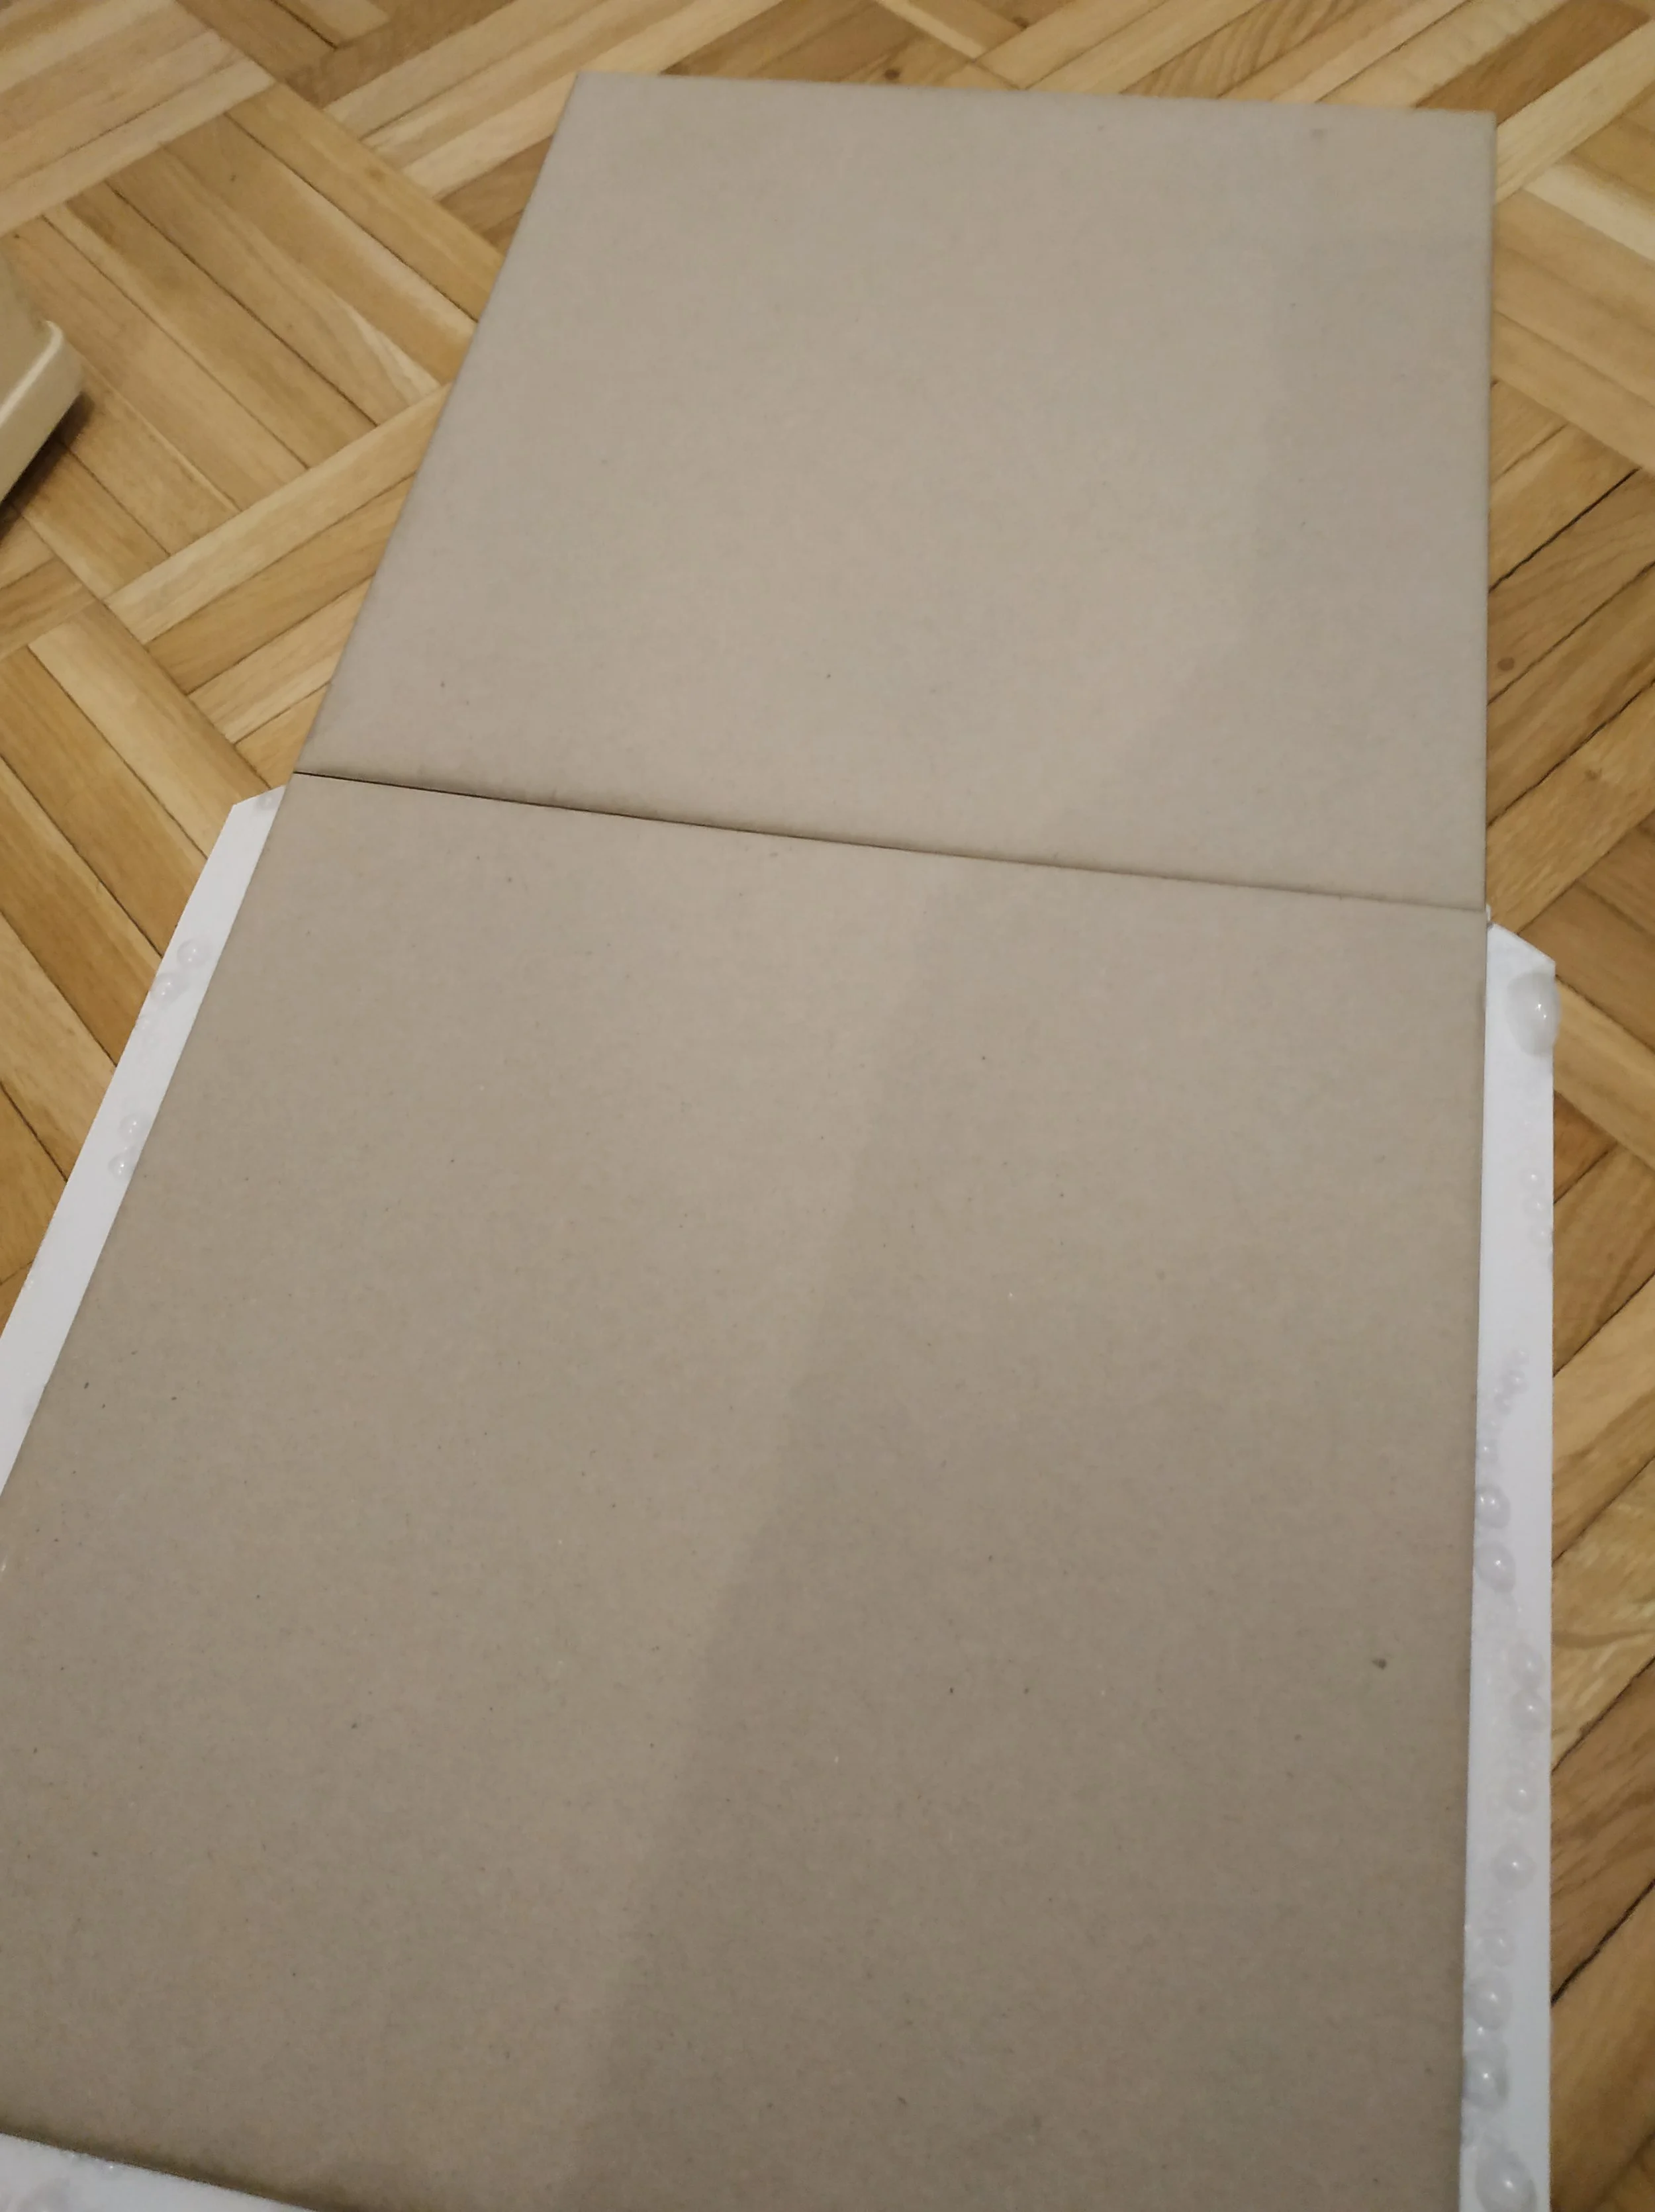
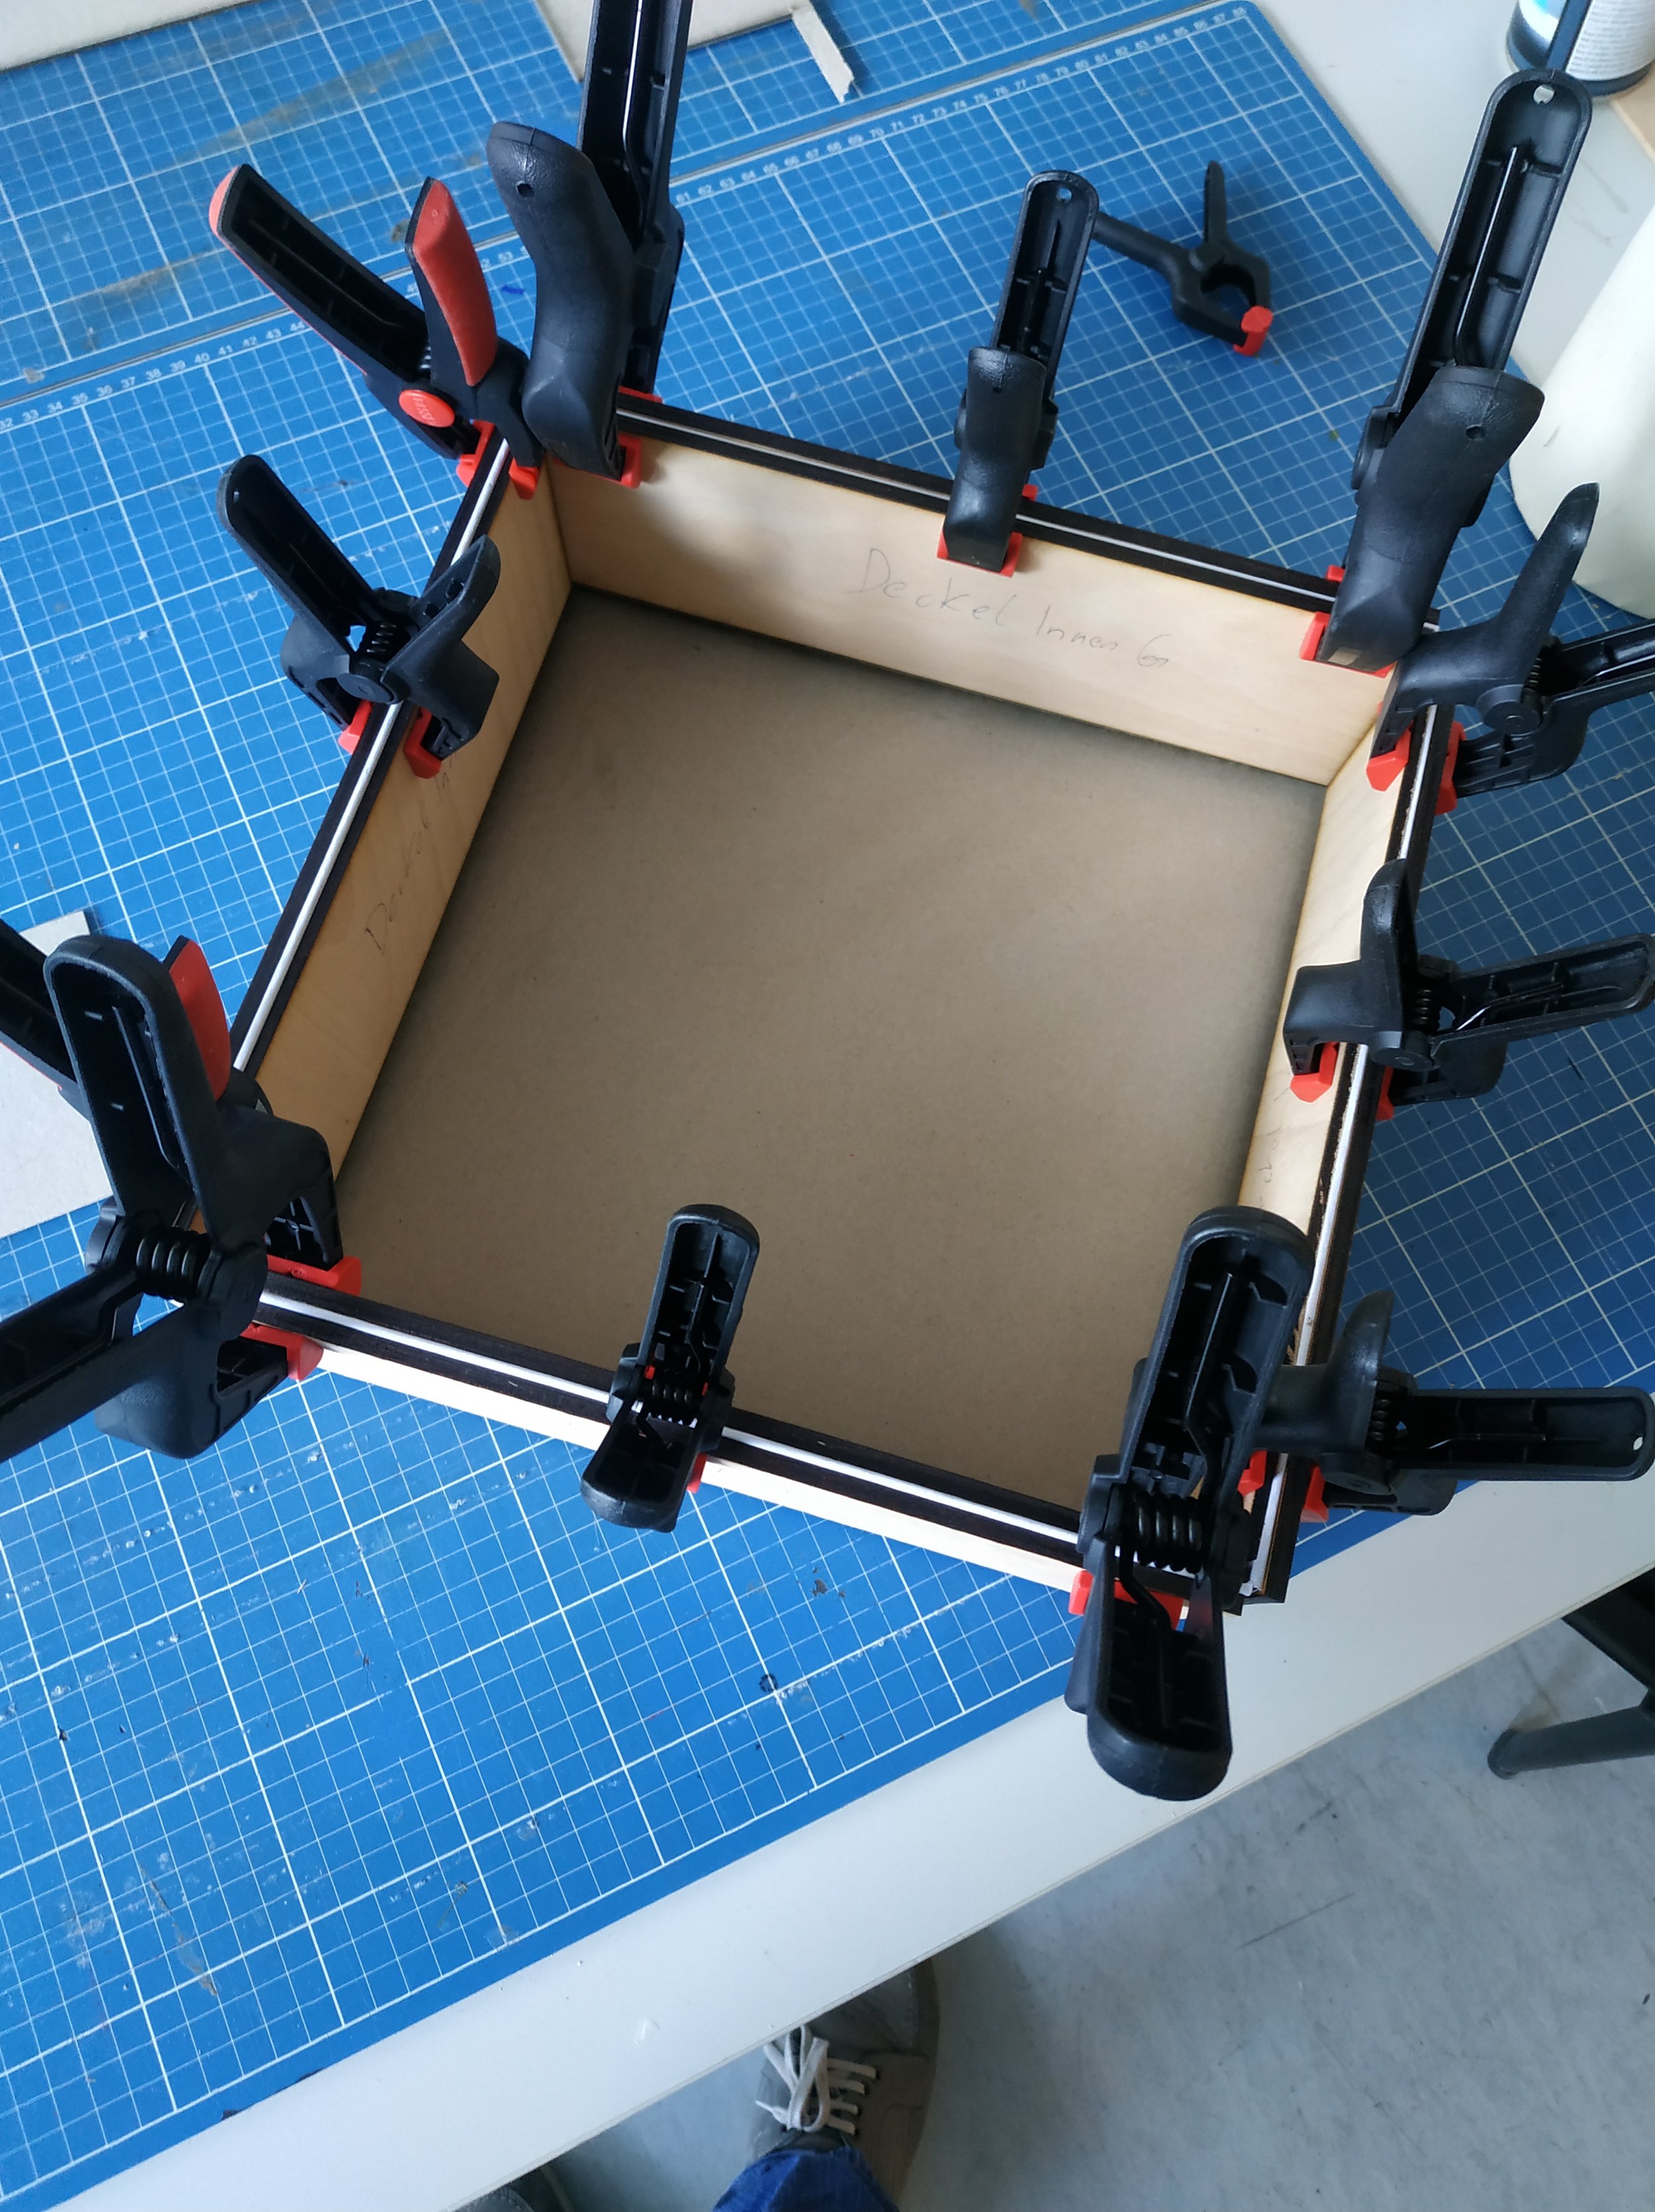
There are certainly several ways to print and mount a game board. For some reason, I wanted to make mine in four parts so that every edge would be overlapped and therefore more stable.
If you do it the way I did, you really need to think carefully about where and in which direction the board will fold. On the edges where the board sections connect, I extended the flap to create more gluing surface. When dividing the artwork, I also had to make sure the images lined up cleanly at the edges. The artwork should always extend slightly beyond the cut line (I used 1–2 mm). If you don’t manage to glue the artwork on perfectly, you’ll end up with white edges — and that doesn’t look very nice. As far as I know, preparing files for actual production is much easier.
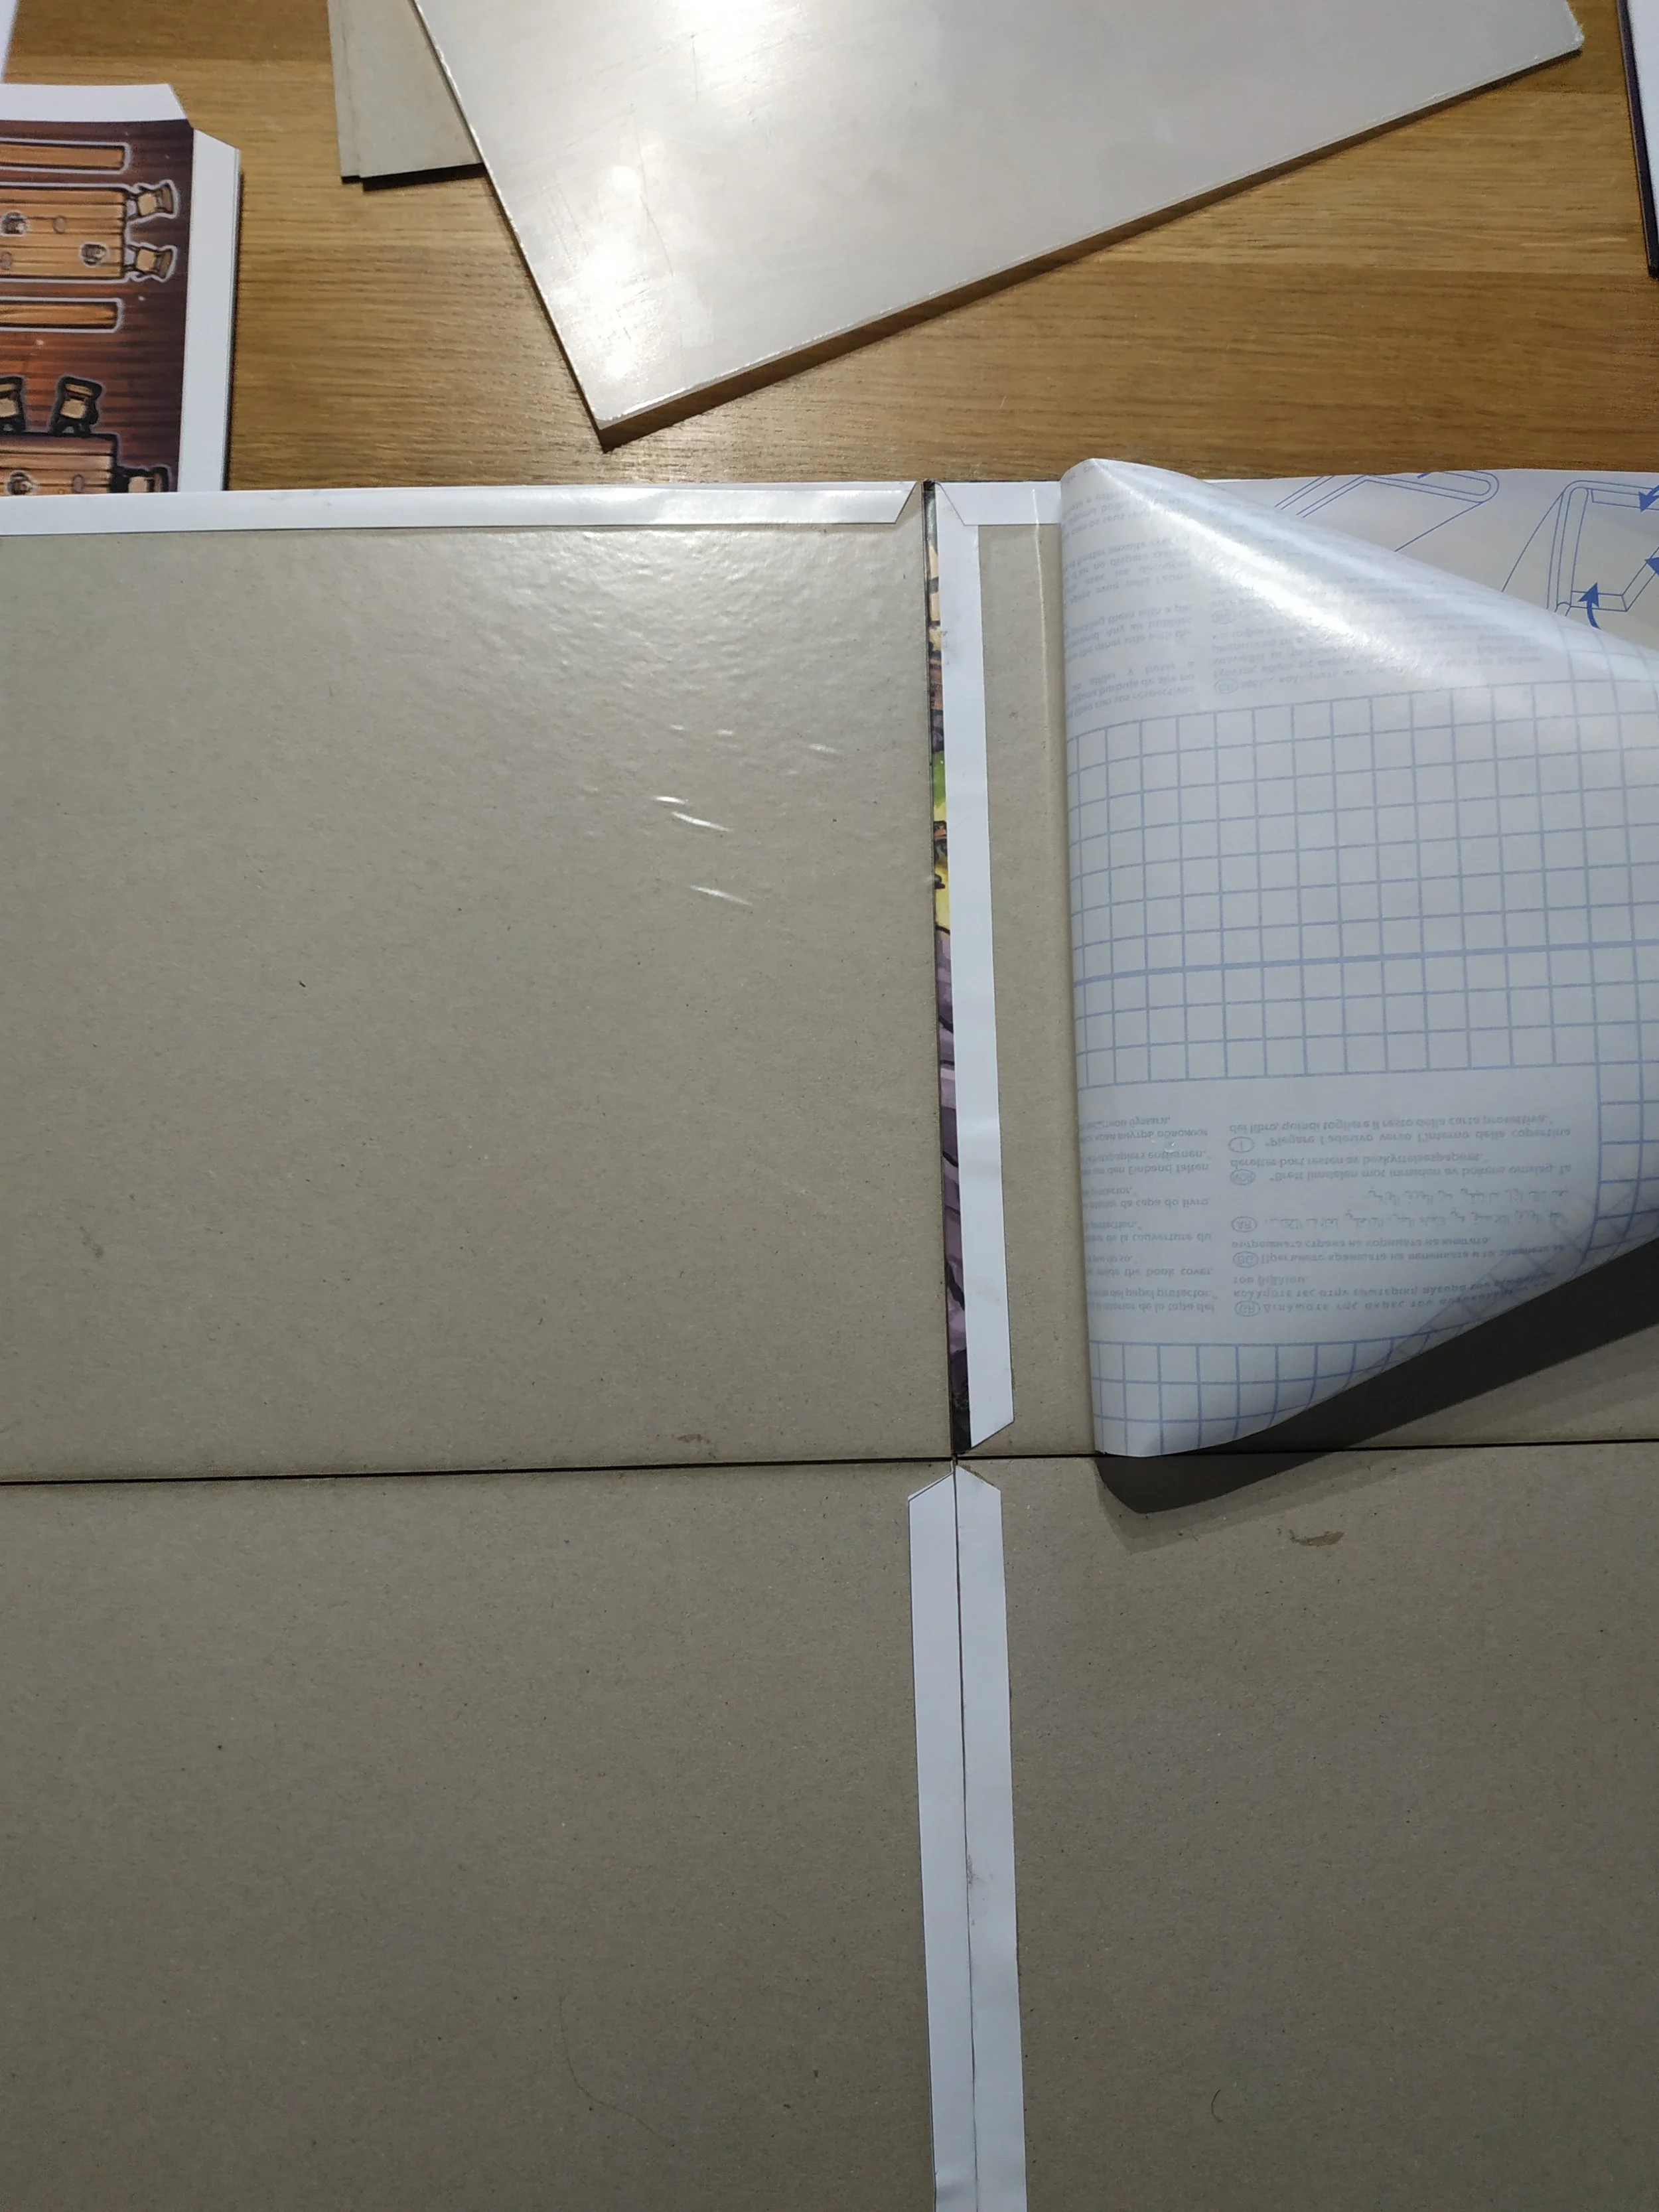
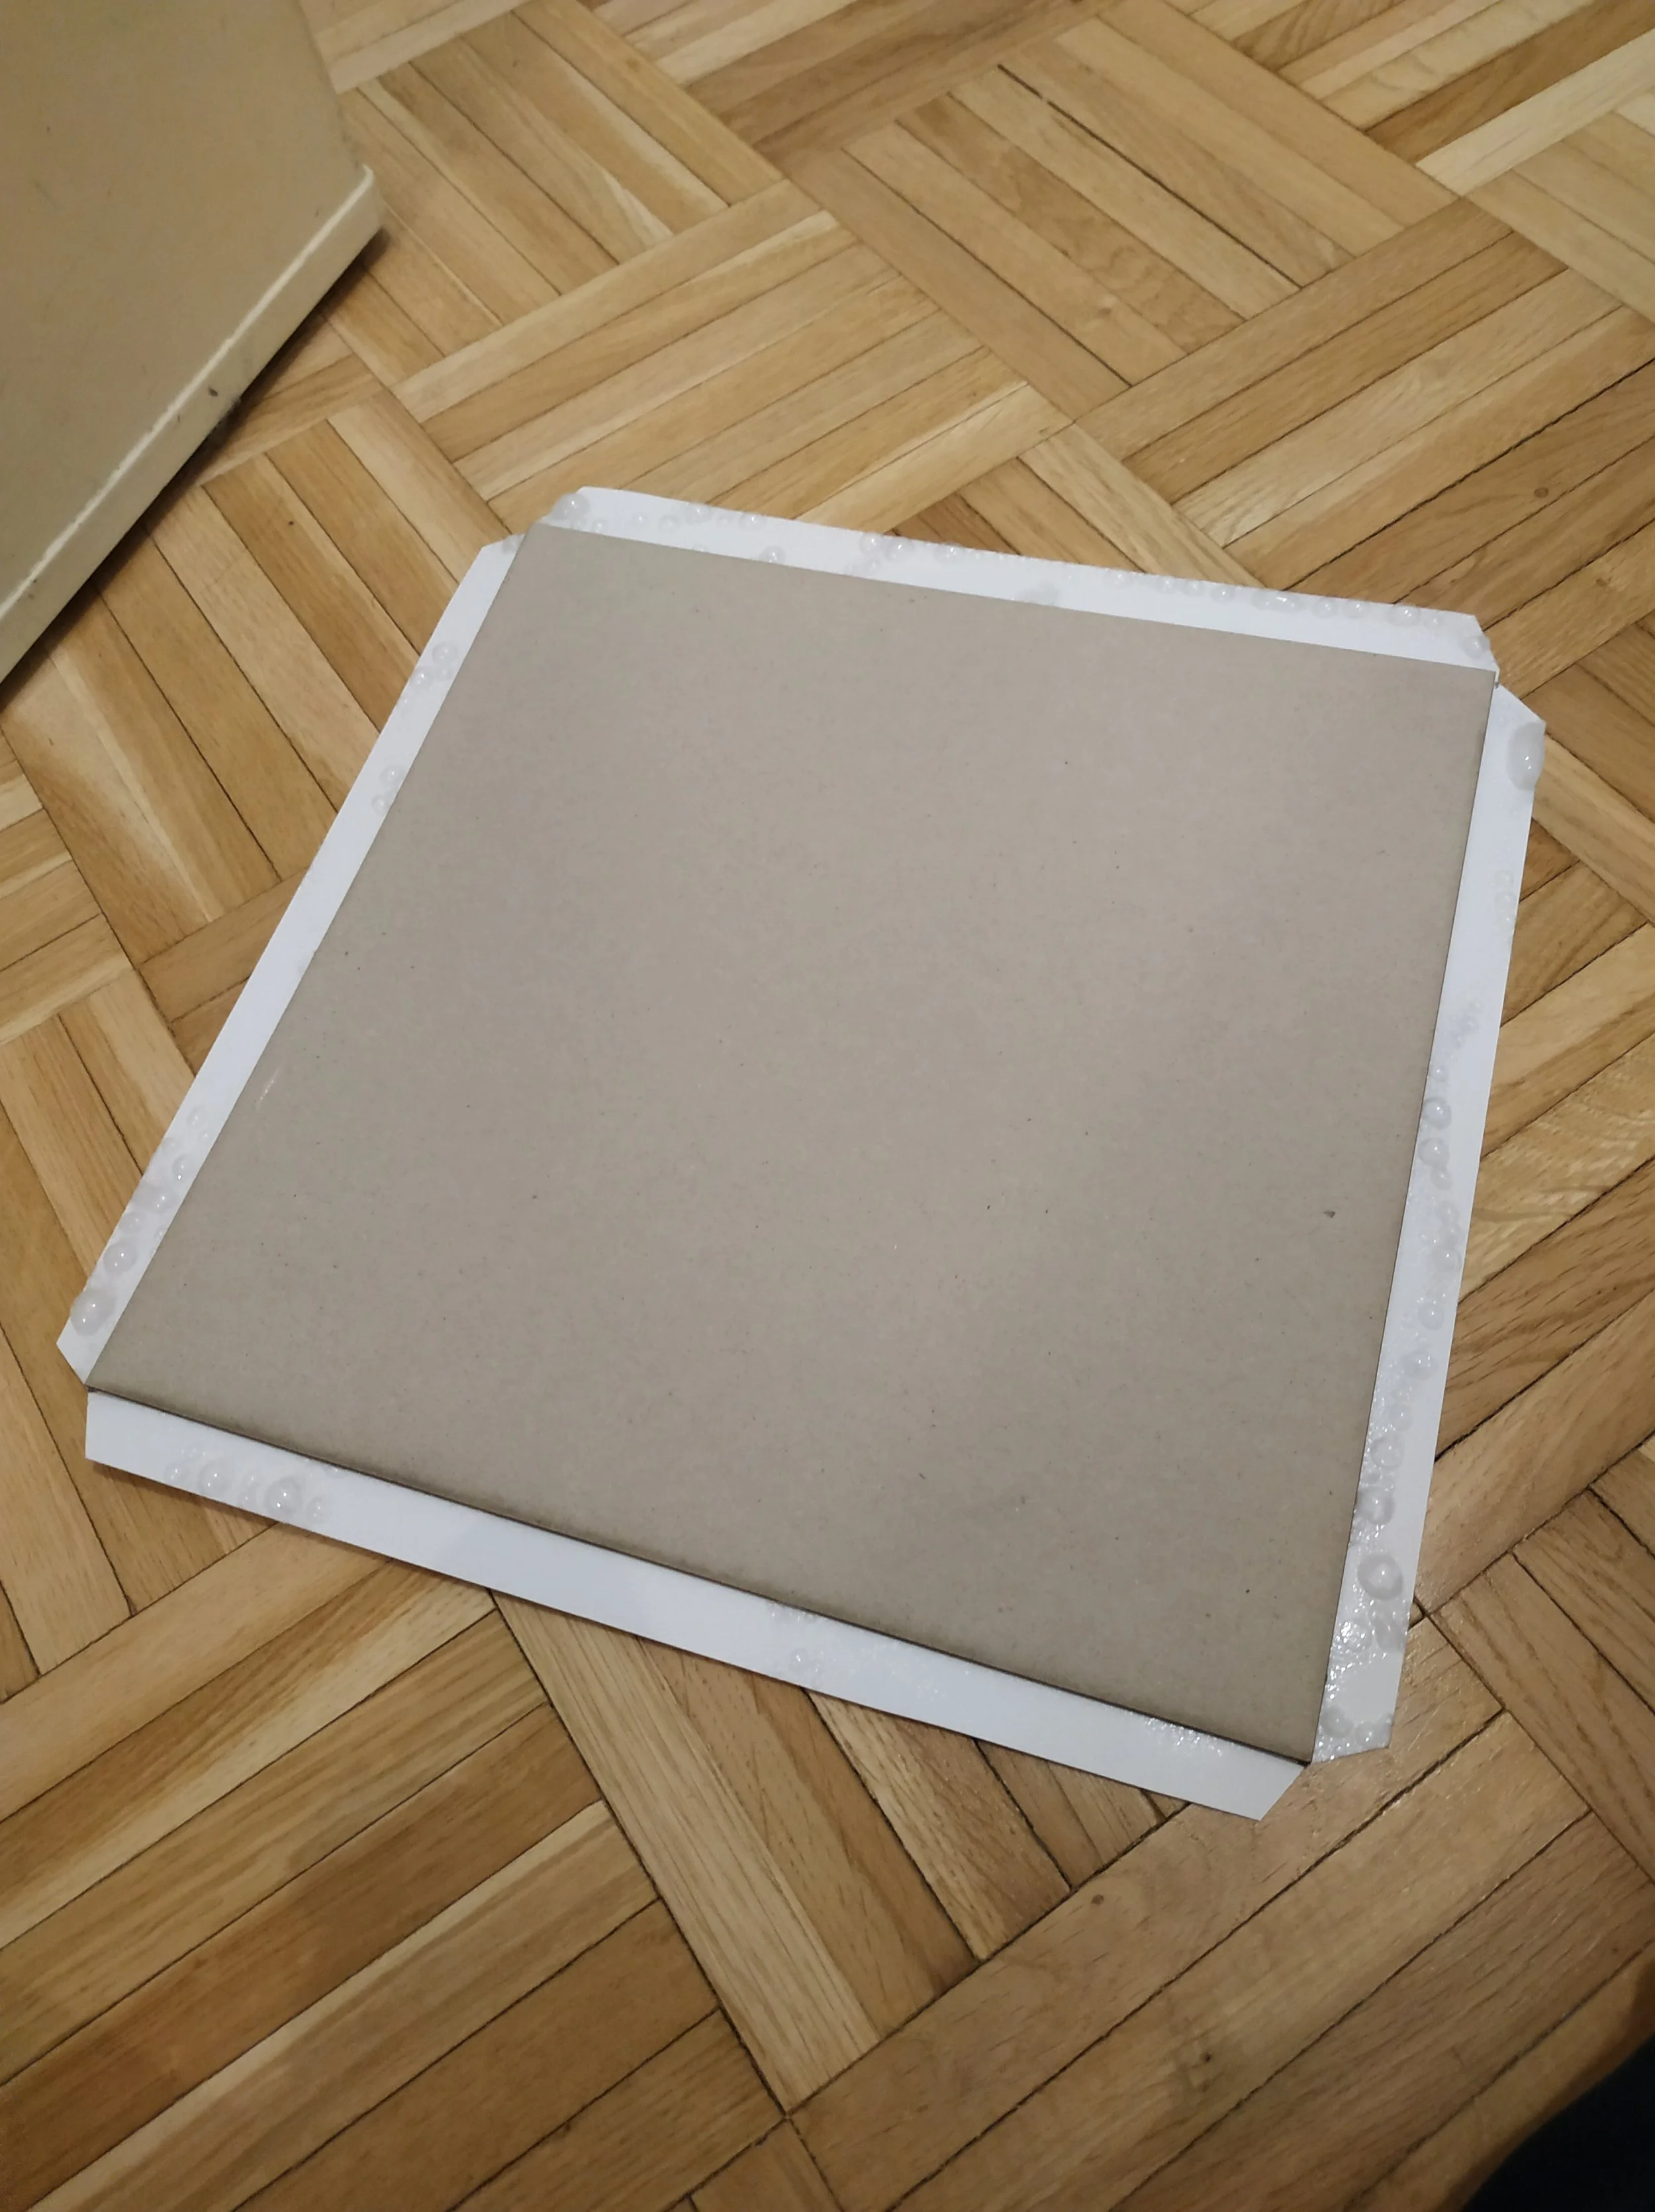
I sprayed the back of the prints with spray adhesive again and carefully glued the first cardboard piece in place. Then I aligned the next piece along the correct edge, glued it down, and let it dry. After that, I glued the next print over it. For later prototypes, I switched to bookbinding glue, and both the process and the results were much better.
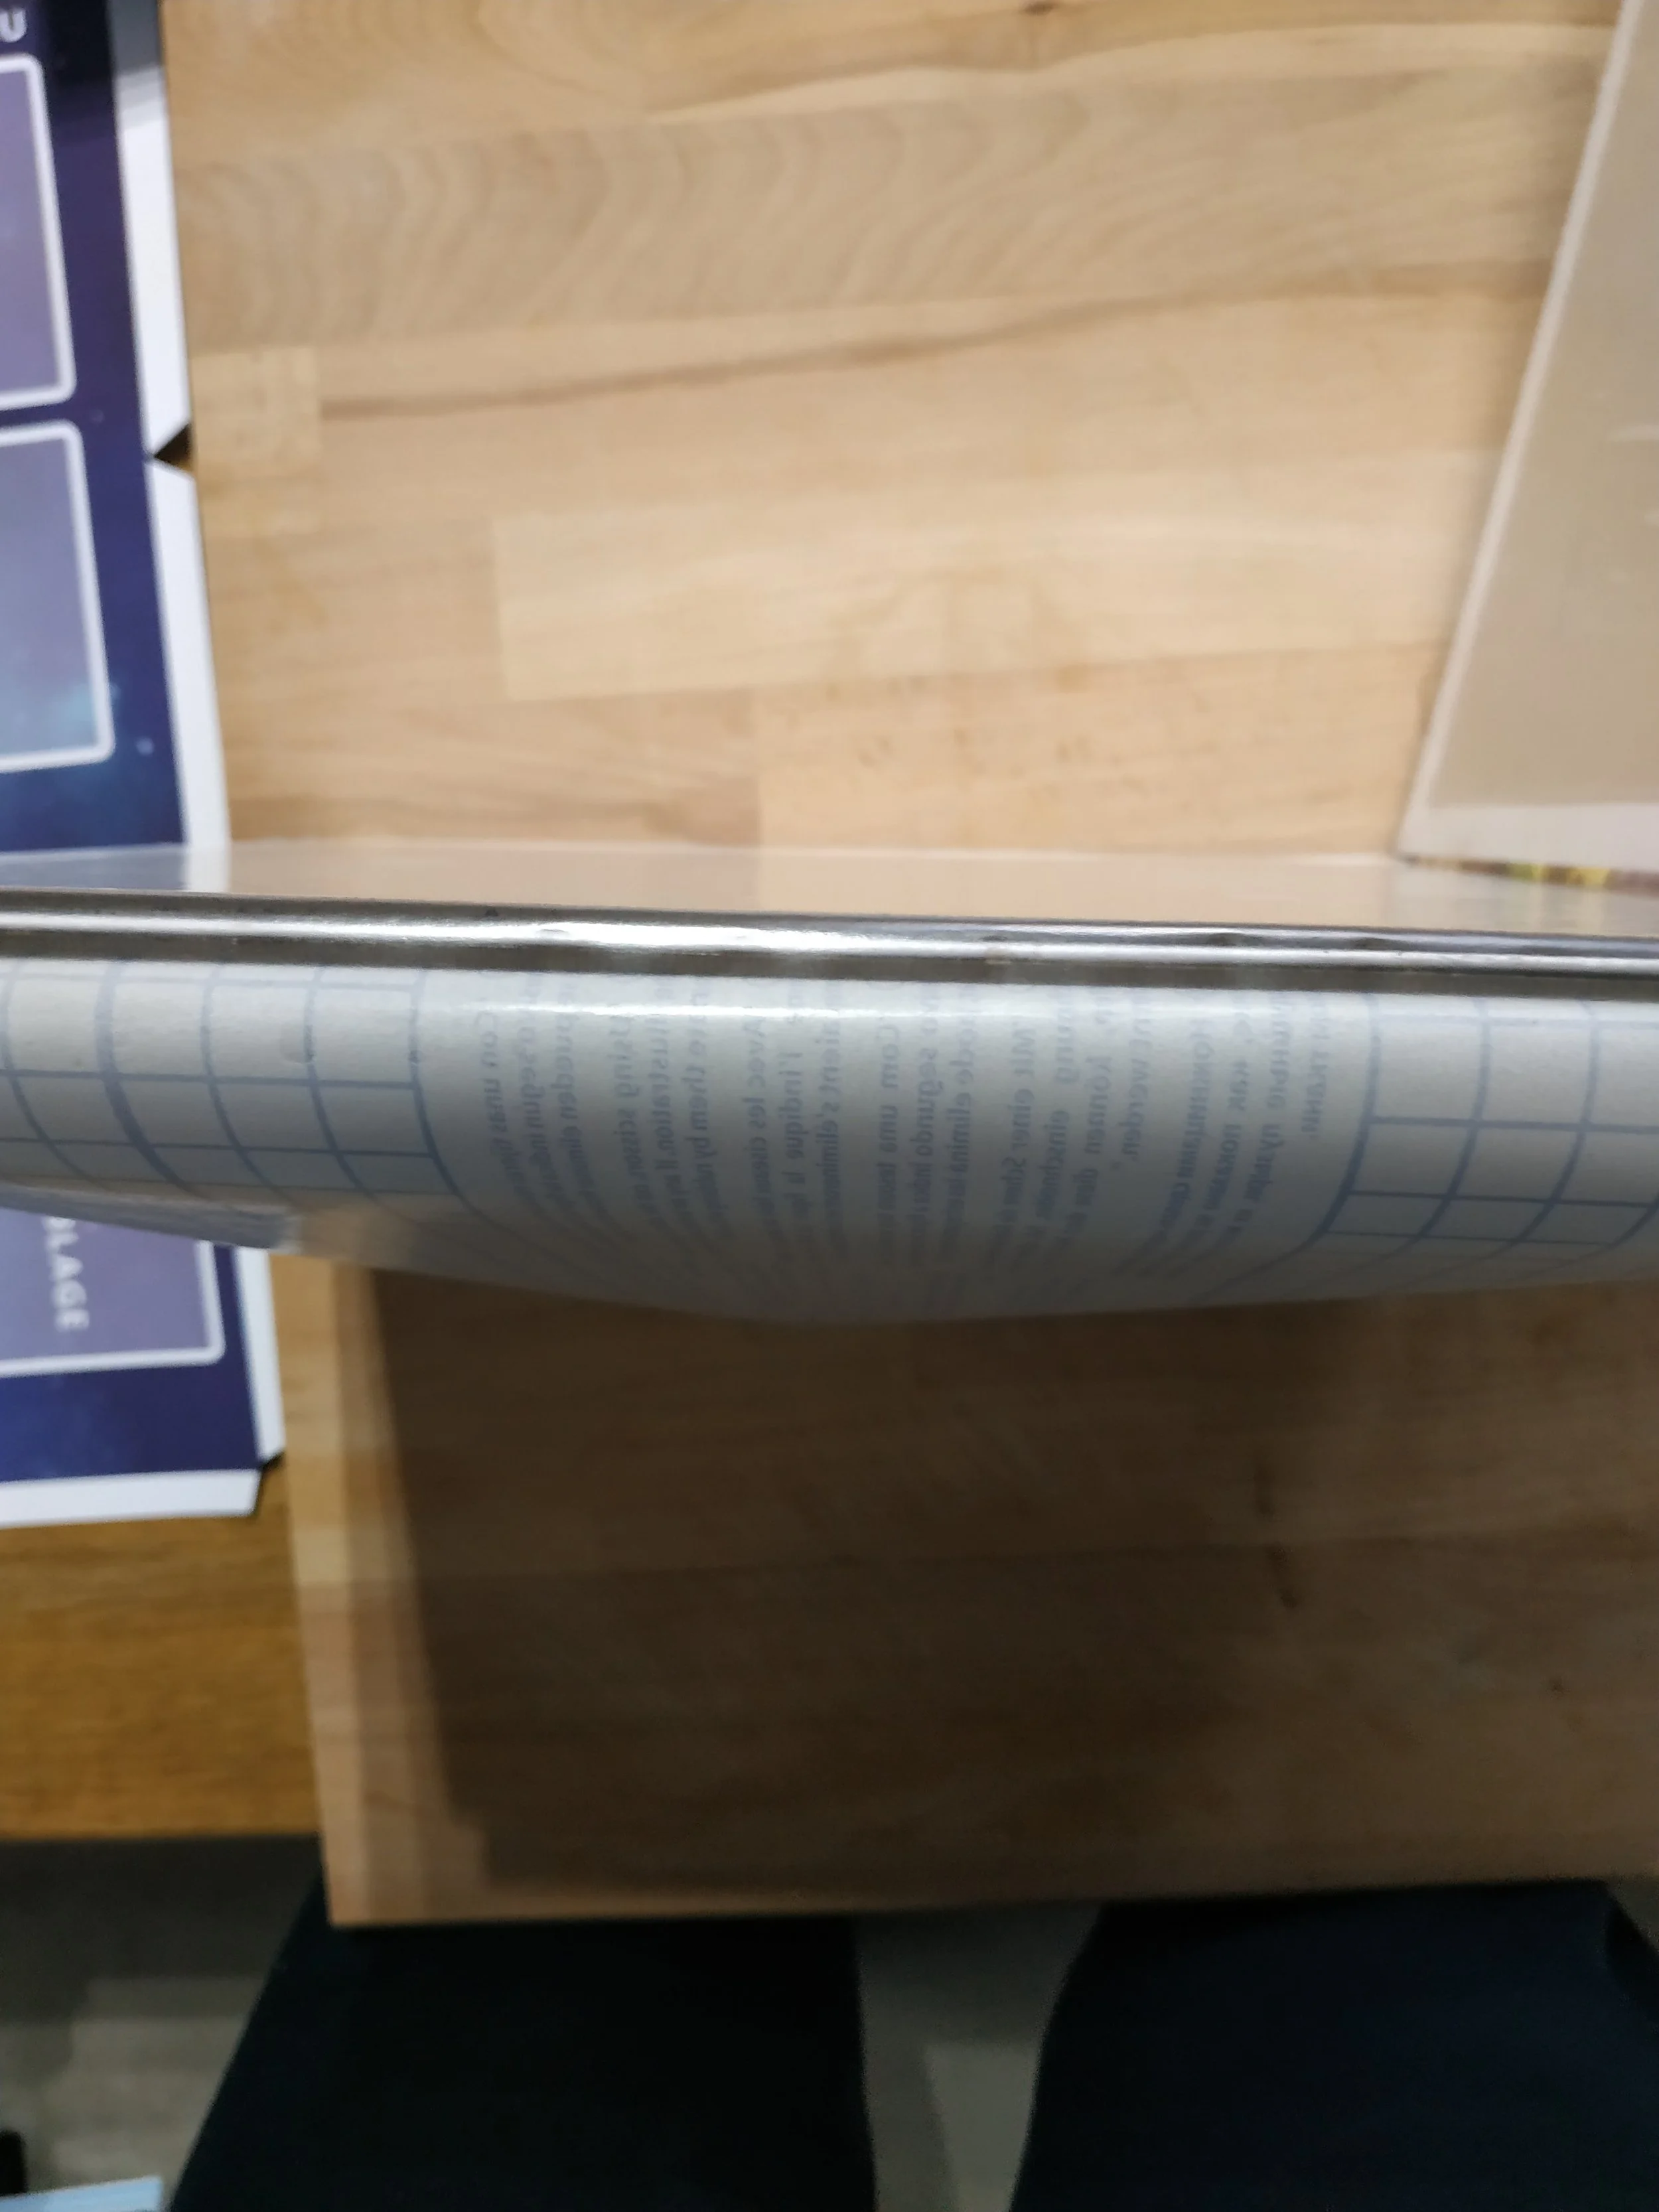
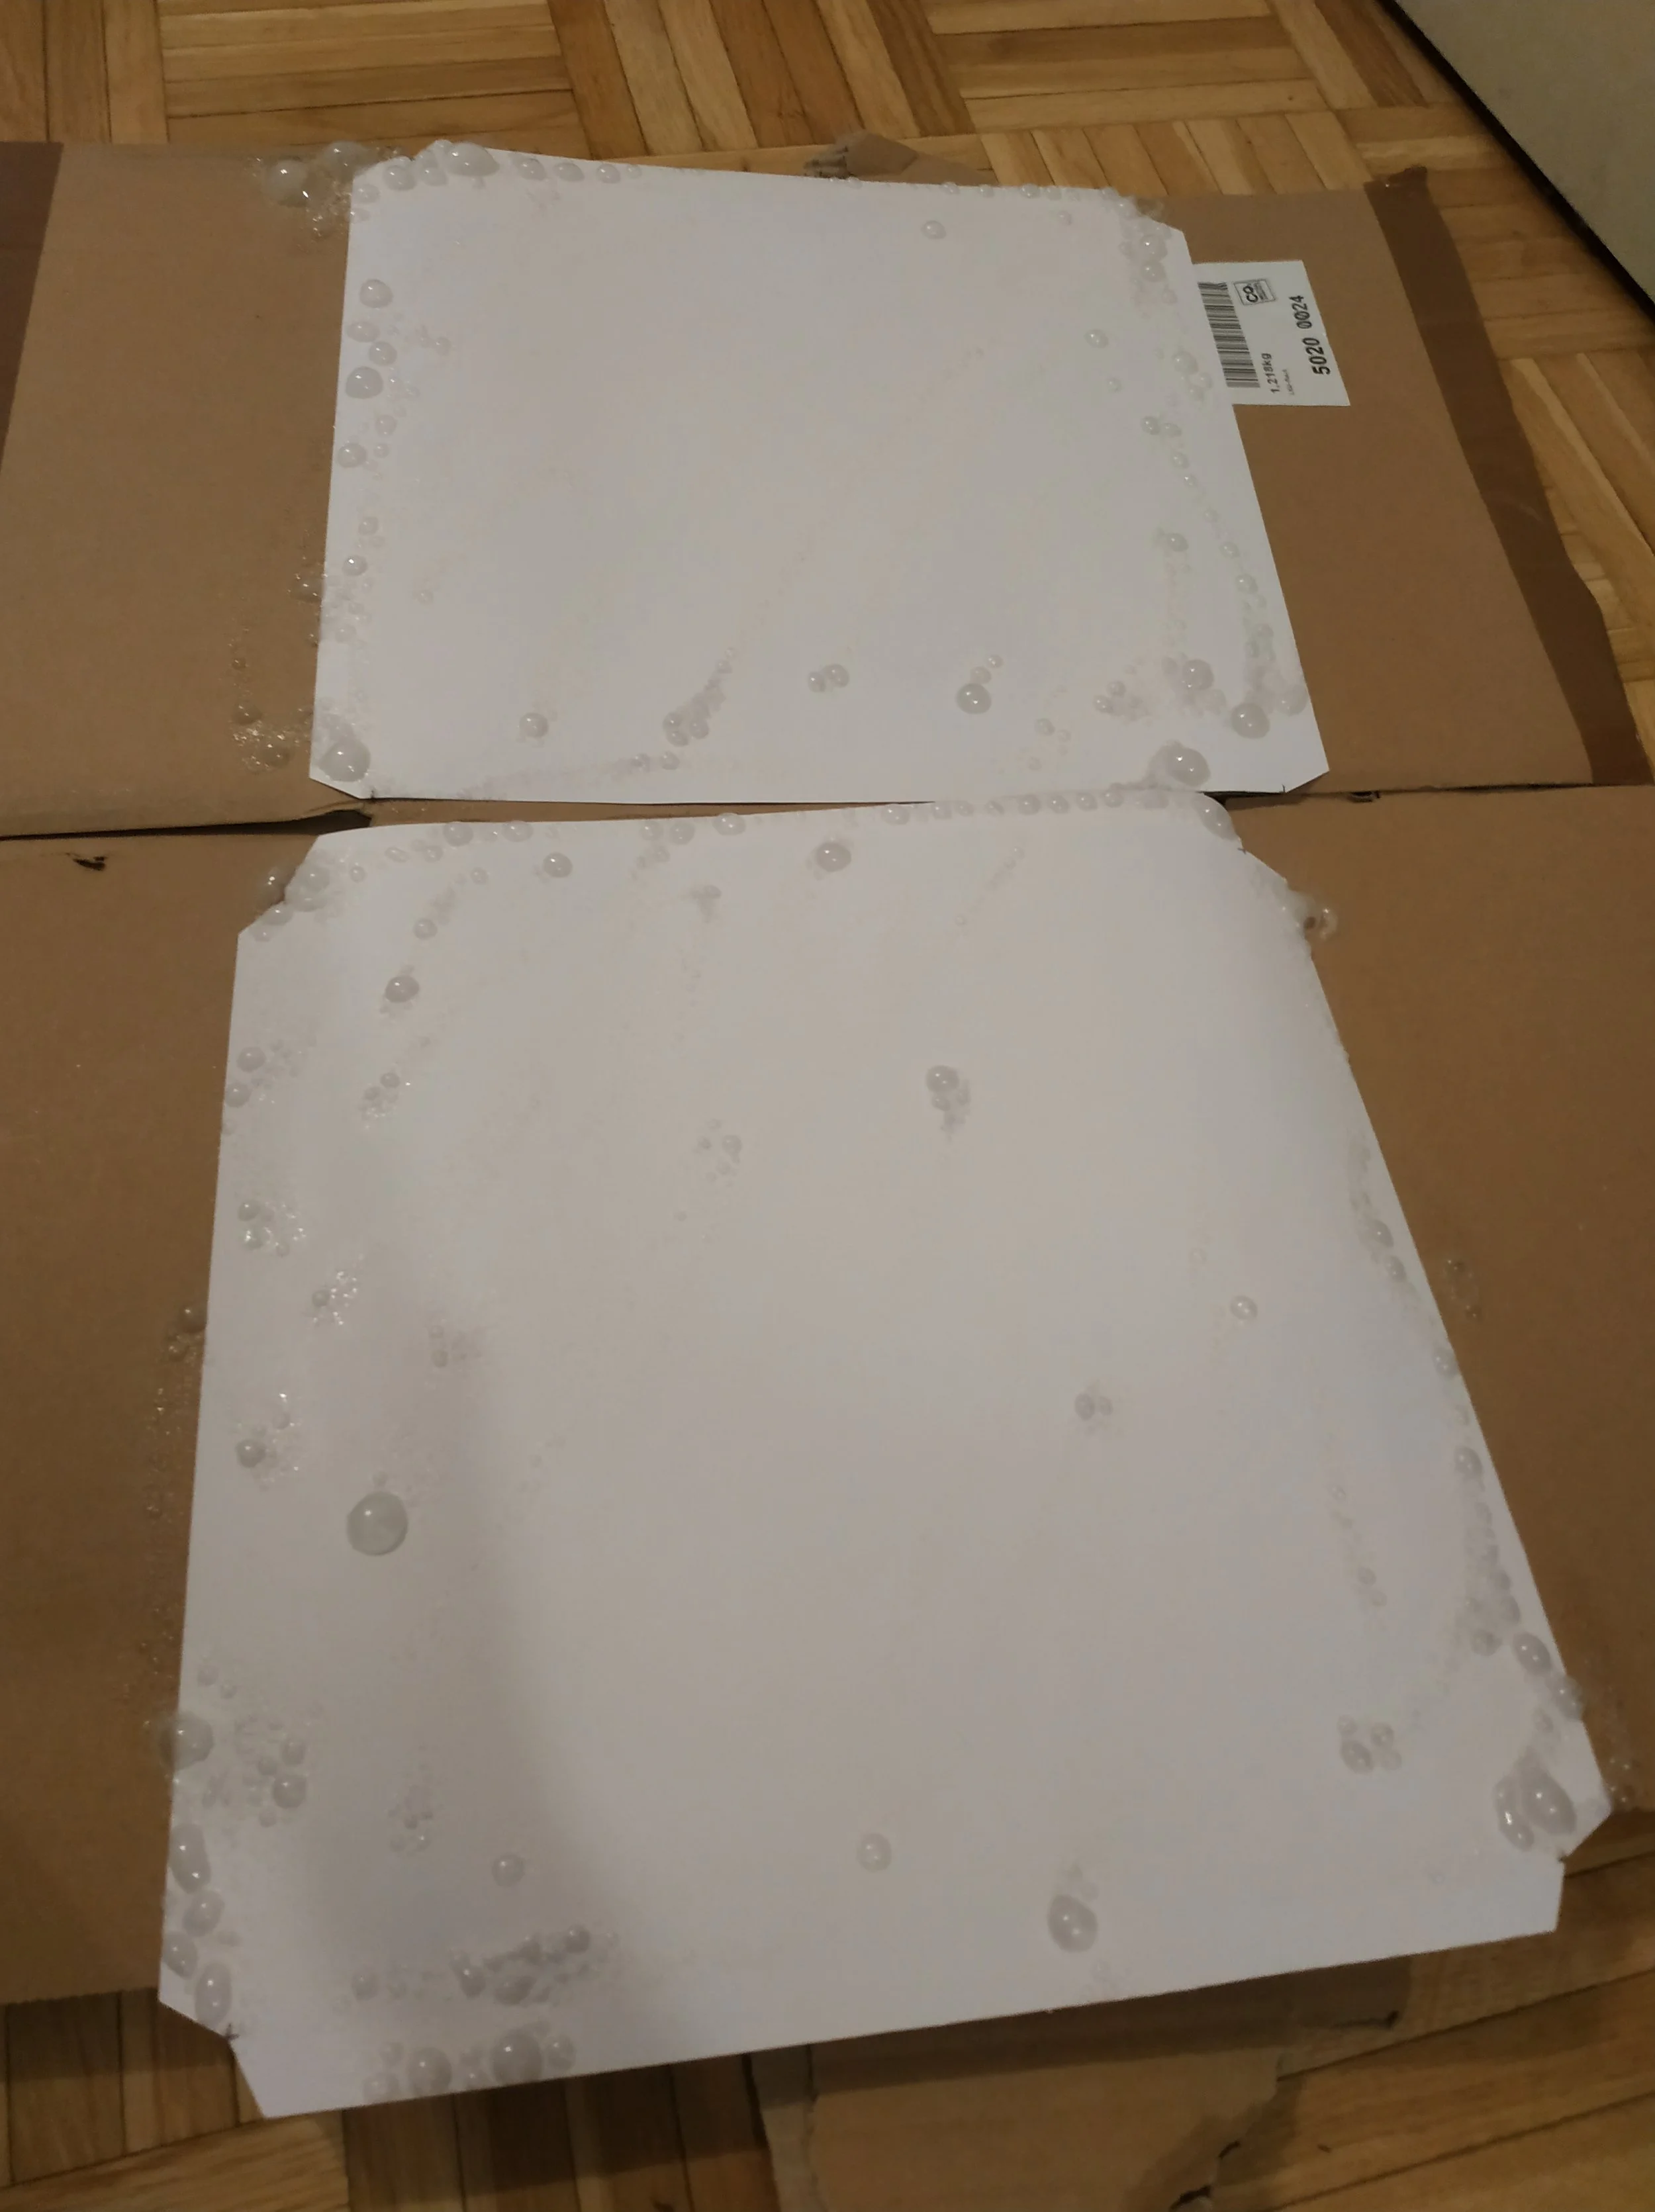
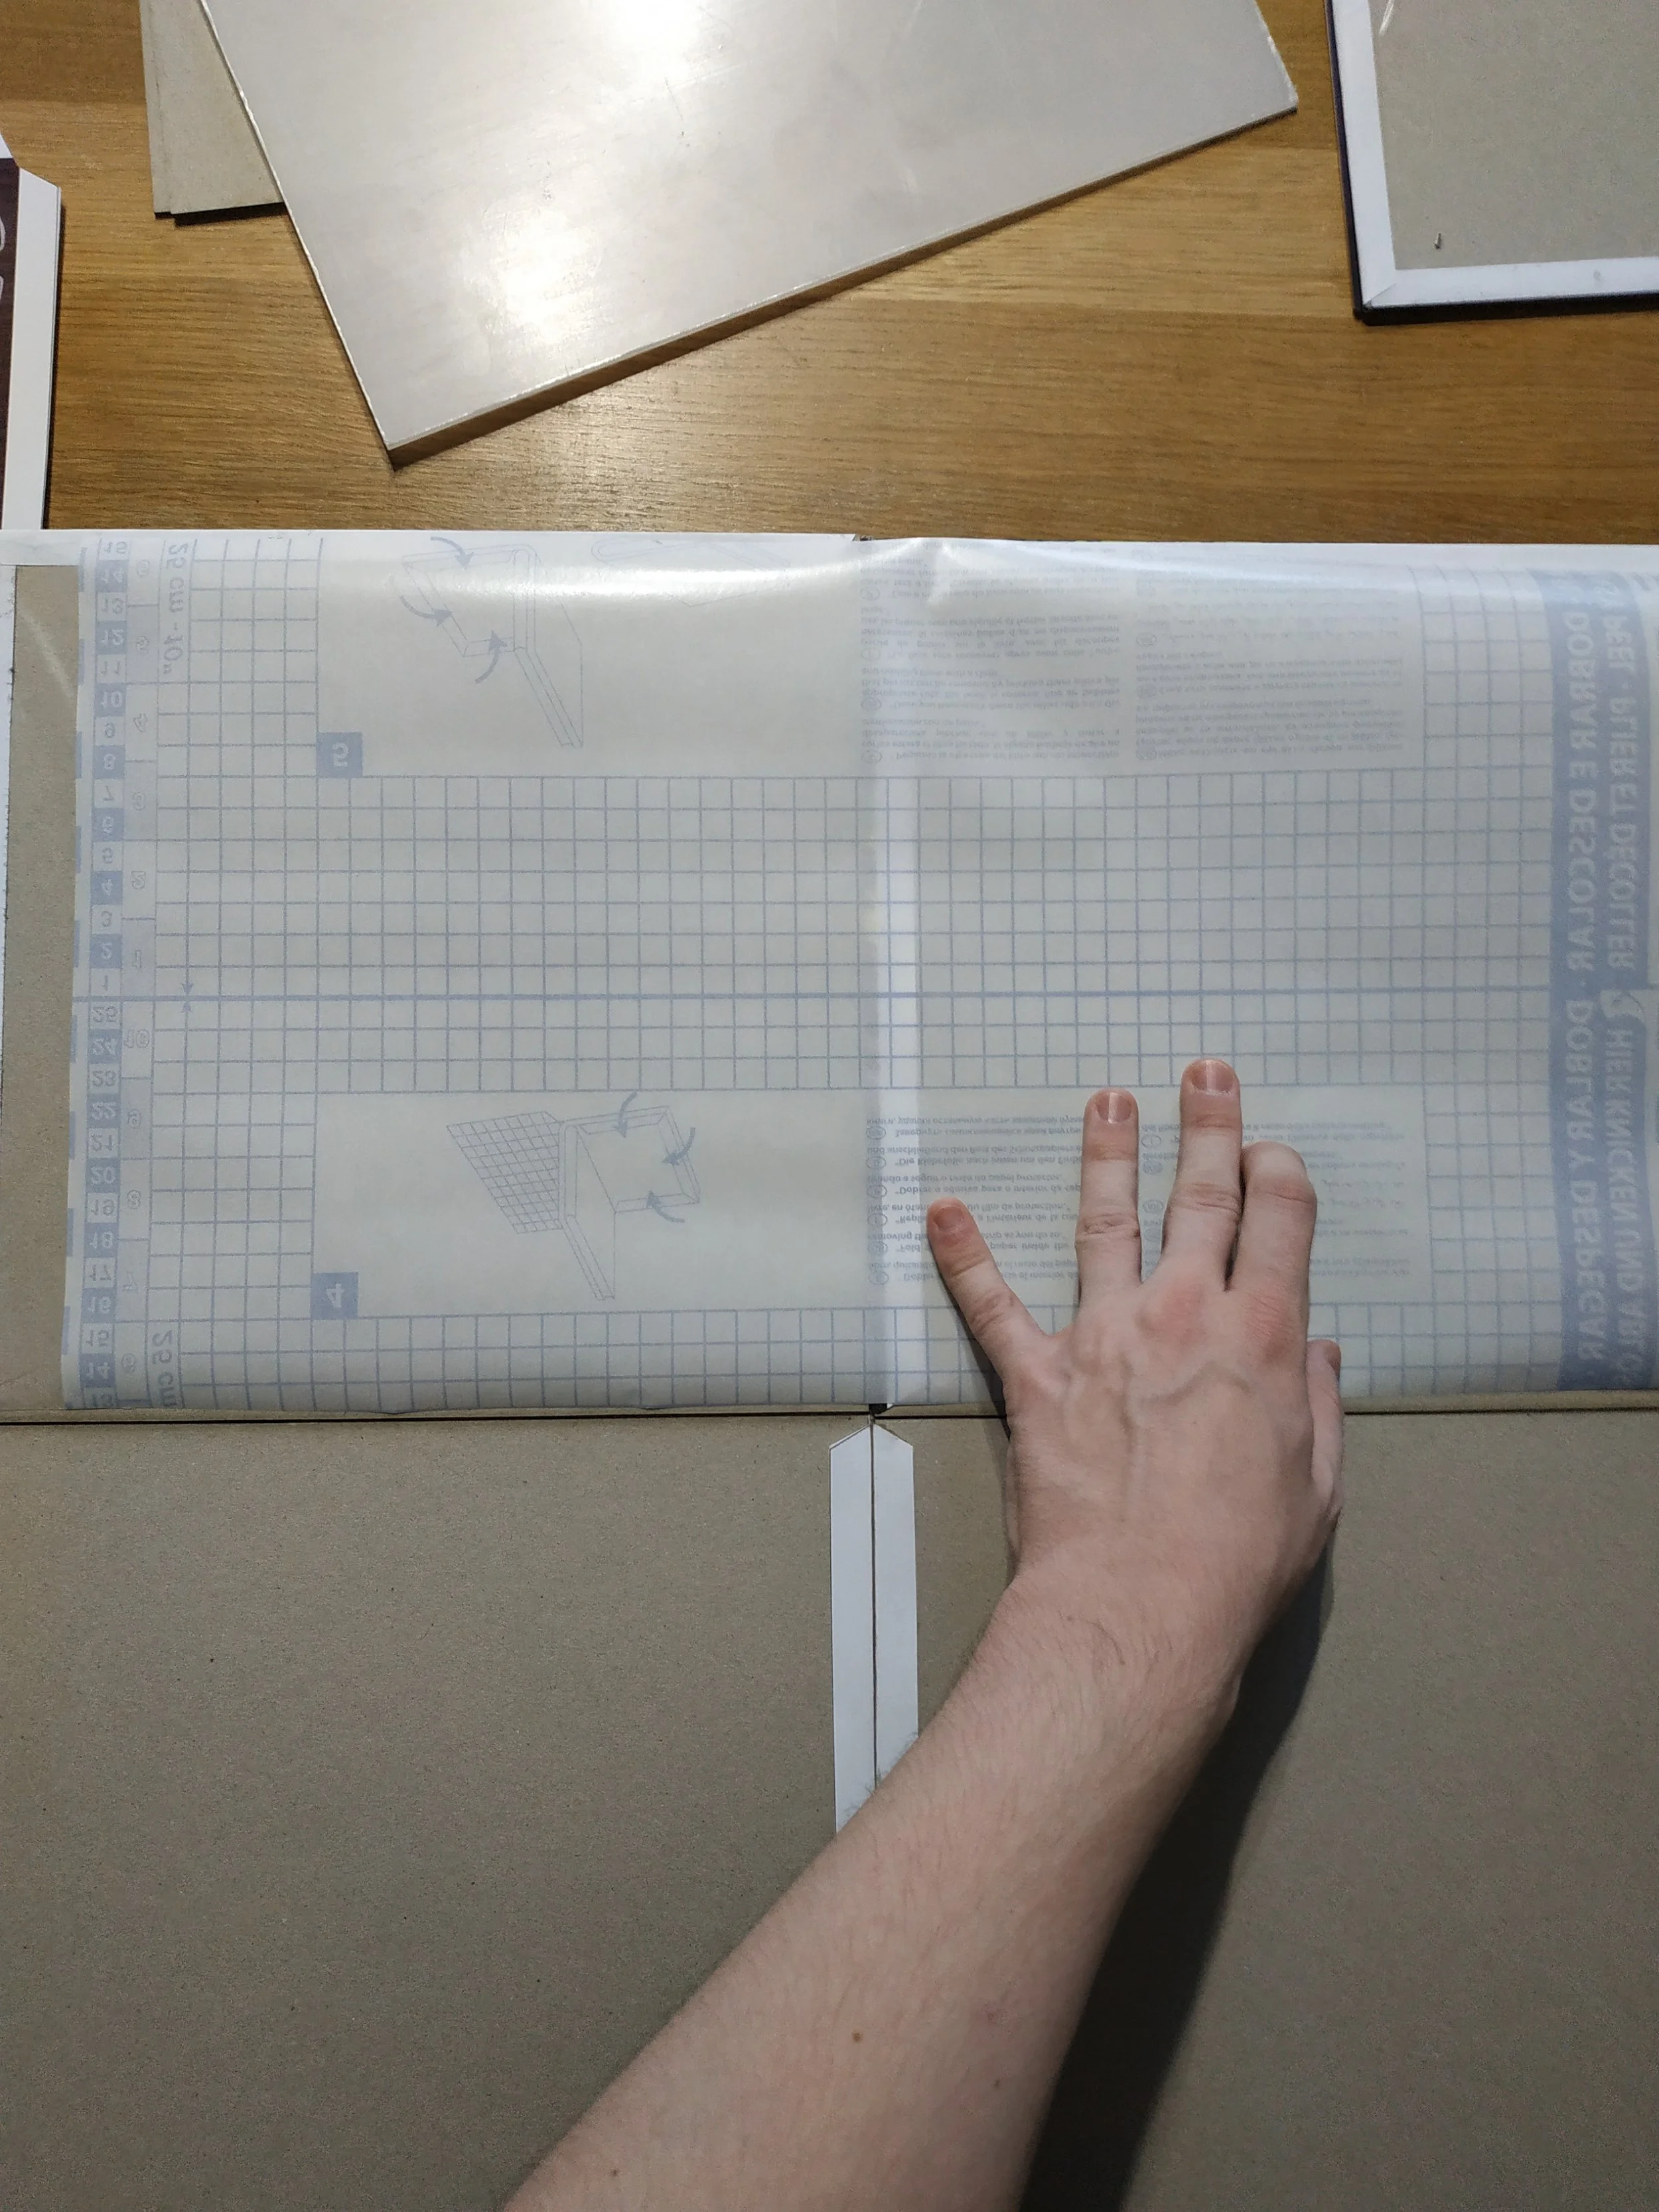
On the back, I reinforced the board with book-cover film. This strengthens the folding edges and also supports the edge that folds in the opposite direction. Otherwise, the board wouldn’t hold together. It’s important to glue the edges correctly — if a section is meant to fold, the film must be glued across the fold (see image 3).
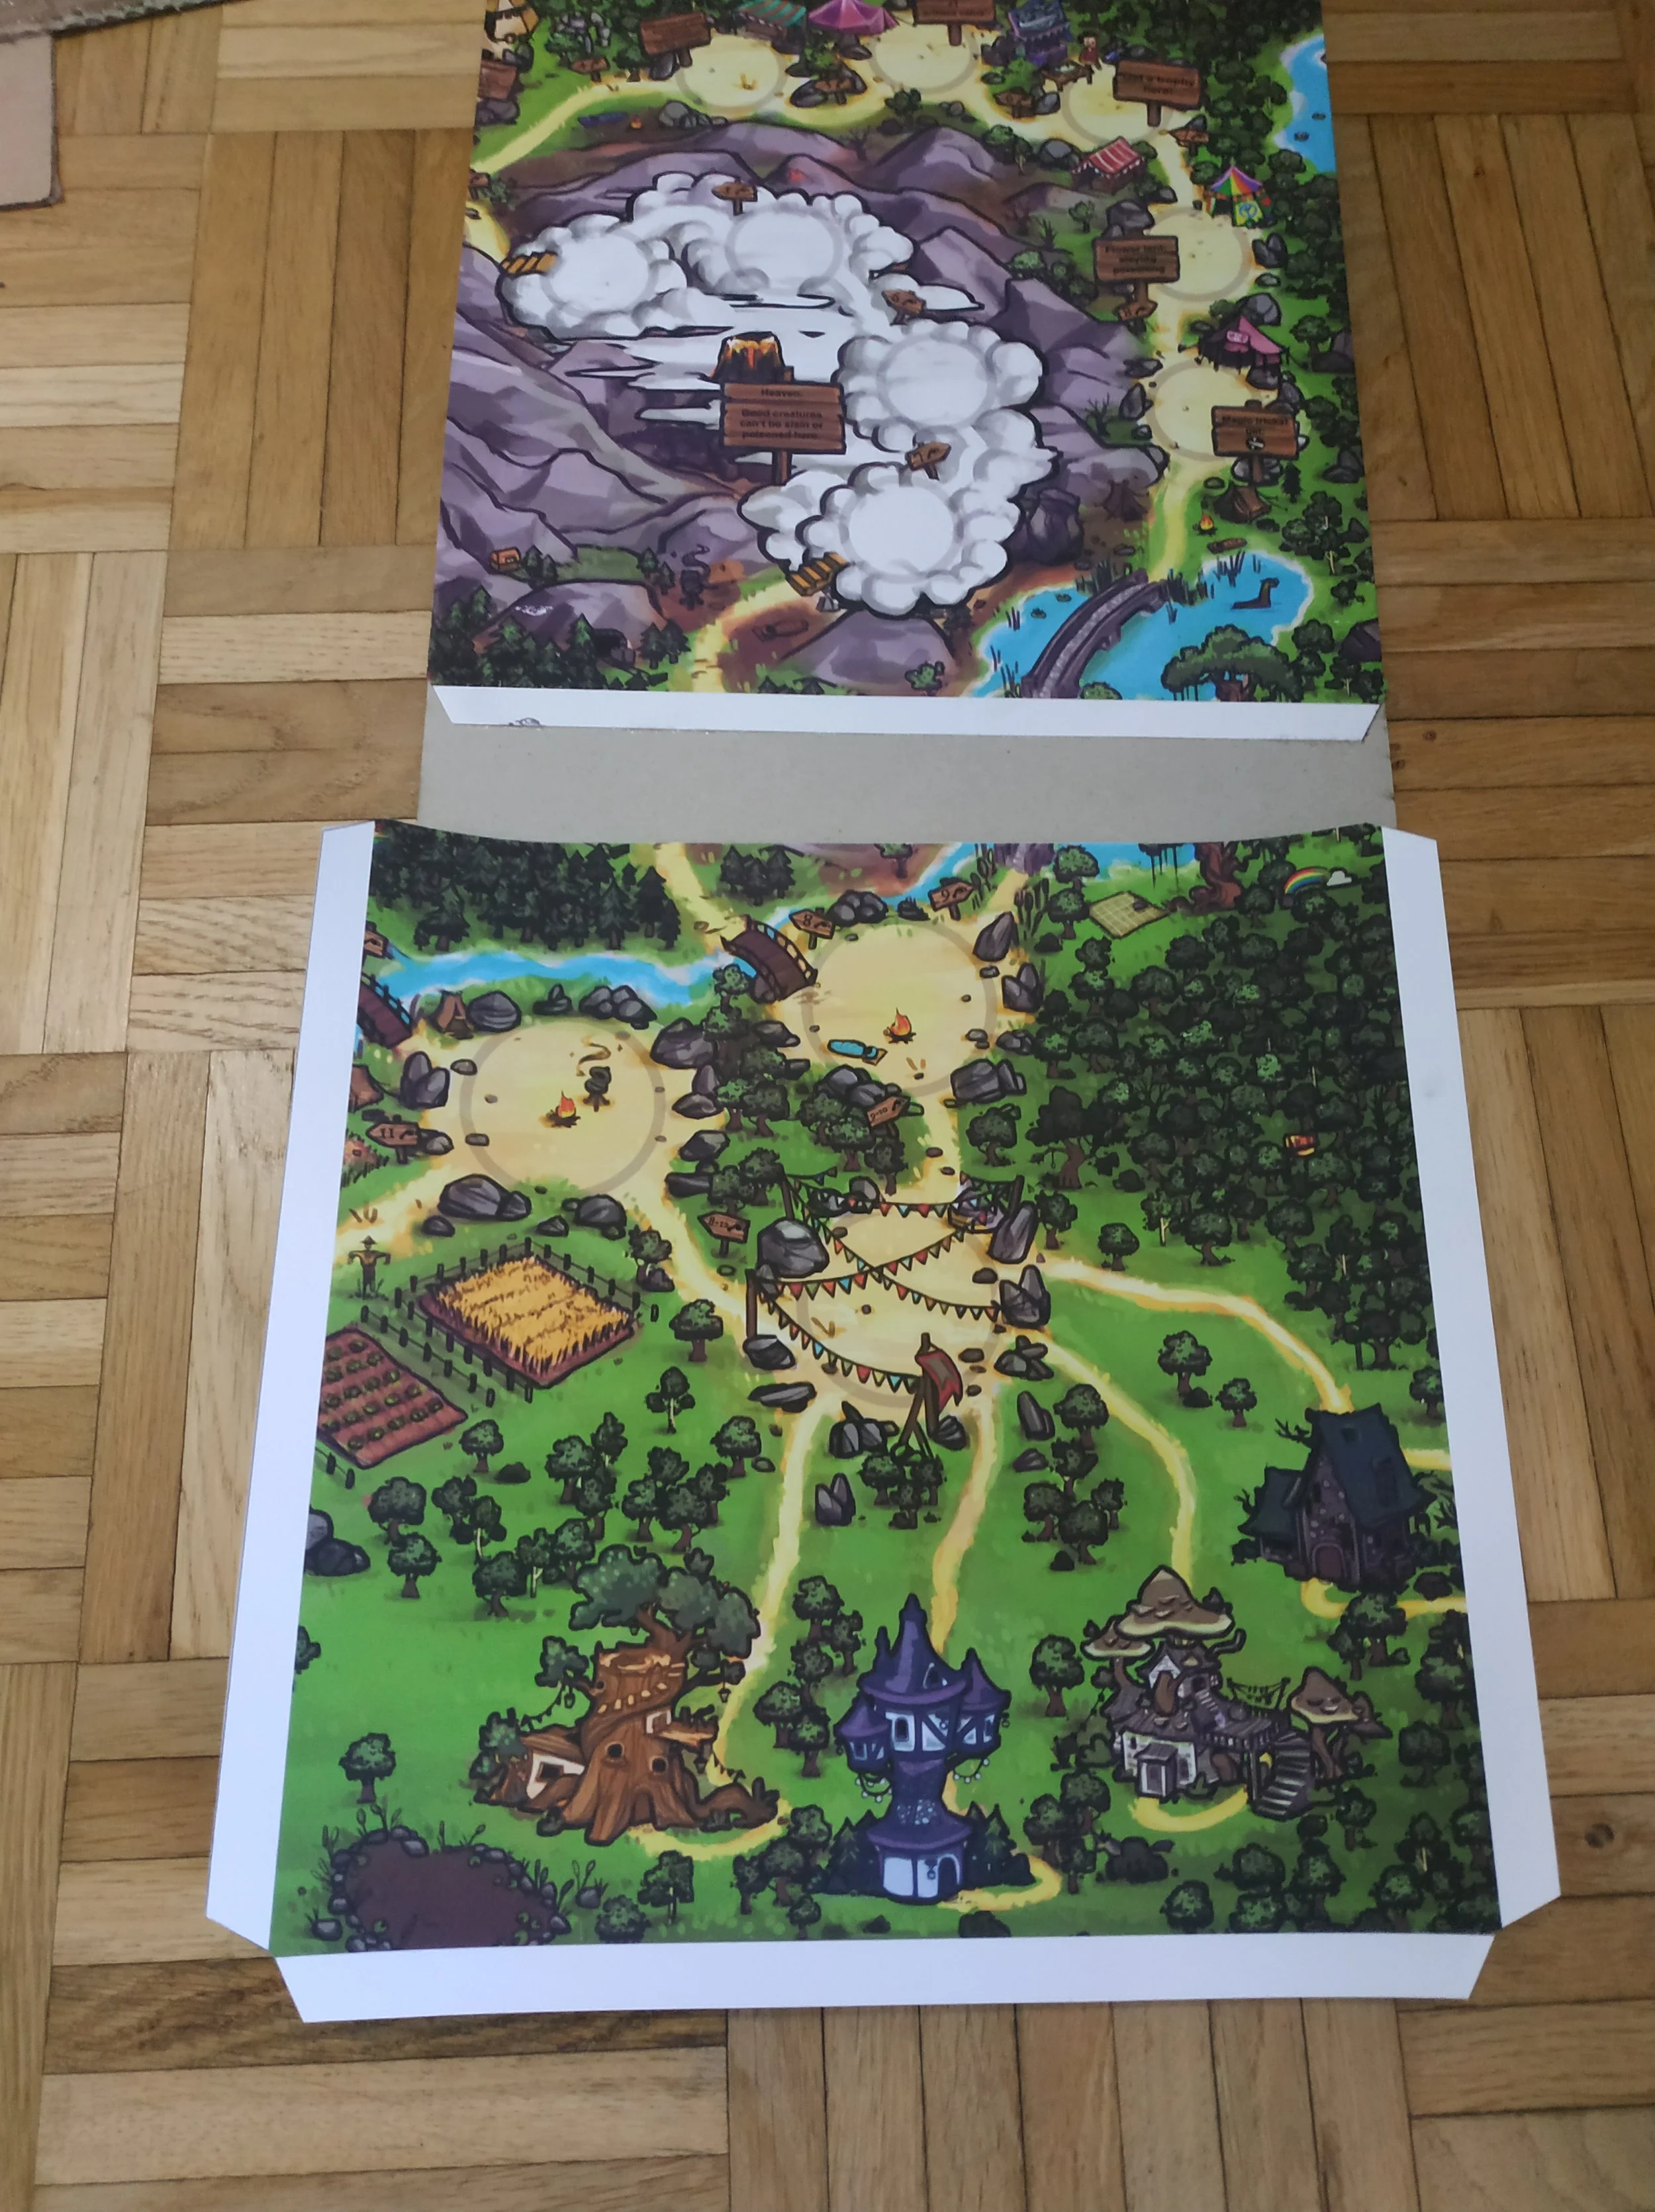
Overall, I’m very happy with the result. If you look closely, you can tell the board is handmade, but it looks good, is sturdy, and feels nice. You get a reliable impression of the material, which was the whole point.
I’m sure you can think of other ways to build a game board like
26 - When You Want the Prototype to Look Pretty … (Part 3: The Box)
26 - When You Want the Prototype to Look Pretty … (Part 3: The Box)
Crafting a nice box is definitely more difficult than cutting out playing cards. But once you finally hold it in your hands, it’s an amazing feeling.
Usually, a game box is made by gluing printed paper onto cardboard. As mentioned in the first part of this series, I used 160 g poster paper for this. Slightly heavier paper is important because the corners of the box are held together only by the glued paper. The lid should be larger than the bottom. With 2 mm cardboard plus 160 g paper, I added a total of 7 mm to the lid’s dimensions.
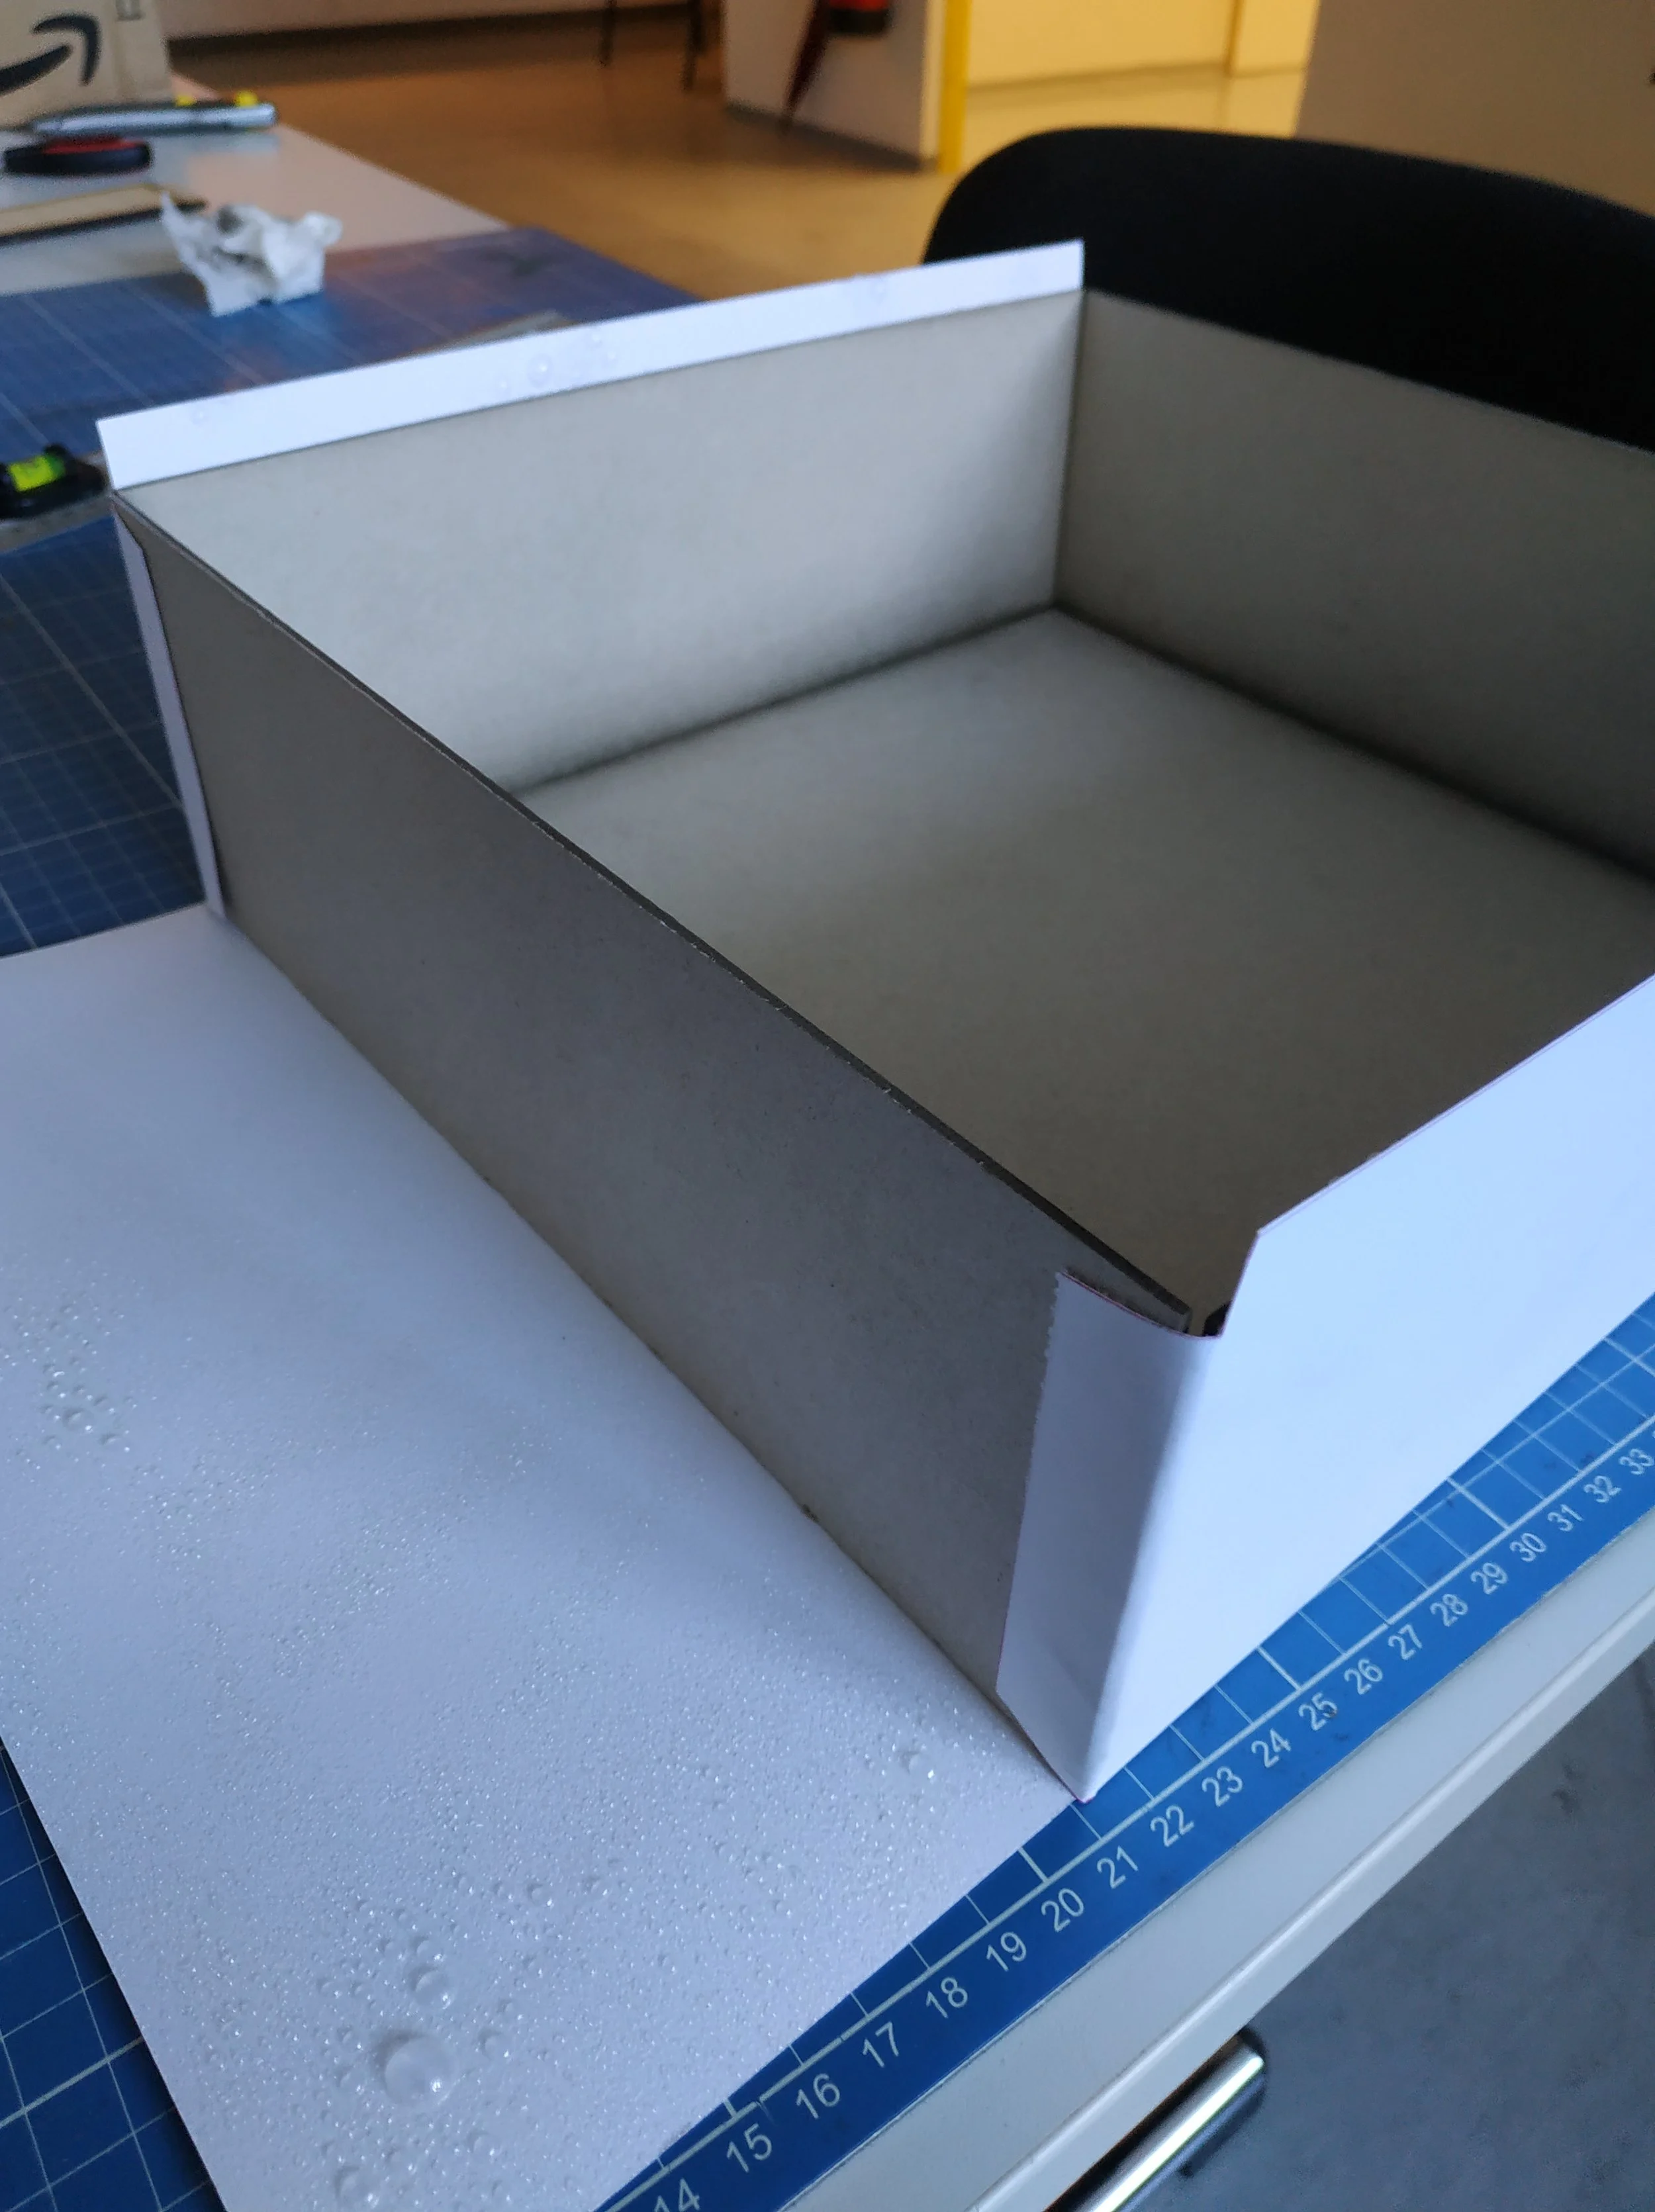
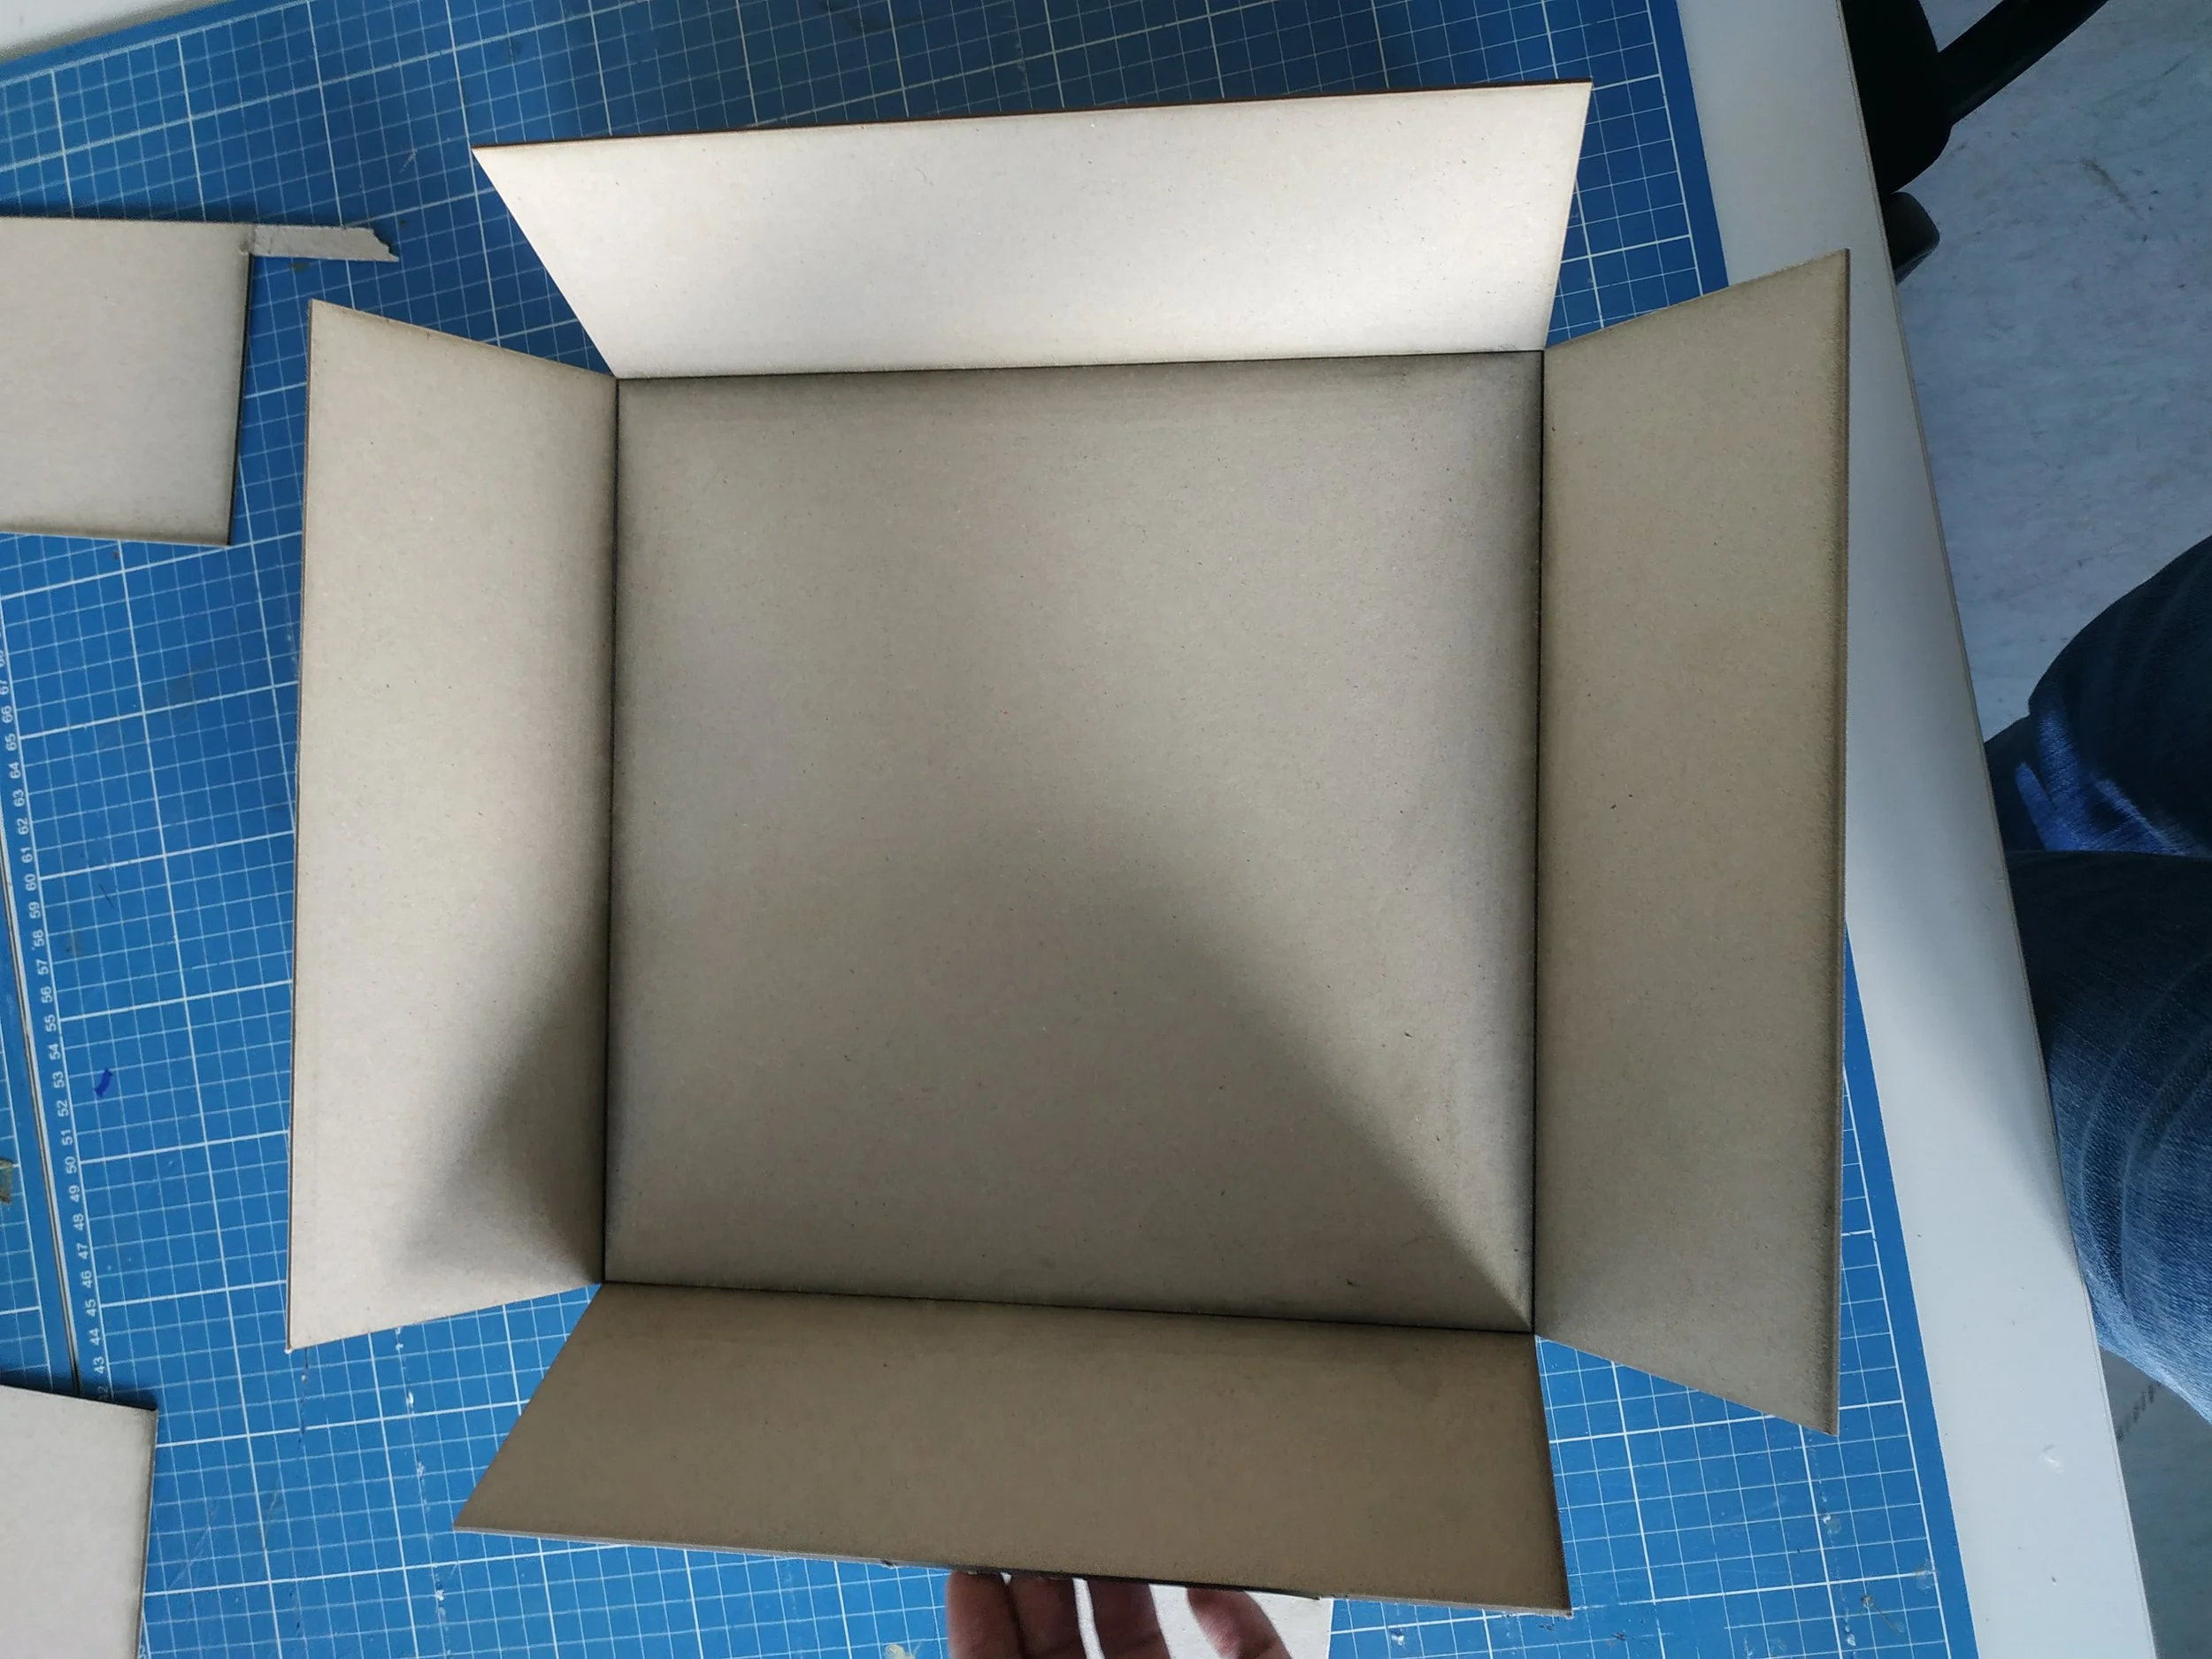

I use 2 mm greyboard. I cut the cardboard using a laser cutter at an open workshop in Salzburg. Along the fold lines, I lightly engraved the material so the board could be bent 90°. Of course, I know not everyone has access to a laser cutter. The cardboard can also be cut with a sharp knife. The box flaps can be cut out and glued manually as well — the paper will hold the flaps together.
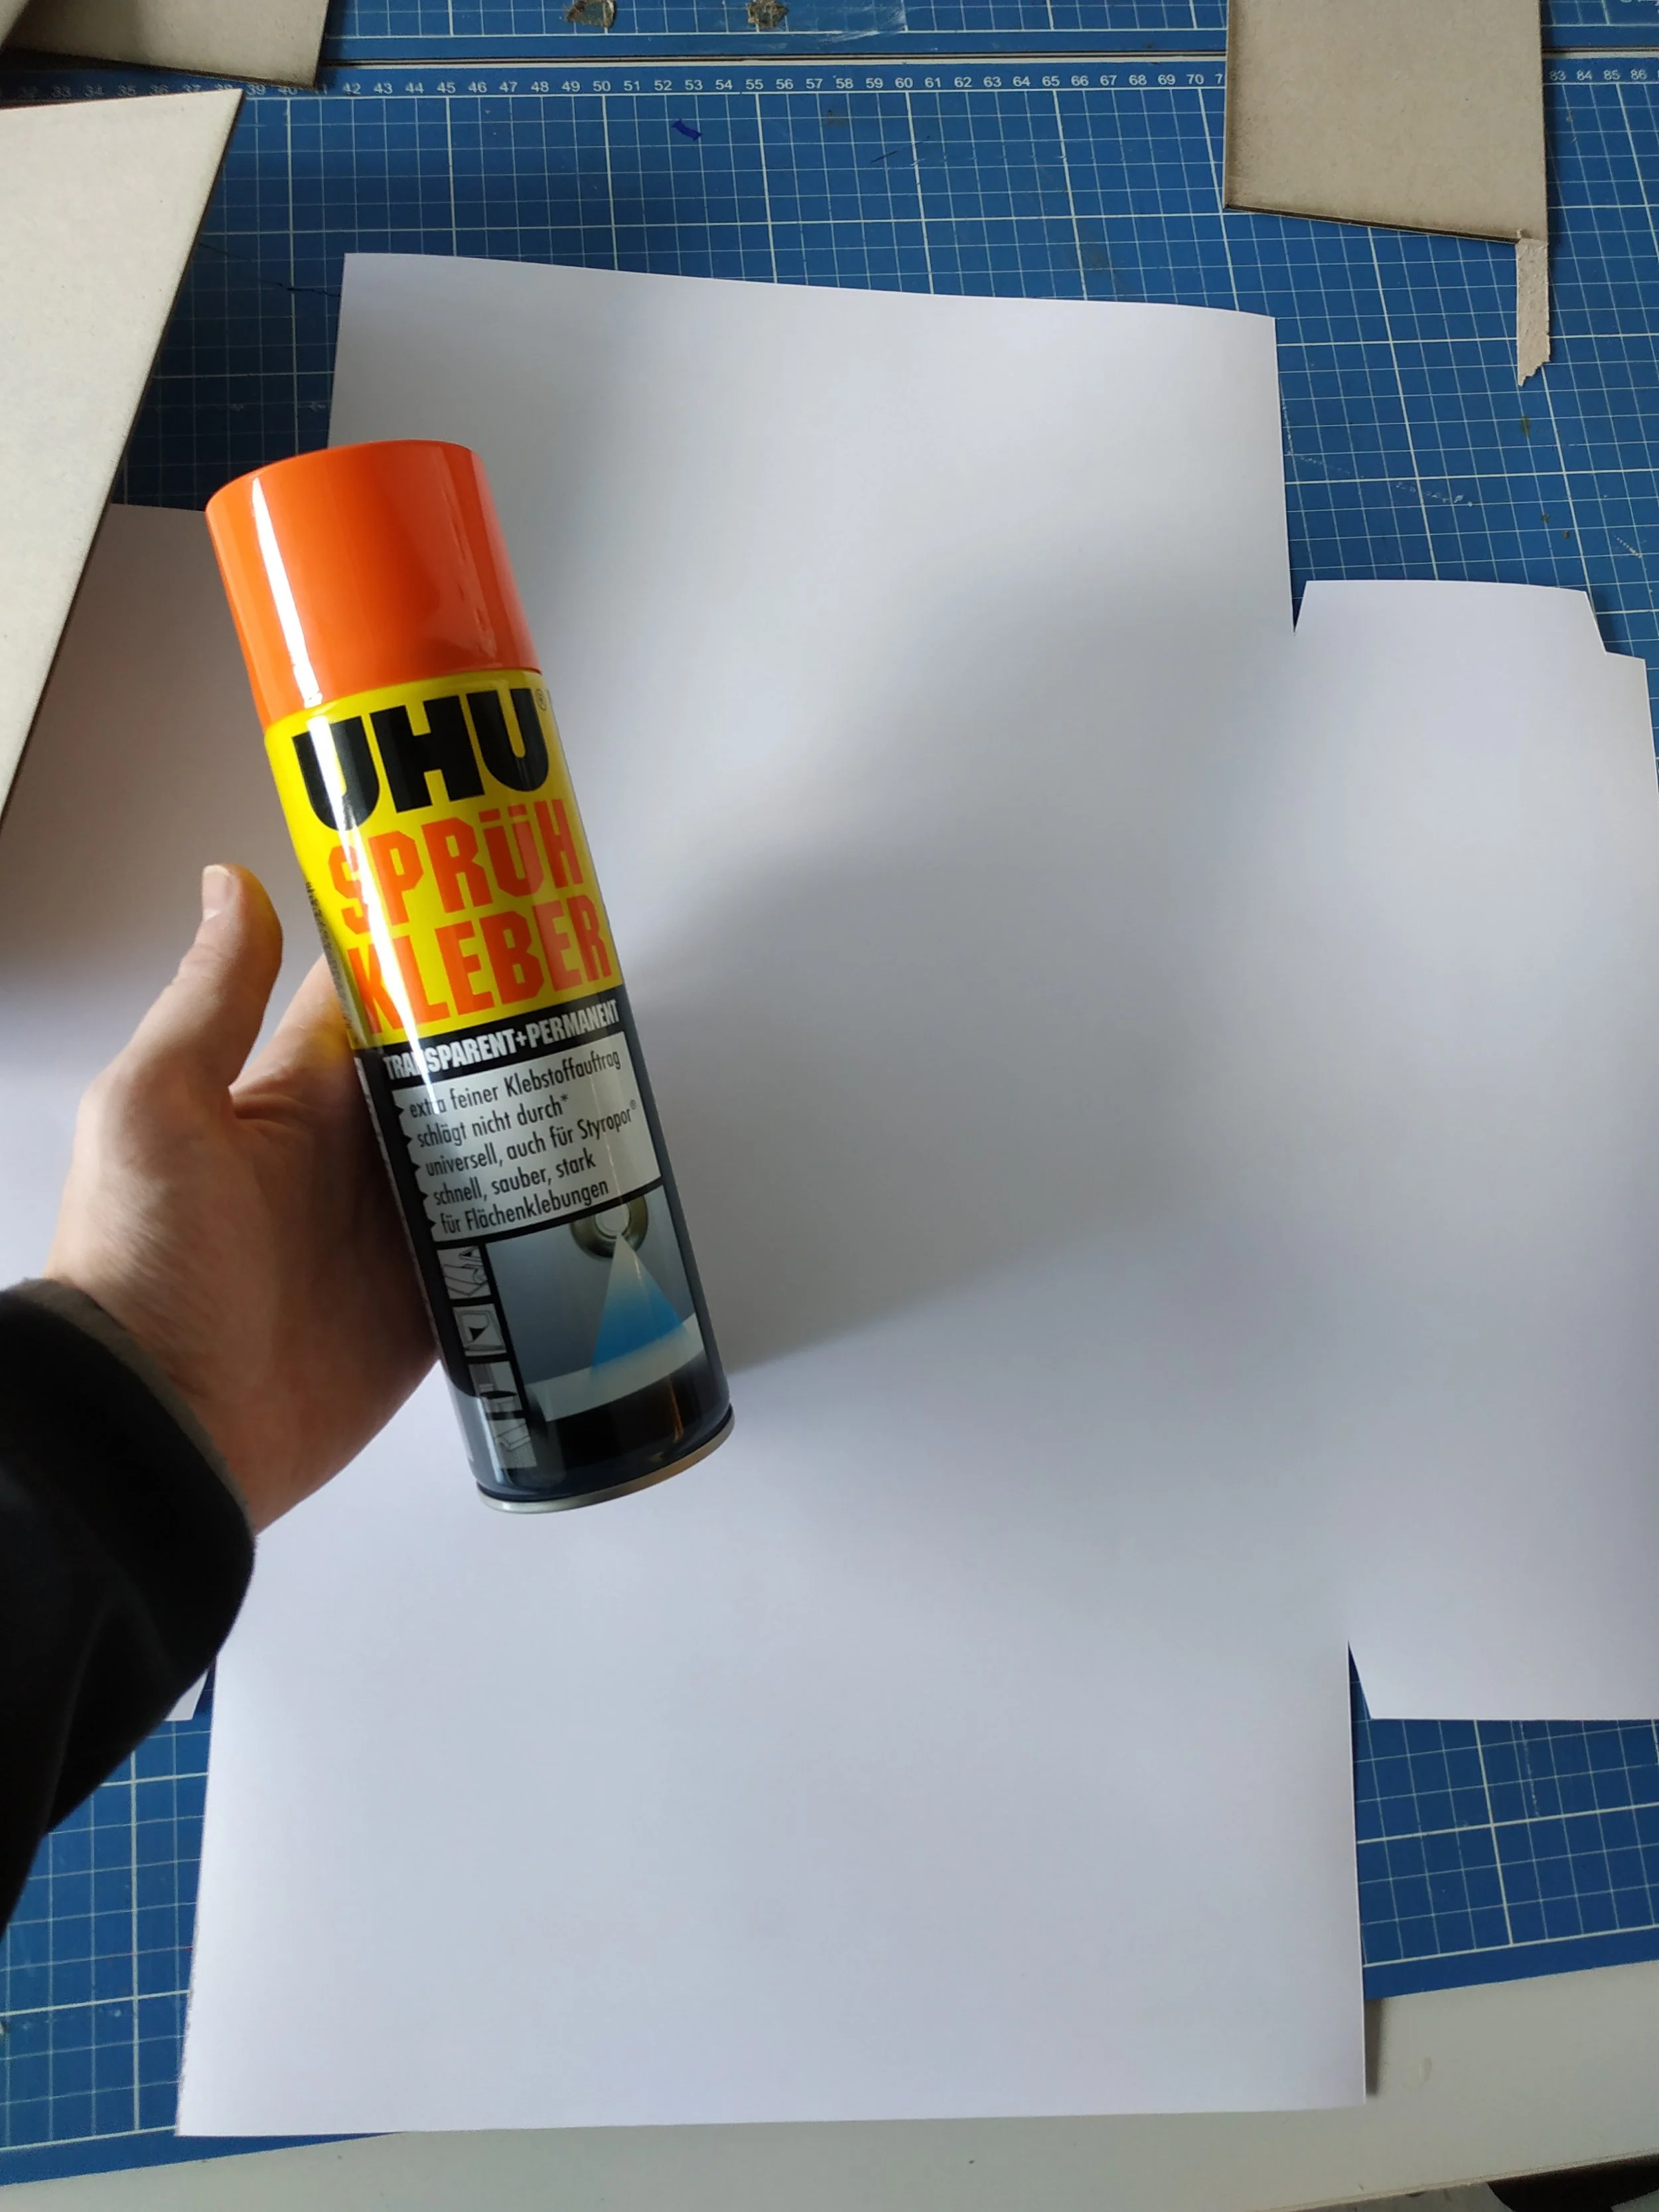
I sprayed the back of the cover paper with spray adhesive, placed the cardboard in the center, and pressed it down firmly. I used the corners of the cardboard as alignment points. You need to be careful here, because not all flaps should touch the glued paper immediately. First, press down the sides where the corner‑flaps are attached. These corner‑flaps should be glued to the adjacent sides at a 90° angle before being glued down under the outer paper layer. After that, the sides should be pressed well and left to dry.
I’m very happy with how the box turned out, but spray adhesive is not pleasant to work with. You have to be careful not to get glue residue on the print, and it takes a long time to dry. Spray adhesive is also not ideal during winter months, since it shouldn’t be used in cold environments. For the remaining eight prototypes I made for shipping, I used bookbinding glue instead. Using bookbinding glue was much more pleasant, and the results were far better. Press once firmly, and the bond holds very quickly. If you ever make your own boxes, I would absolutely recommend bookbinding glue!
I made my special insert for the cardboard standees the same way as the box, but additionally engraved and cut it with the laser cutter. I’m afraid that part would be difficult to do without one. But not everyone needs such an insert. I didn’t pre‑print and cut it because I couldn’t align the print cleanly with the cutouts otherwise.

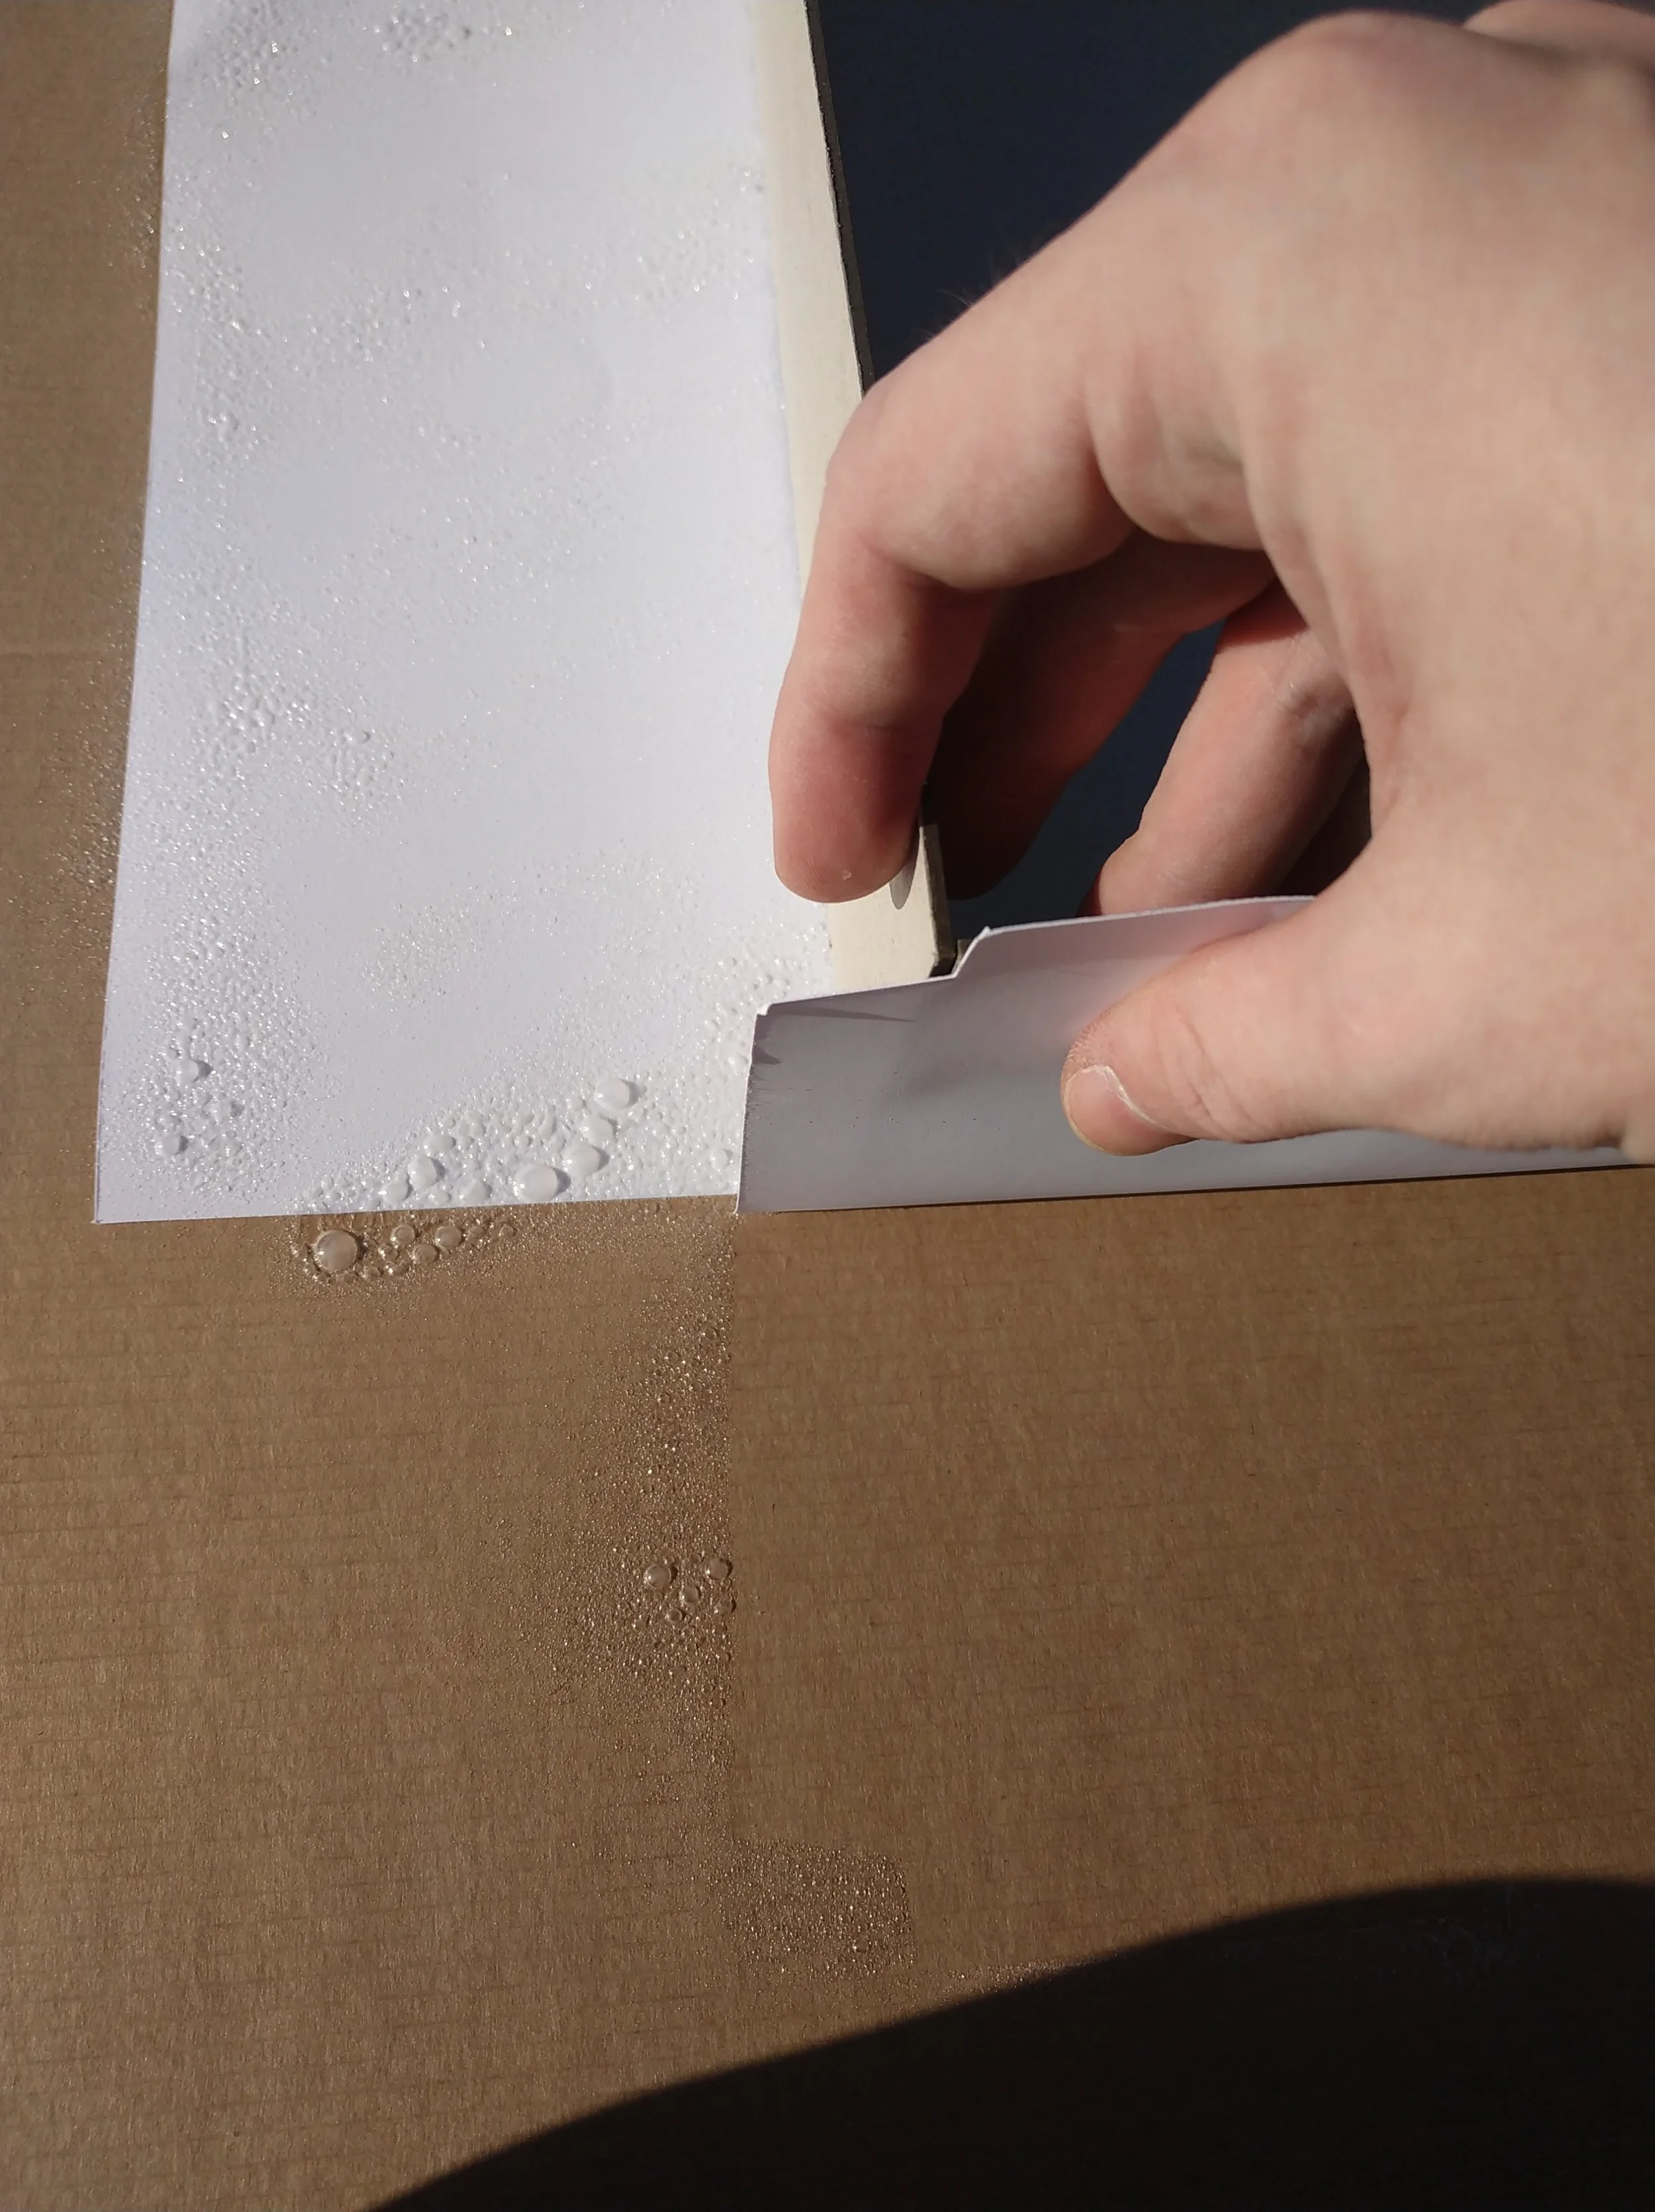
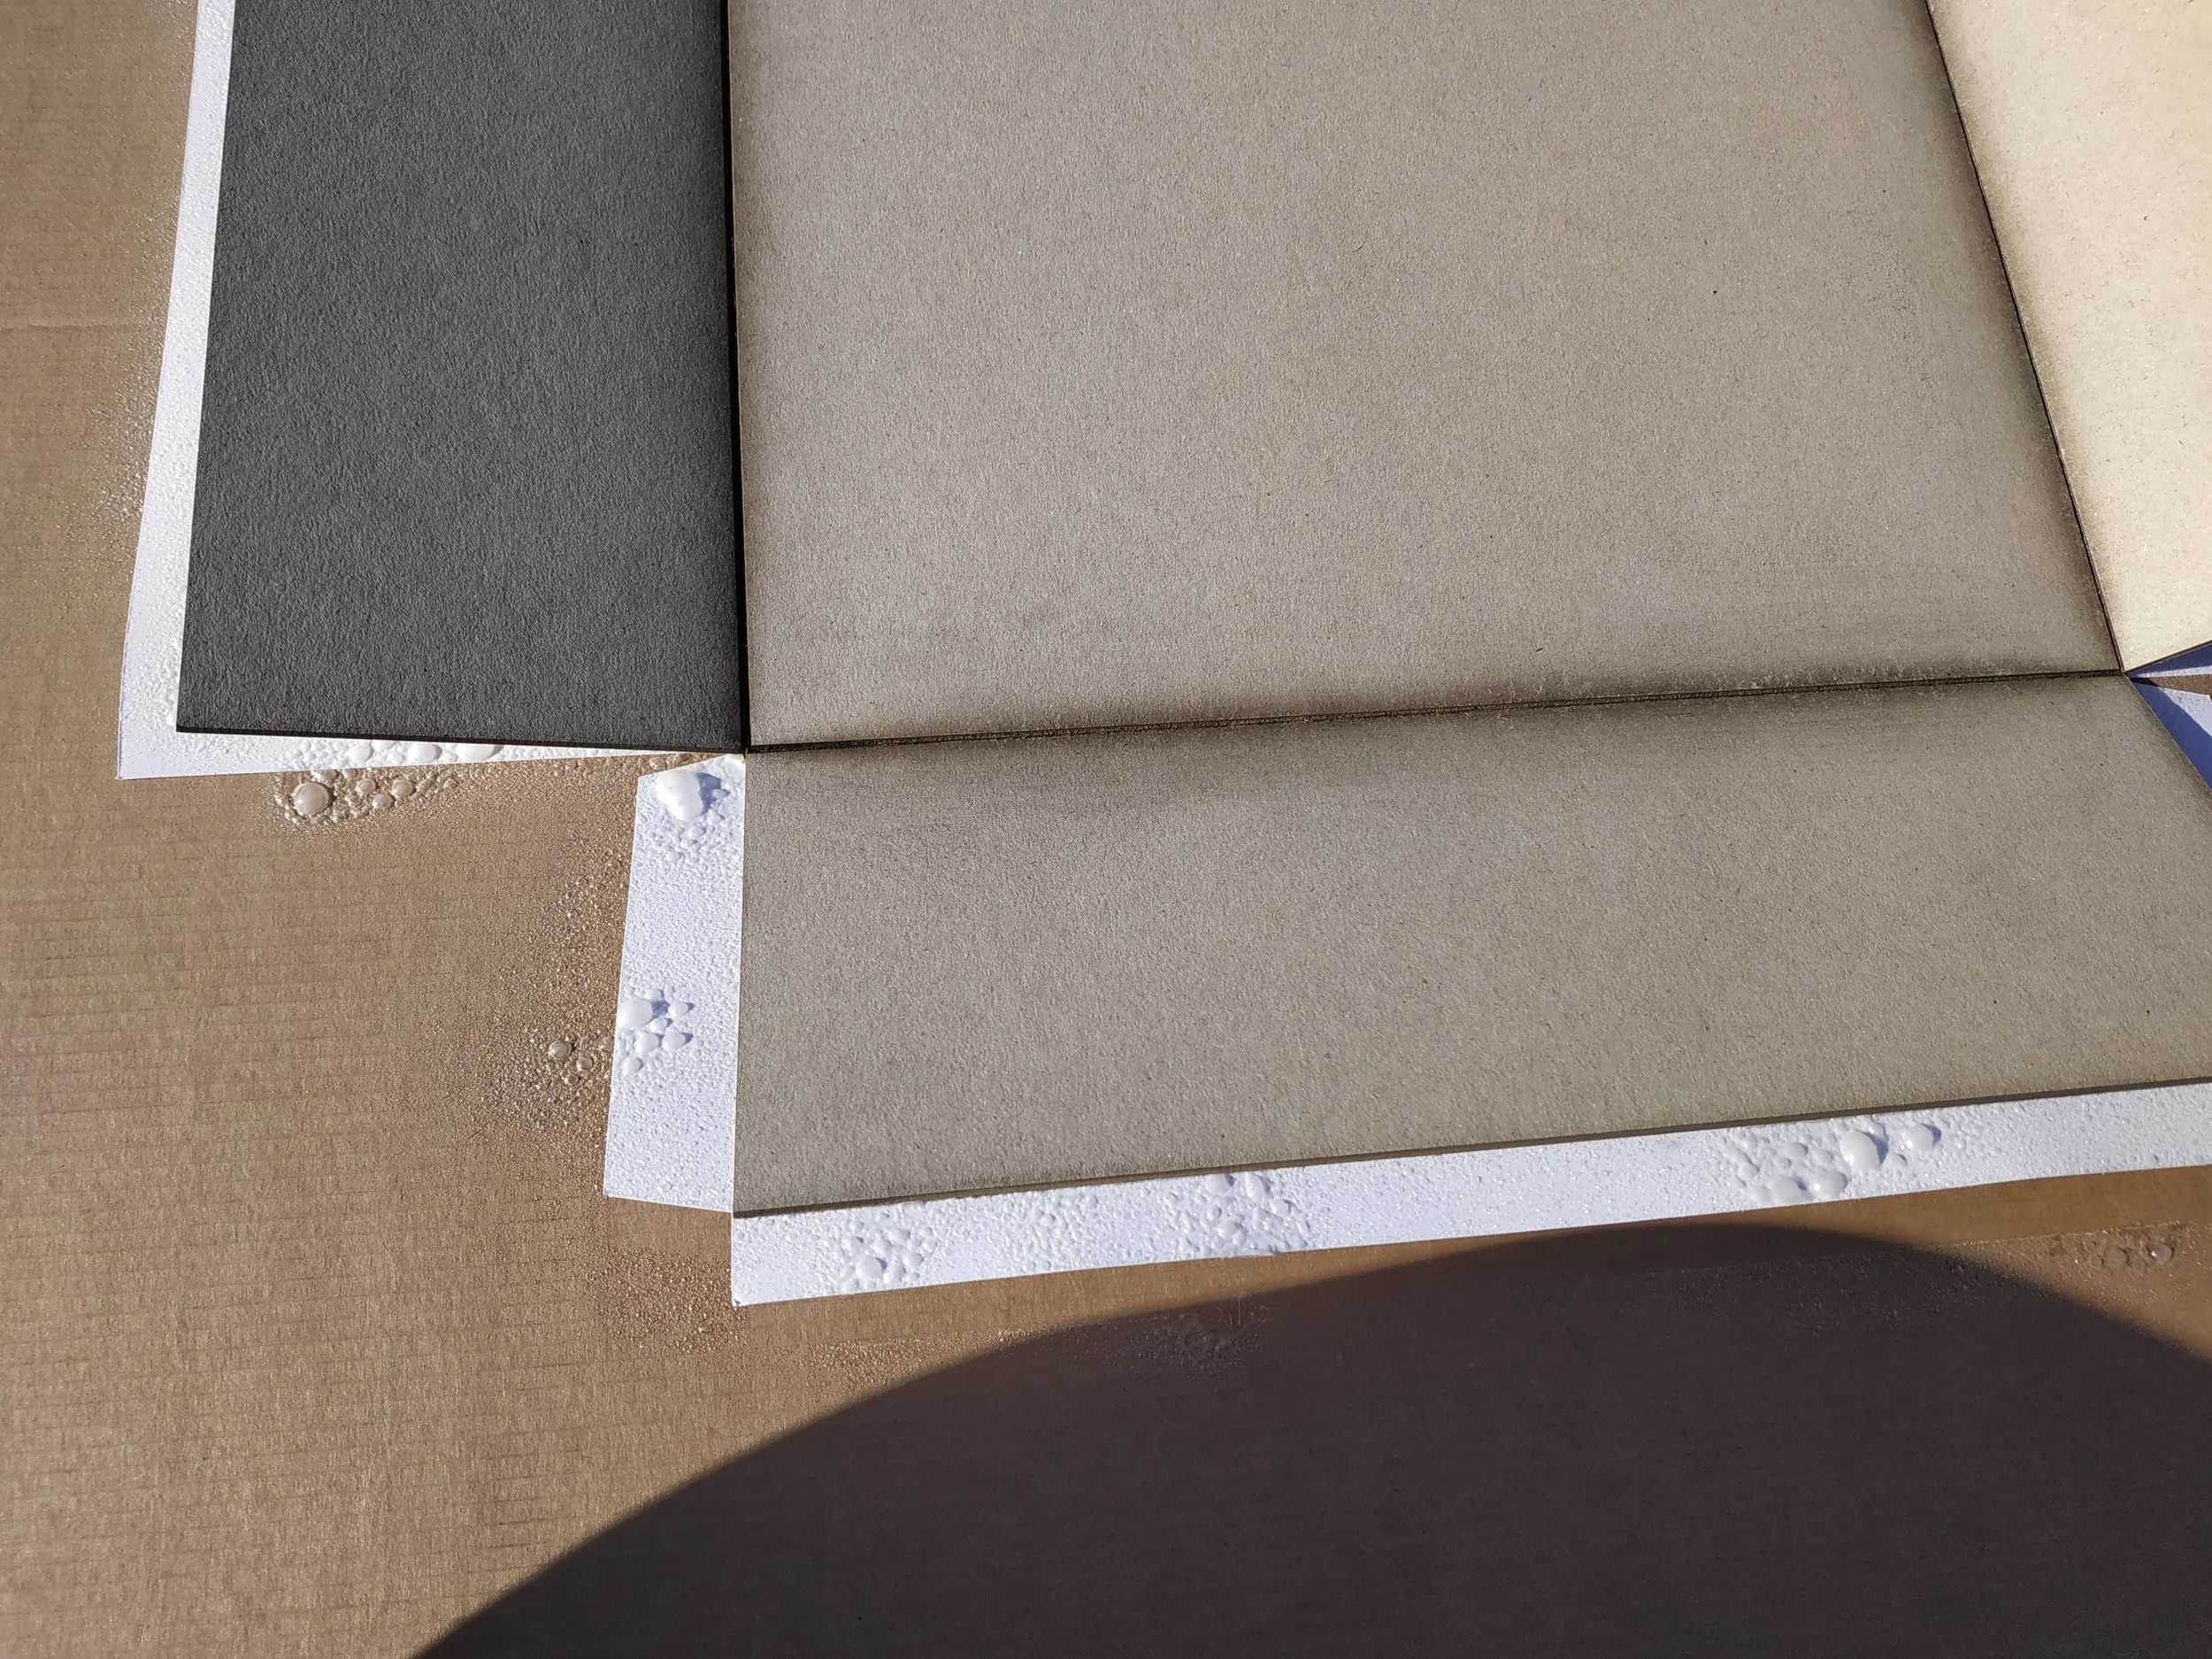
A word of caution: at least with my print, the surface is not very water‑resistant. A single drop is enough to make the colors run. I sprayed a thin layer of clear matte varnish over the box so that a splash of water wouldn’t immediately ruin the artwork.
There are certainly many different ways to build boxes like this, even if you use the same materials. I’m always open to tips and suggestions for improvement. Just leave me a comment.
25 - When You Want the Prototype to Look Pretty … (Part 2: Cards)
25 - When You Want the Prototype to Look Pretty … (Part 2: Cards)
Handmade playing cards can look surprisingly professional very quickly. There’s not much magic behind it. What you’ll notice most are poor print quality and paper that’s too thin — which is why I went to the copy shop.
For my cards, I only added bleed to the back side, since I cut the fronts by hand anyway. That way, the front stays nicely centered. If it’s important in your game that card backs are indistinguishable, I would definitely do it the other way around.
And don’t forget to rotate the card backs correctly!
As mentioned before, I cut the cards by hand. Whether you use scissors or a knife, it needs to be sharp. With my paper and print quality, the color can sometimes crack along the edges if the blade isn’t sharp enough, and that doesn’t look good.
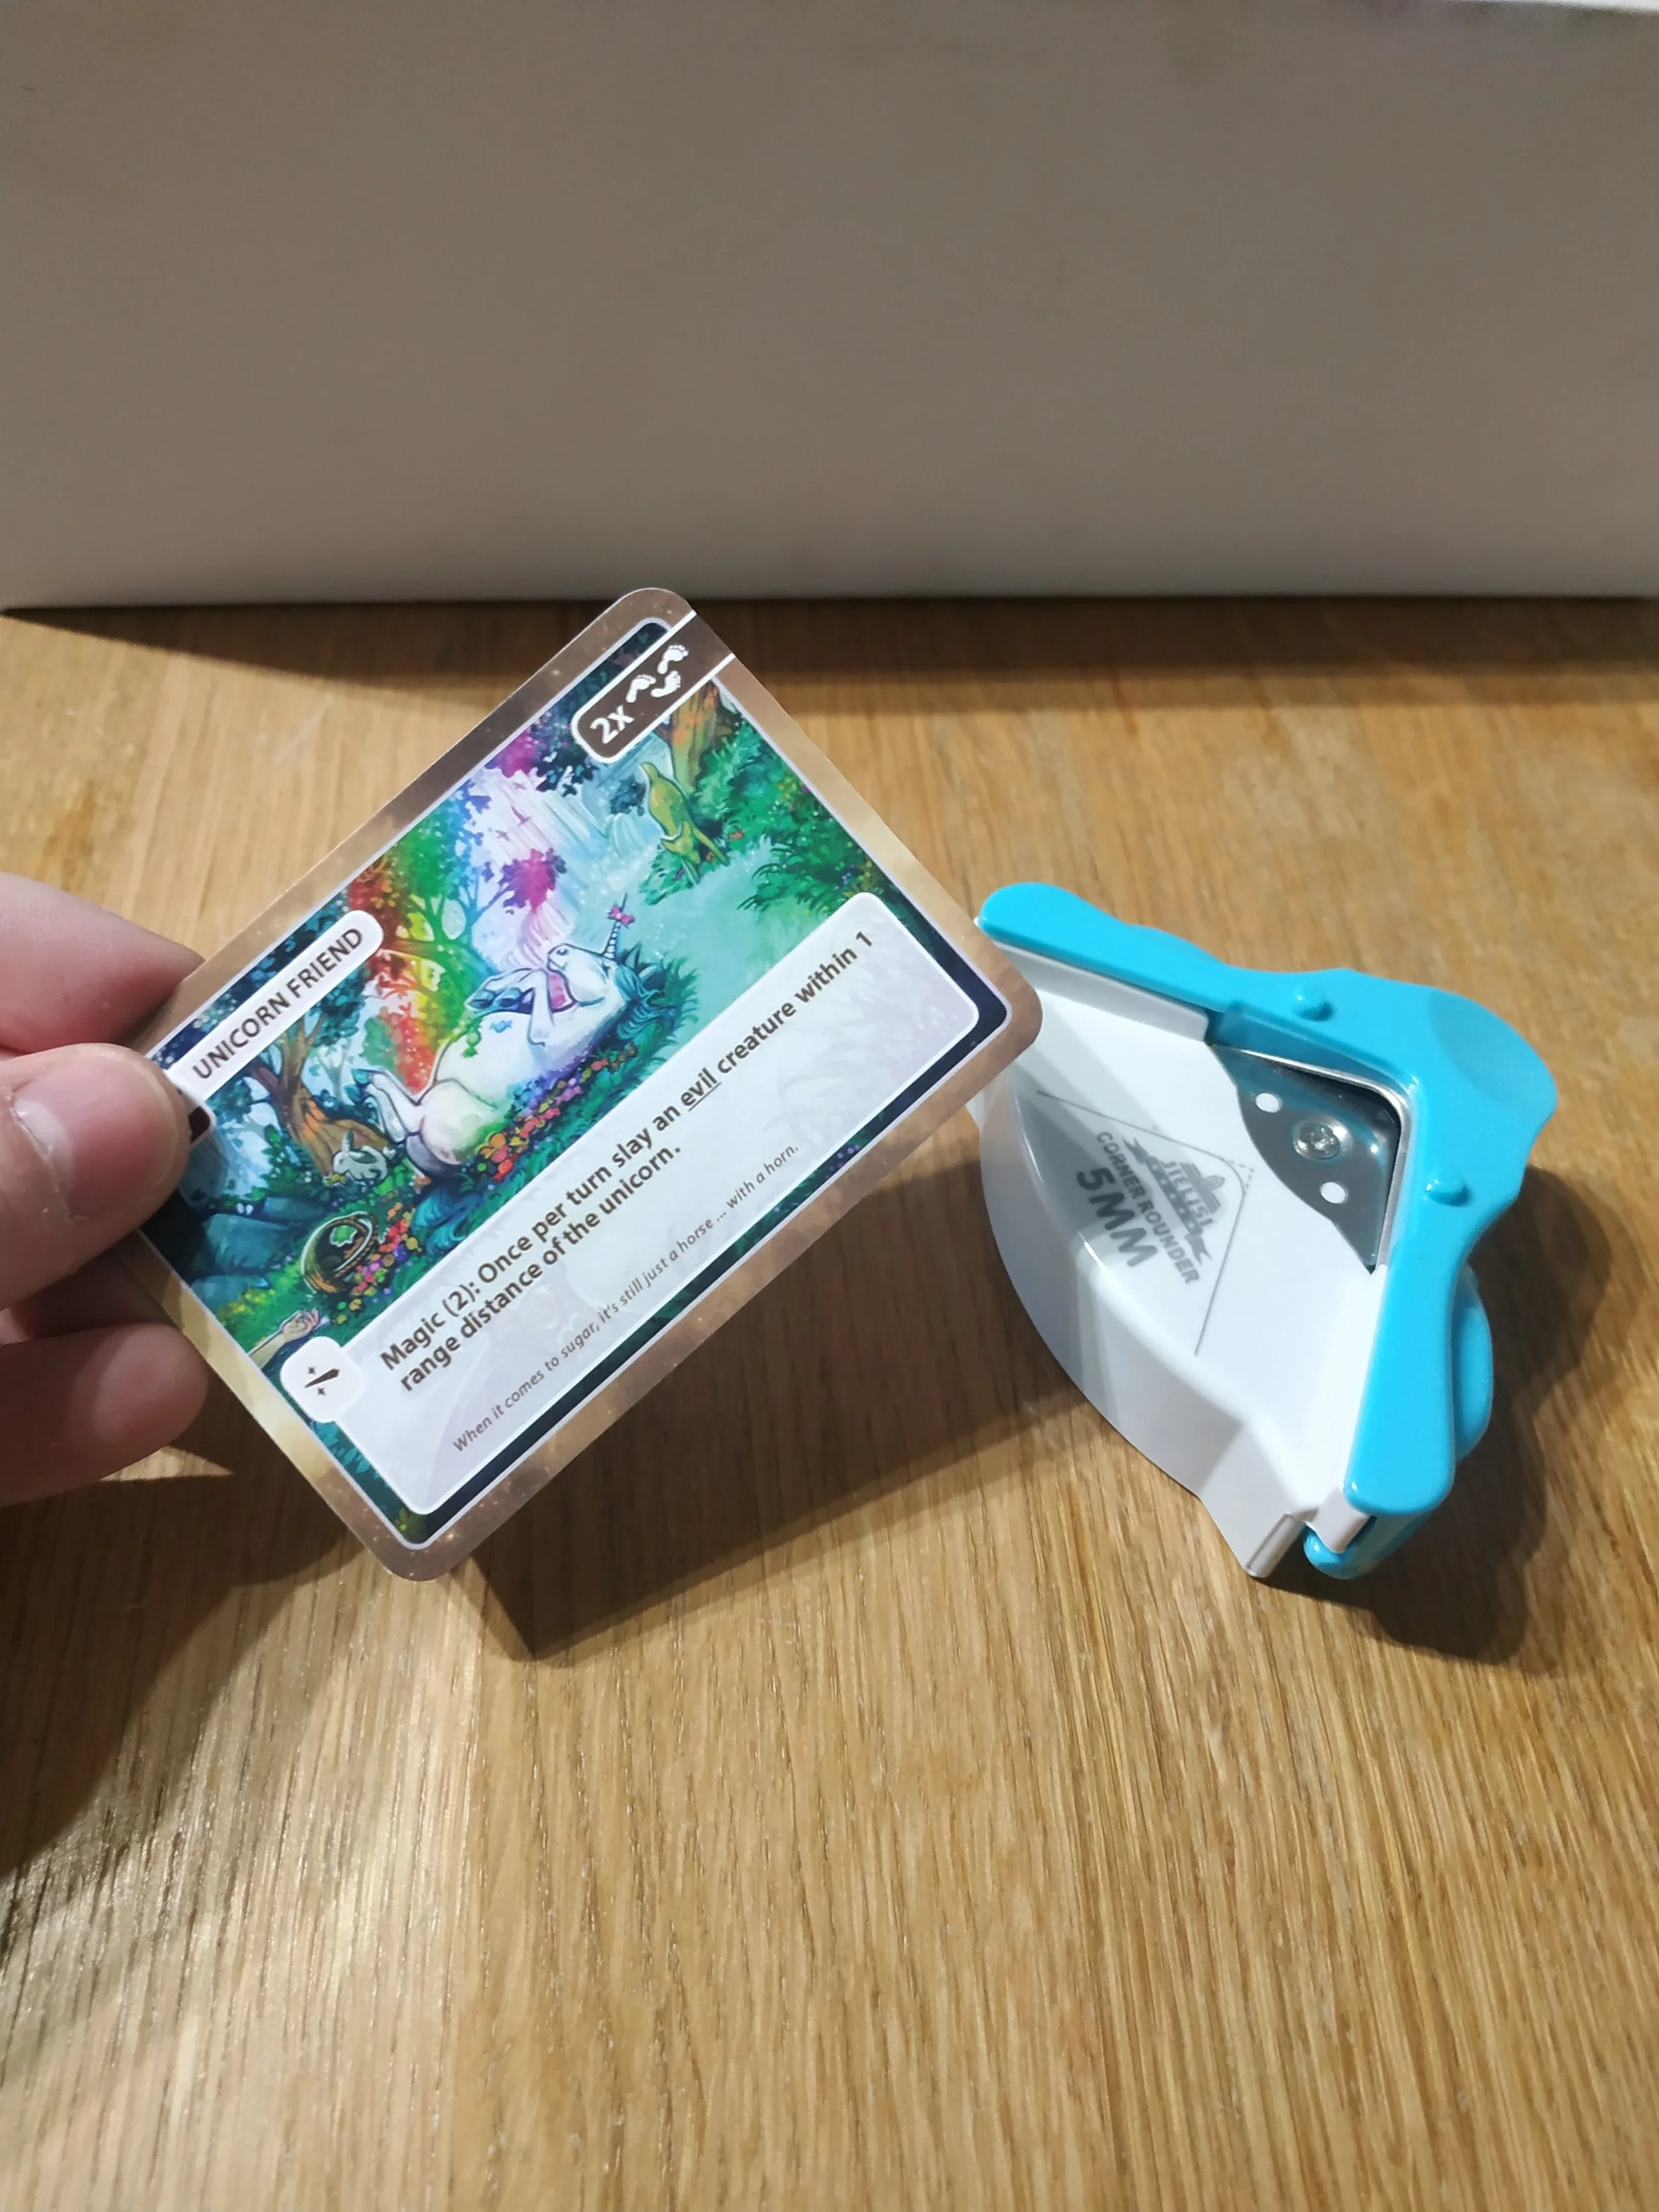
For the corners, I used a corner rounder. It makes the rounded edges look much nicer. These tools aren’t expensive (though I wouldn’t buy the same model again).
Normally, cards would also get a coating — a finish to fix the colors and sometimes add effects. Instead, I simply put my cards into sleeves. That way, the missing finish isn’t noticeable, and the prototype lasts longer.
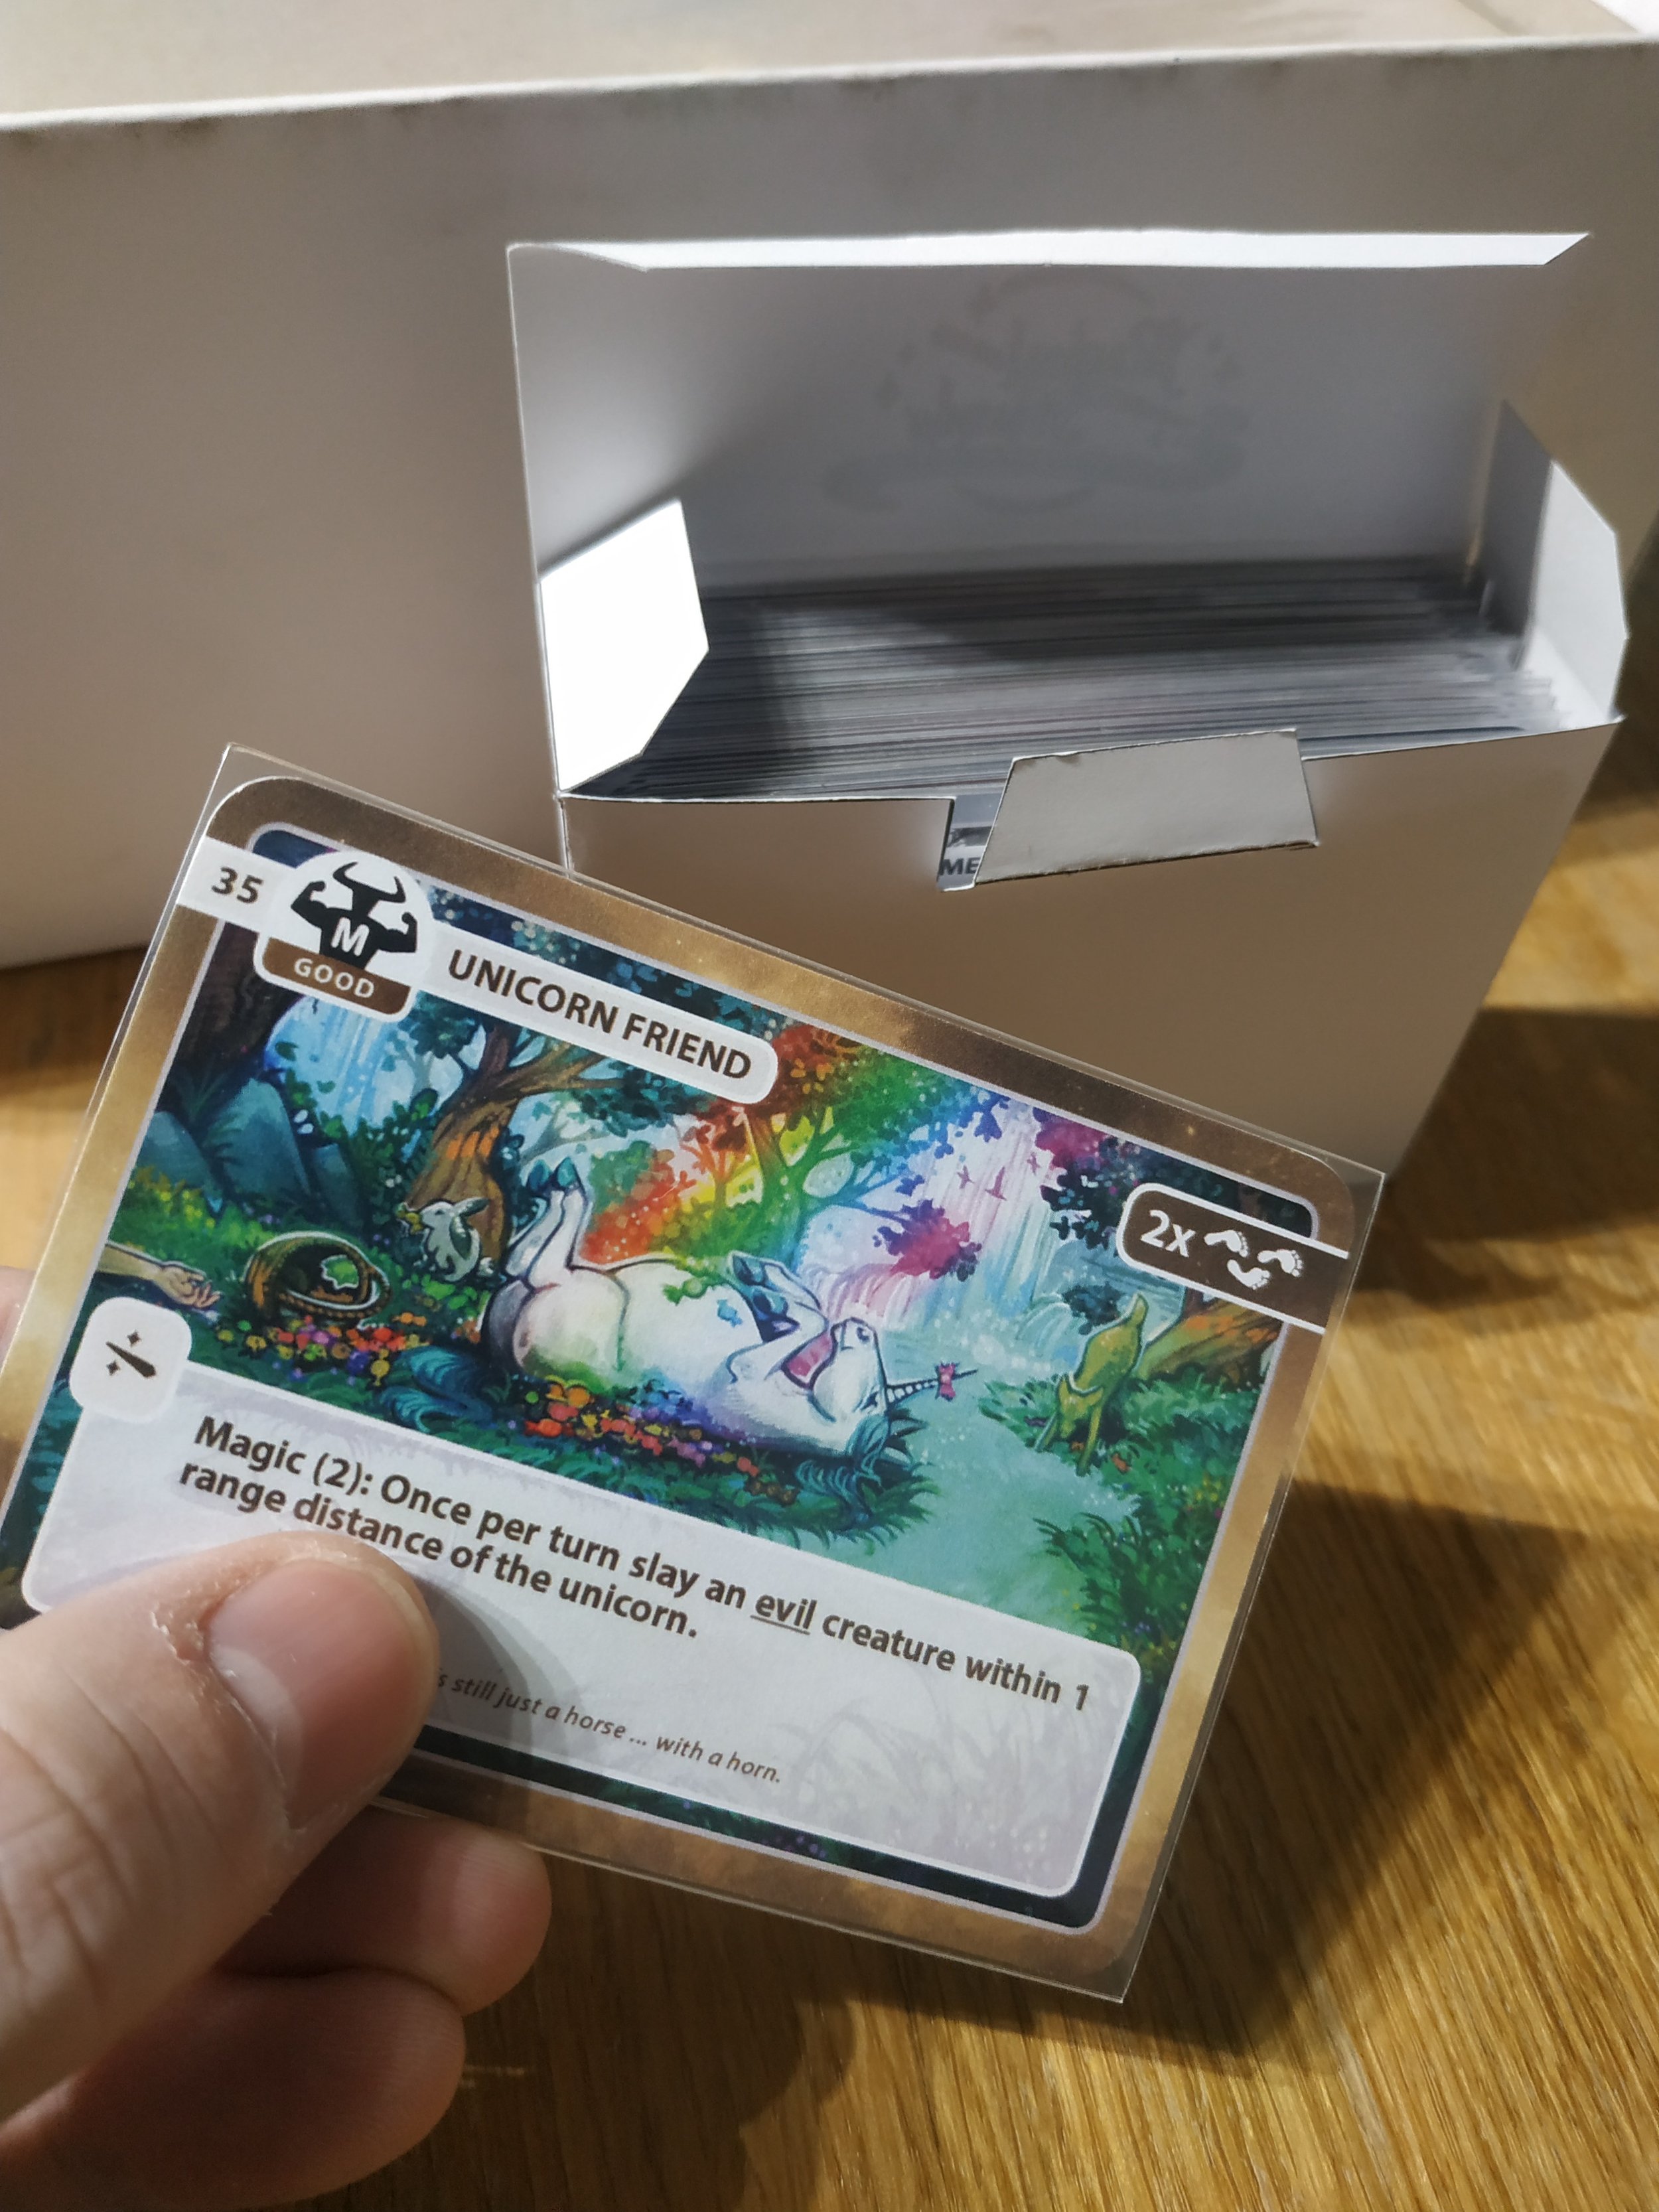
For storing the cards, I made simple boxes. A sheet of A4 paper (200 g) and a home printer for the template are enough. These boxes are very practical because they can hold both sleeved and unsleeved cards. This template worked very well for me.
Have you ever made playing cards yourself and have experiences you’d like to share? I’d love to hear your thoughts in the comments.
24 - When You Want the Prototype to Look Pretty … (Part 1: Copy Shop)
24 - When You Want the Prototype to Look Pretty … (Part 1: Copy Shop)
… the best option is usually to have someone else make it for you! However, that becomes difficult when your game has many special components. That’s why I ended up doing everything myself. The amount of work is enormous, and my approach is certainly not ideal. I’ll explain as clearly as I can how I build my review prototype by hand. There are definitely steps that could be done better. Since I still have several prototypes ahead of me, I’m very grateful for creative suggestions on how I could improve or simplify things without losing quality or adding significantly more effort.
The first step takes me to the copy shop.
Game cards can still be printed reasonably well on a home printer. But since the color quality of my printer isn’t great, I had them printed at the copy shop. For cards, I recommend using 300 g or 350 g paper, as this roughly matches standard card stock. Thickness isn’t the only factor that matters for cards, but for a nice prototype it’s definitely sufficient.

The player aids were also printed on 350 g paper. Even though they’re just information sheets, they simply feel better that way. For a final version, however, I would still choose a more durable material that doesn’t warp as easily.
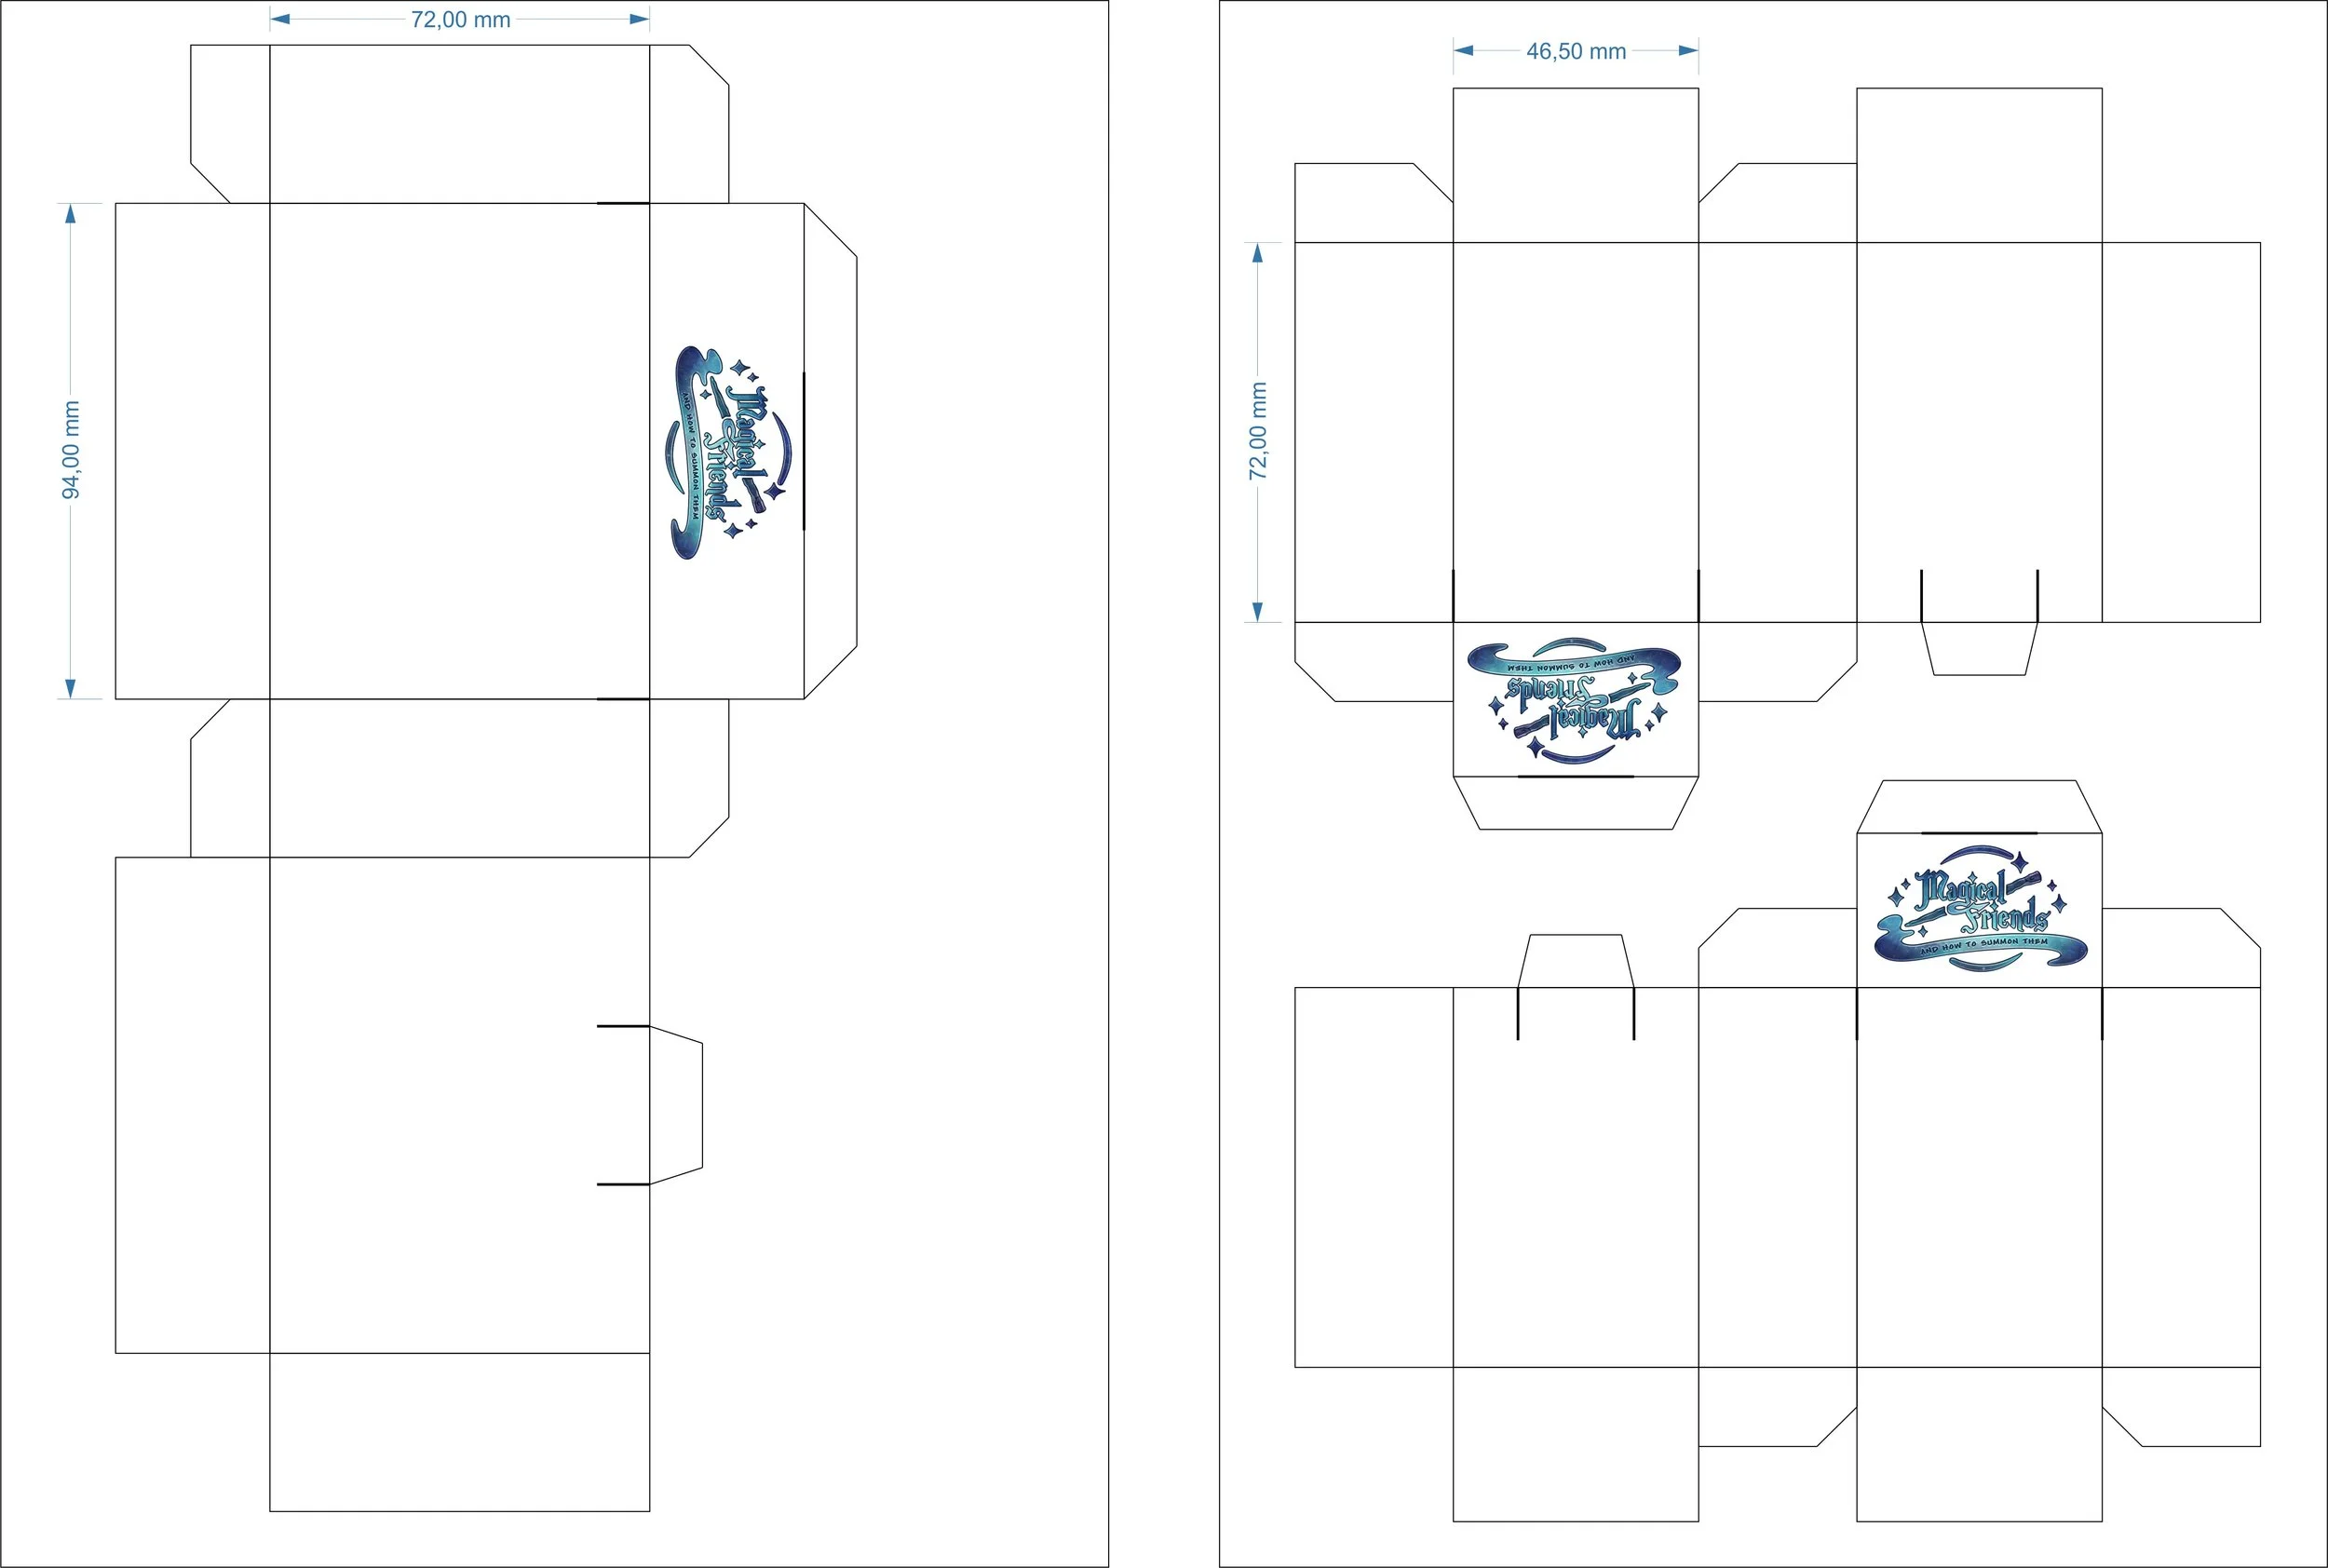
Printing the rulebook is much more complicated than you might think. Ideally, my rulebook would be almost as large as the game box itself. But that wasn’t possible at this copy shop. Rulebooks need to be printed double‑sided, and since each printed sheet equals two pages, you need a fairly large format. If I want the rules to be 280 mm × 280 mm, the printed sheet would need to be 280 mm × 560 mm — larger than A3. Having the rules bound as a booklet is very inexpensive at the copy shop, and it looks quite nice. For the rulebook, I used 140 g paper.
For all the larger prints I needed to glue onto cardboard, I used poster paper with a weight of 160 g. Depending on the size of your game, you might not need poster printing. But many of my graphics are larger than A3, so they had to be printed as posters. The box cover for a 300 mm × 300 mm × 100 mm box requires a print of roughly 550 mm × 550 mm. In a final production version, the box would also be wrapped in 160 g paper. It’s important that this paper isn’t too thin, because the corners of a box aren’t held together by the 2 mm cardboard — they’re held together only by the paper, and that paper shouldn’t tear easily.
Even though many illustrations and details aren’t finished yet, it’s a wonderful feeling to have high‑quality prints in front of you. At this stage, you get an excellent impression of the game and can imagine how the artwork will develop.
In the coming weeks, I’ll write more about what happens next with the prints. I’ll go into more detail about each component. If you have questions about printing, feel free to leave a comment. I’m also very happy about feedback and suggestions for improvement.
23 - Illustration and Production (Printing Plates)
23 - Illustration and Production (Printing Plates)
In the last post, I talked about bleed and margin. This time, it’s about printing plates and why they can be very important.
For larger productions, offset printing is the standard. In this process, printing plates are created for the colors cyan, magenta, yellow, and black (CMYK), which are then used for printing. For smaller print runs (500–1500), these plates also count as tooling costs.
Why am I mentioning this? Some companies offer special colors and use a fifth printing plate for them (something you should clarify when requesting quotes). This fifth plate can be used for special colors such as metallic inks. But it can also be an additional black plate. This has the following advantage:
If you want to produce a game in multiple languages, the text can be removed from the main black plate and placed on the fifth additional plate. This can potentially save tooling costs, because for an additional language you only need one extra plate instead of four.
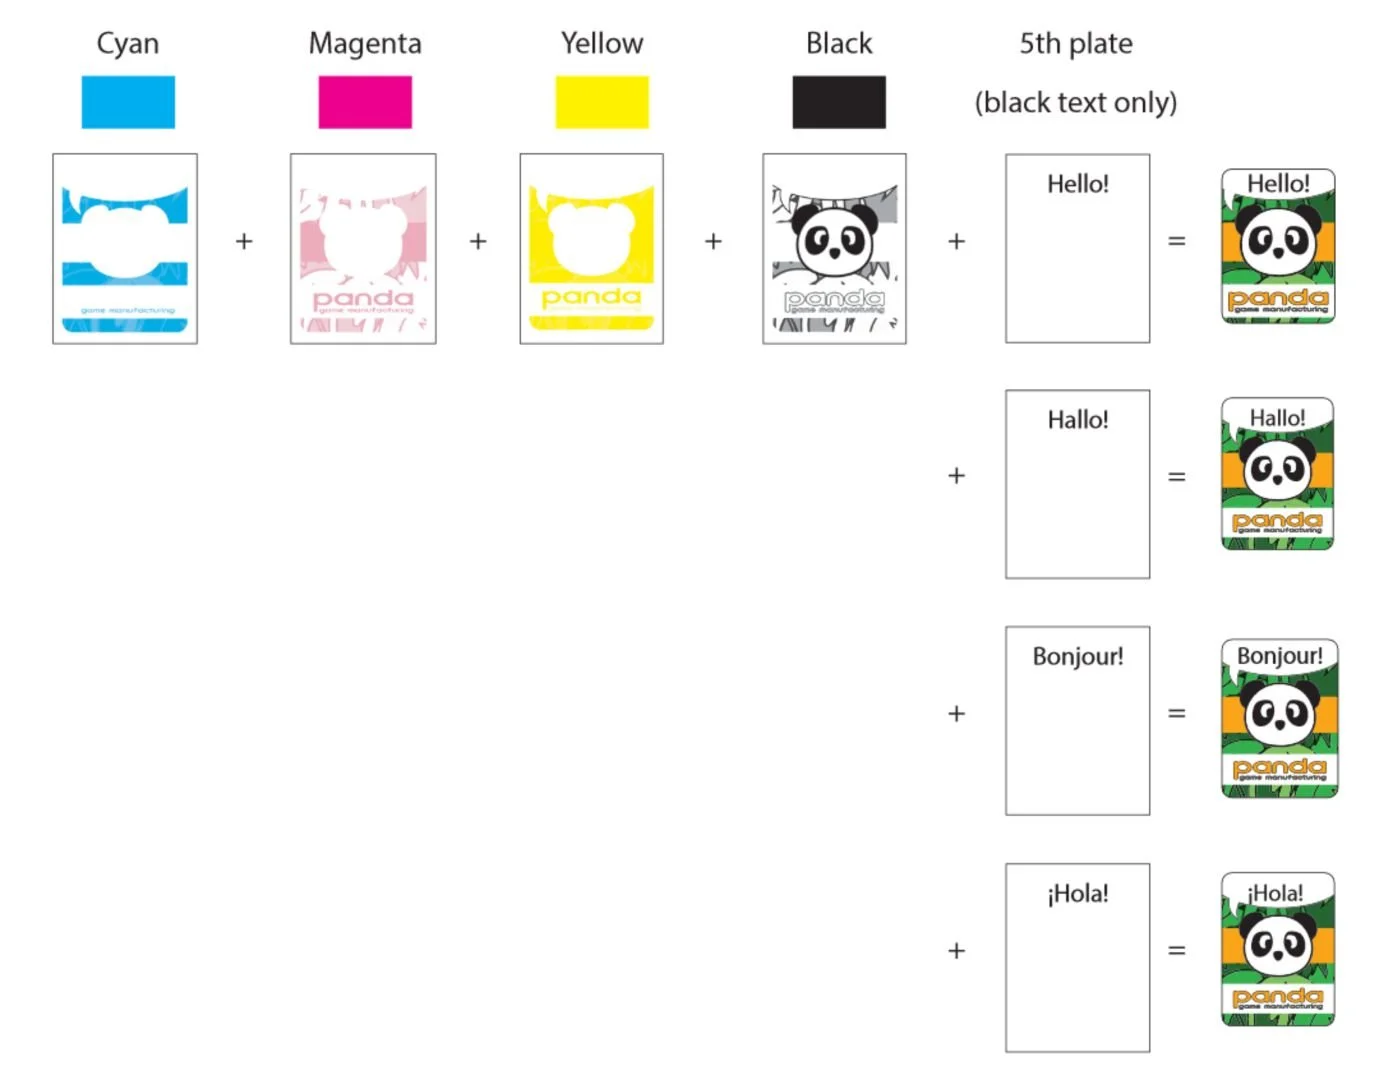
Source: Panda Game Manufacturing - Design Guidebook
This is why it’s important, when creating illustrations, to ensure that text can be edited separately from the artwork. In general, the design should be set up so that the text can use the same color everywhere. If, for example, you decide to use white text on dark backgrounds and black text on light backgrounds, you’ll run into problems.
Do you have more experience with printing and maybe something to add? There’s definitely still a lot to learn. Questions are helpful too. I’m looking forward to your comments.